

-
-
Another idea that comes to mind since the mention of plastidip is liquid electrical tape. That may serve the same purpose as plasti dip.Enjoy what you like, and let others enjoy what they like. (C) Azrak 2009
Too much space. Need more toys!


Check out the ever growing Mego like sized vehicles data base.Comment
-
BRAVO!!!
I really liked this tutorial, 'Boywonder0'.
You provided a real solution and addressed issues that's been bugging alot of folks, myself included.
I definately agree that Mattel missed the mark on their figure design and they, of ALL PEOPLE, should know better.
Shame on you, Mattel!
What I like especially is how you're emphazing the strengths of this design which, I also agree, there are a few.
So, as far as I'm concerned, you just made the proverbial 'lemonade' from those same proverbial 'lemons' and shared with us the 'recipe' for yet another decent customizable body.
Thank you.
Of course, I can still stuff cotton into the torsal..., but I digress.
Seriously, though..., on removing the head with the 'boiling water' method..., and if I remember correctly, you've talk about this in previous threads, so please forgive me....
Is it simply a matter of dunking the head and upper body in a pot of boiling water, wait a few minutes and then yank the head off?
Also, does this method also affect the adhesive attaching the post to the head?
Maybe softening it up a bit so that the 'yanking' will be alittle easier?"...You can capture the Klingon & bring him back to the Enterprise!"Comment
-
Of course, I can still stuff cotton into the torsal..., but I digress.
Wait a minute..., 'torsal'?
What the heck's a 'torsal'?
I think what I meant was , "...I can still stuff cotton into the pelvis..."
TORSAL... I don't even know what that is! "...You can capture the Klingon & bring him back to the Enterprise!"
Comment
-
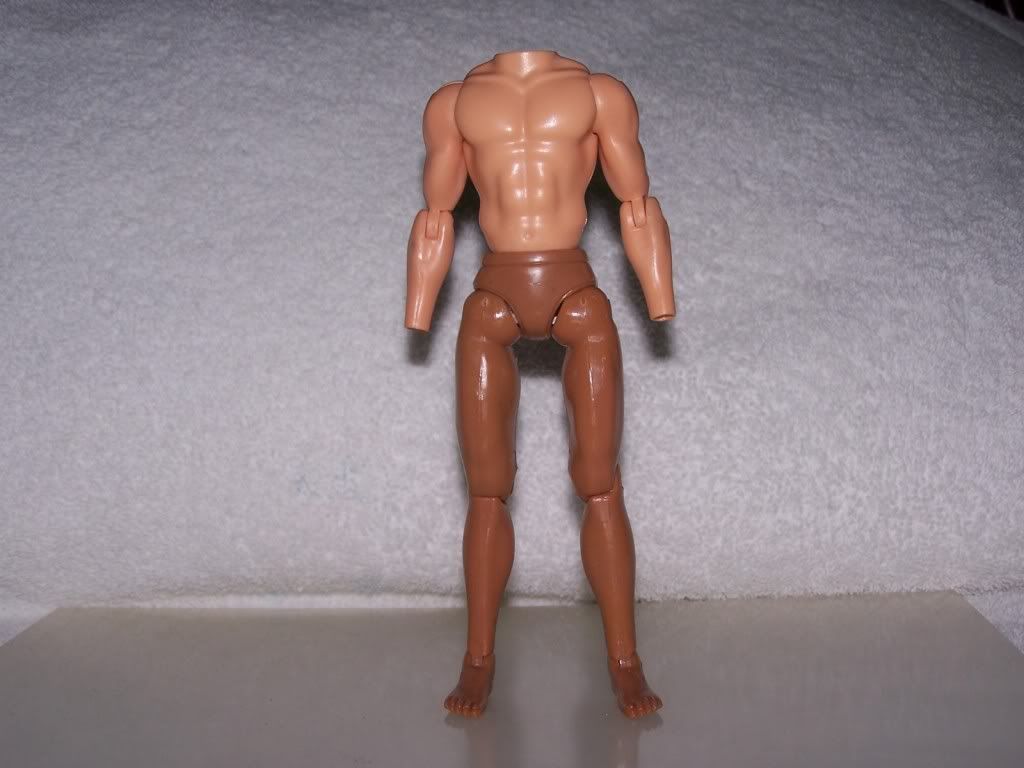
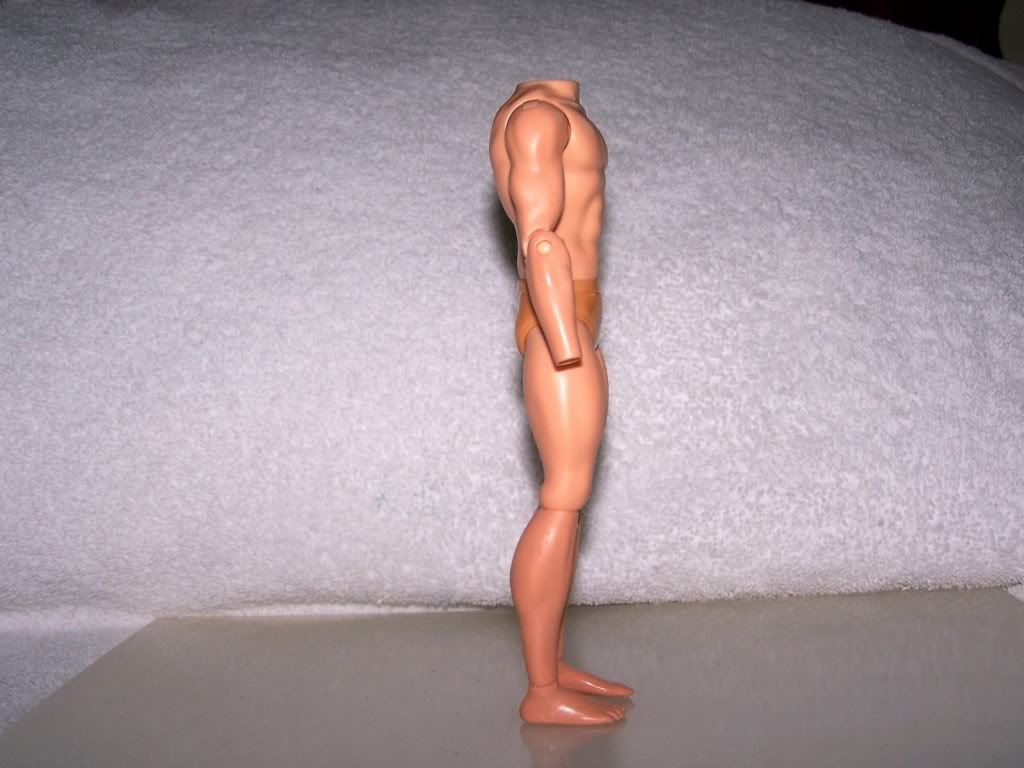
I had promised you this analysis and here it is:
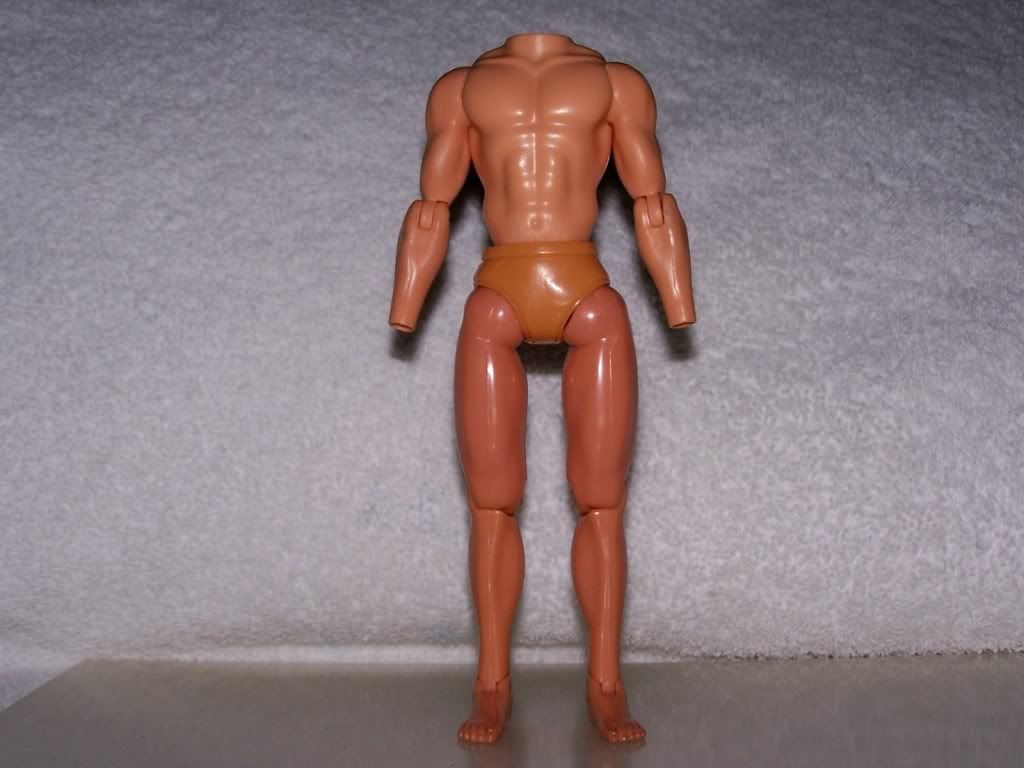
Retro Action Torso with Cast-A-Way Toys Pelvis Analysis

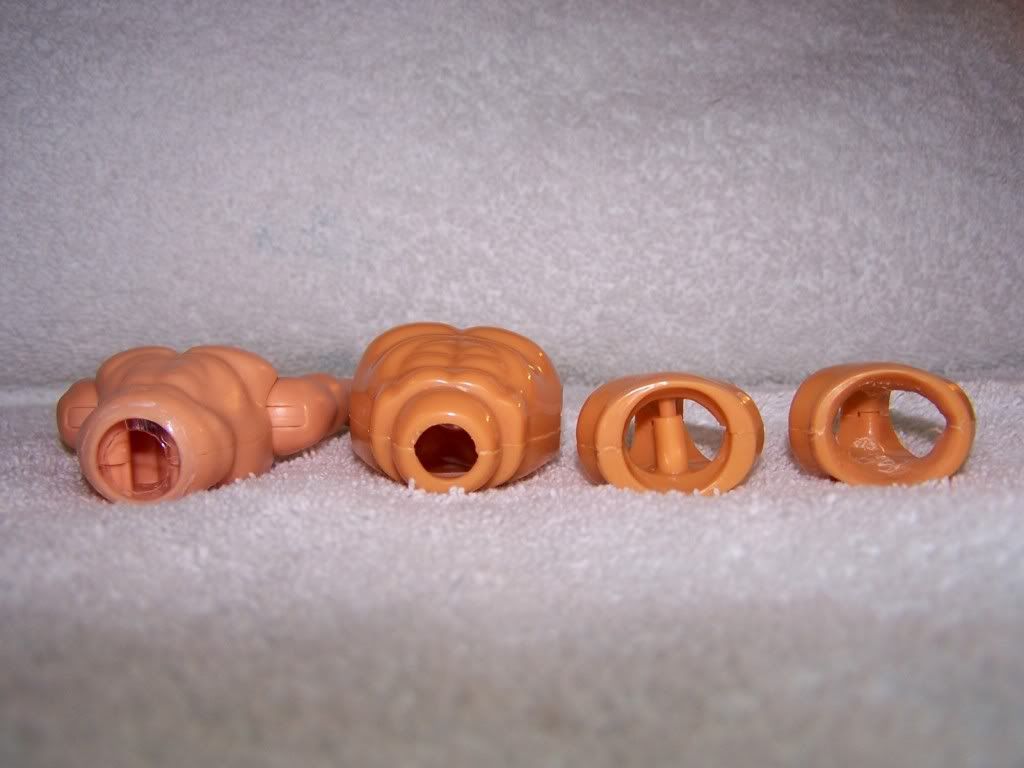
As explained before, the Retro Action torso would not enter nor seat into the vintage, CAT or EMCE pelvis. These pelvis entrance are sized for their corresponding torso pivot ball, which is very small (see CAT torso - 2nd item Left to Right).
In order to accommodate a Retro Action torso you will have to increase the pelvis entrance using a Rotary Tool. Refer to original CAT pelvis (3rd item Left to Right) and modified CAT pelvis (4th item Left to Right). After you had modified as shown in picture, simply re-string as instructed in my tutorial. Below, the end results:
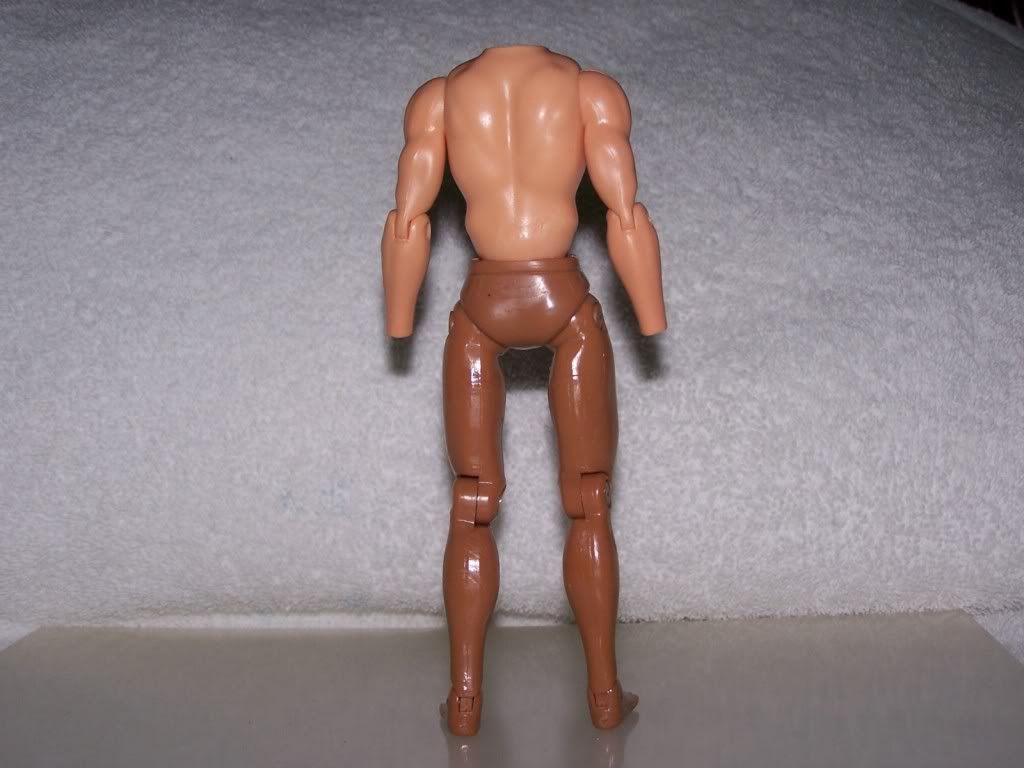
Retro Action Torso with CAT Pelvis & Legs
With EMCE, the same story:
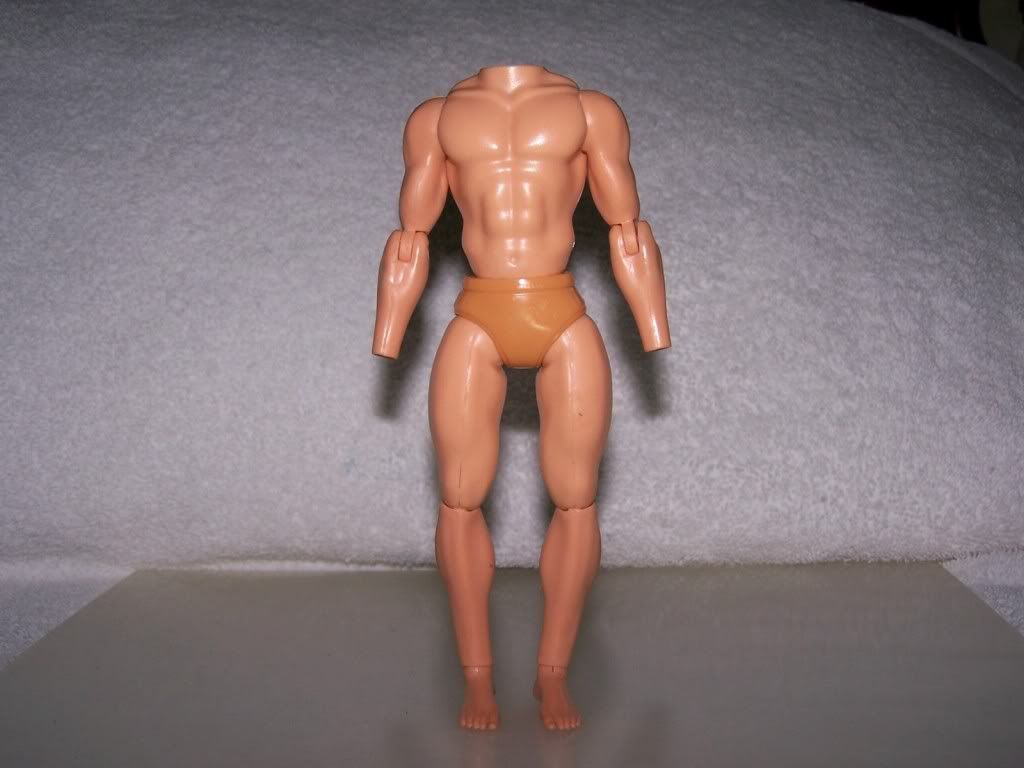
Retro Action Torso with EMCE Pelvis Analysis
Items from Left to Right: Retro Action torso, EMCE torso, EMCE original pelvis and EMCE modified pelvis. Below, the end results:
Retro Action Torso With EMCE Pelvis & Legs

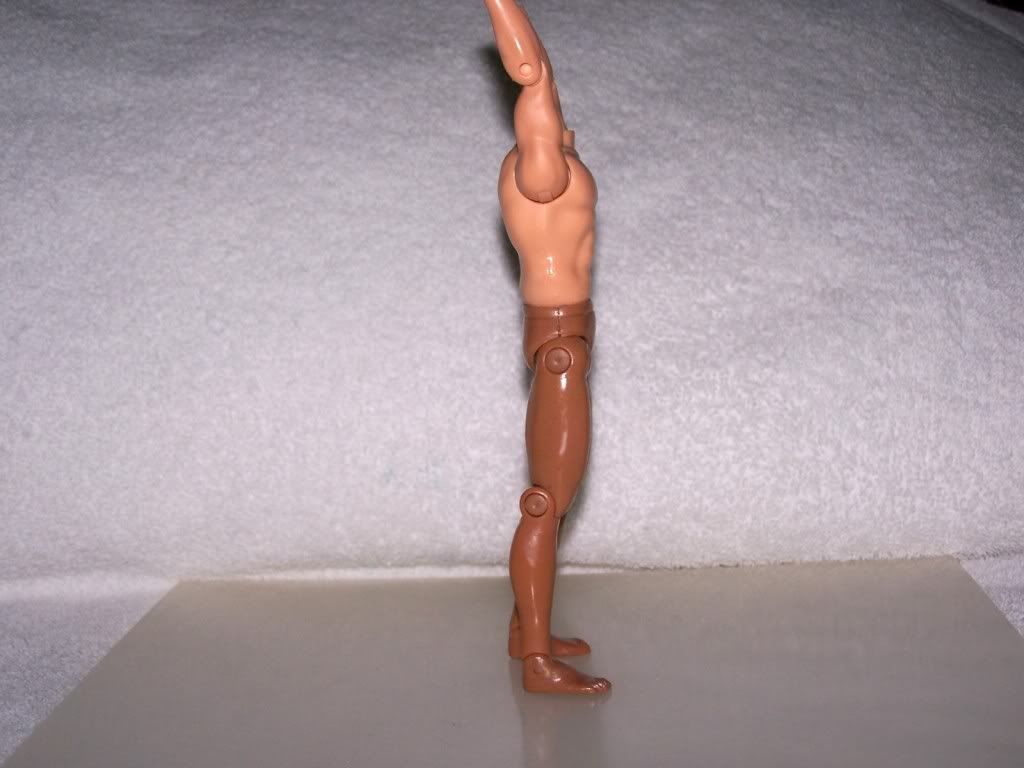
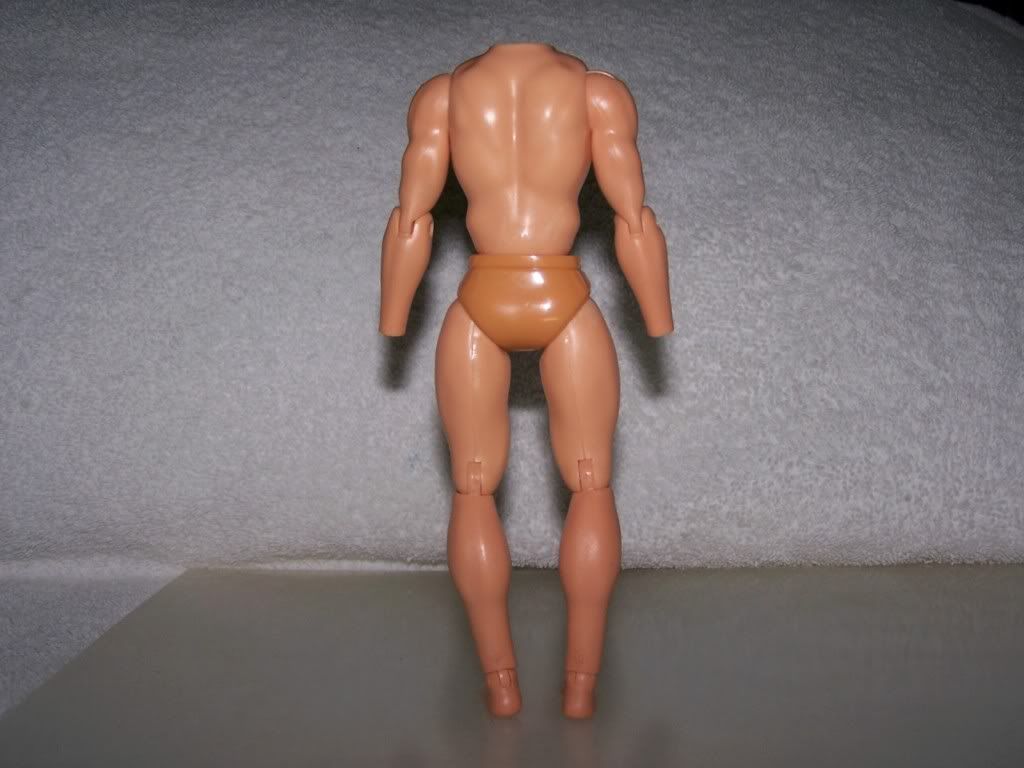
And to me, the greatest revelation of all: Retro Action torso & legs WITH EMCE pelvis:

Get on your marks, get set, go!
.Comment
-
Thanks for that.
I do not know why, but when I see the words EMCE Pelvis I cannot help but to think that someone will see that and make it their new rap group name. Enjoy what you like, and let others enjoy what they like. (C) Azrak 2009
Too much space. Need more toys!
Check out the ever growing Mego like sized vehicles data base.Comment
-
Marvelous, many thanks!WANTED: Dick Grayson SI trousers; gray AJ Mustang horse; vintage RC Batman (Bruce Wayne) head; minty Wolfman tights; mint Black Knight sword; minty Launcelot boots; Lion Rock (pale) Dracula & Mummy heads; Lion Rock Franky squared boots; Wayne Foundation blue furniture; Flash Gordon/Ming (10") unbroken holsters; CHiPs gloved arms; POTA T2 tan body; CTVT/vintage Friar Tuck robes, BBP TZ Burgess Meredith glasses.Comment
-
With the modifications you made, 'Boywonder0', I like this Mattel torso/Emce pelvis combo.
Mmmm...combo...does it come with fries?
I haven't decided which legs I like better: the Mattel ones or the Emce.
The more I look at it though, the more I find myself leanin' toward the Emce legs.
They both look good. Each a little different.
Is it me, or are the wrists aligning a little higher on the thigh?
I do think both Castaway's and Emce's pelvis are definite improvements over the Mattel one.
The figure overall looks more solid to me.
Just curious: after you made these modifcations, did you notice anything different
about the figures articulation: better? Worse?
Also, thanks for the PM on the Mattel head removal tip.
You should make that one public!
I'll be using it this weekend and I'll let you know the results."...You can capture the Klingon & bring him back to the Enterprise!"Comment
-
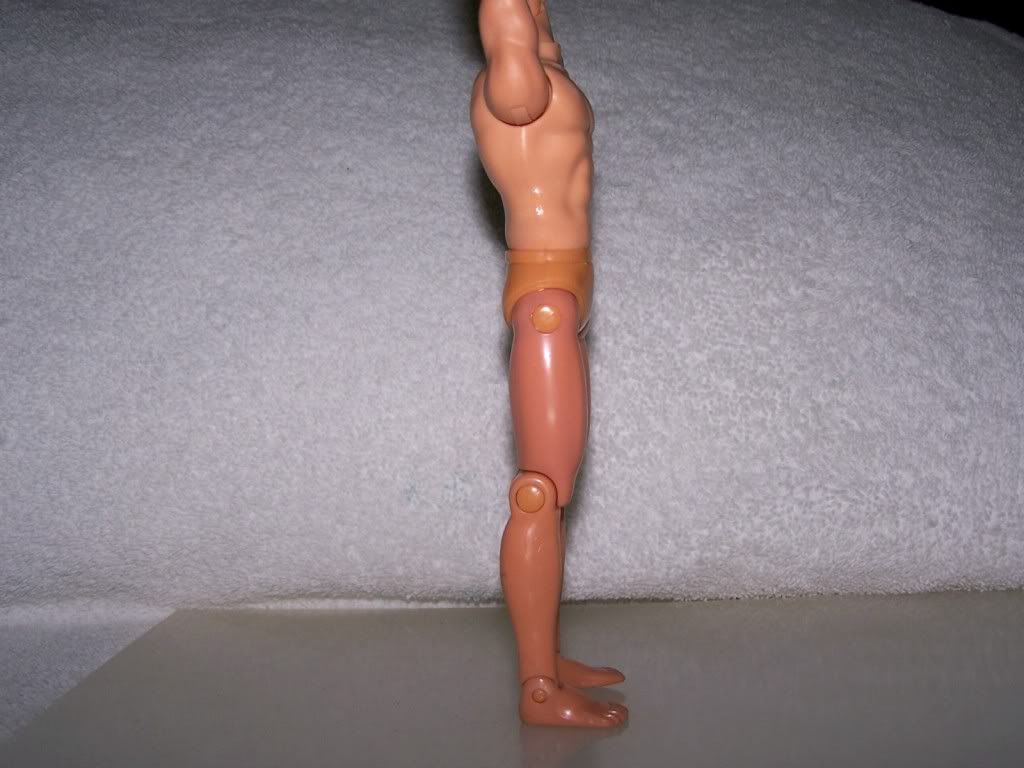
Thanks for the tutorial and all the great pics. I am curious though, how is the leg poseability with the Retro Action torso & legs WITH EMCE pelvis? Are the legs still floppy or can they hold a kick pose like the classic Megos could?Comment
-
I did this repair last night to my new Batman. It is an involved process, so you should be prepared to invest some time into the project. But it works like a champ. When you fix the flops, the figure looks a thousand times better.
Thanks again Boywonder for posting this!Comment
-
Amazing Fix...was going to post my own then found this! My fix is very similar except, I use masking tape and not sheet vinyl which also lets you skip the super glue step. I also don't dremel out the waist support...the masking tape has a rough texture anyway and between placing both parts add not only strength but holds the pose. I also restring with 1/4 inch elastic...here are some quick pictures. My process take about 10-15 a figure but if you set up an assembly line I was able to do all my series 1 and Series 2 figures plus Green Arrow in about an hour and half.
bodyfix1.jpgbodyfix2.jpgbodyfix3.jpgbodyfix4.jpgbodyfix5.jpgComment
-
Here is the rest of the follow up pictures for my fix on Type 1 Retro Action Bodies.
bodyfix6.jpgbodyfix8.jpgbodyfix9.jpgbodyfix11.jpgComment
-
My fix for the Type 2 Retro Body is very similar to my fix for the Type 1 Retro Action figures...minus the fact you don't have to remove a head...the waist is fine on these so I'm only putting masking tape on the hips and upper leg joint and then re-string with the 1/4 elastic. See photos...
bodyfix13.jpgbodyfix14.jpgbodyfix15.jpgbodyfix16.jpgbodyfix17.jpgComment
 Tweet
Tweet

Comment