

So. aside from compliments how well this custom is turning out and the meticulous documentation about it's construction, let me say how cool it is that you're telling everyone how you're making the figure. I have no intention of making one myself, but often customizers for any scale are very secretive about what they did, and it's great to see someone share the "secret sauce."
Kudos to you on the work you've done and your contribution to the custom building knowledge base.
-
Now, now boys. No need for cage matches. Owning one of these custom 9Art Boy Wonders will be easy as pie starting in late July when I begin accepting commissions. Last edited by darklord1967; May 19, '17, 6:13 AM.
Leave a comment:
-
-
UPDATE:
PIXIE FOOTWEAR REVISITED
While working on my custom Robin The Boy Wonder figure, it quickly became clear to me (as with my other custom figures) that I was going to have to pay careful attention to the various surface textures and details of his complex costume… possibly even MORE so than most of my other customs.
Last month, I thought I had put Robin’s pixie shoes to bed. But as often happens with works in progress, one will create something, live with it for a while, and then decide that it is actually NOT to their liking. I'm sure I don't have to tell any of you, that’s the nature of being a picky artist! LOL!
Alas, this is what happened to me regarding Robin’s footwear:
I decided that my original low-cut / open top version of the Boy Wonder’s pixie shoes was NOT really the version of Robin’s footwear that I felt best complimented my custom figure. Initially, I was trying to pay homage to the style of Robin footwear depicted by classic MEGO, and Figures Toys Company).
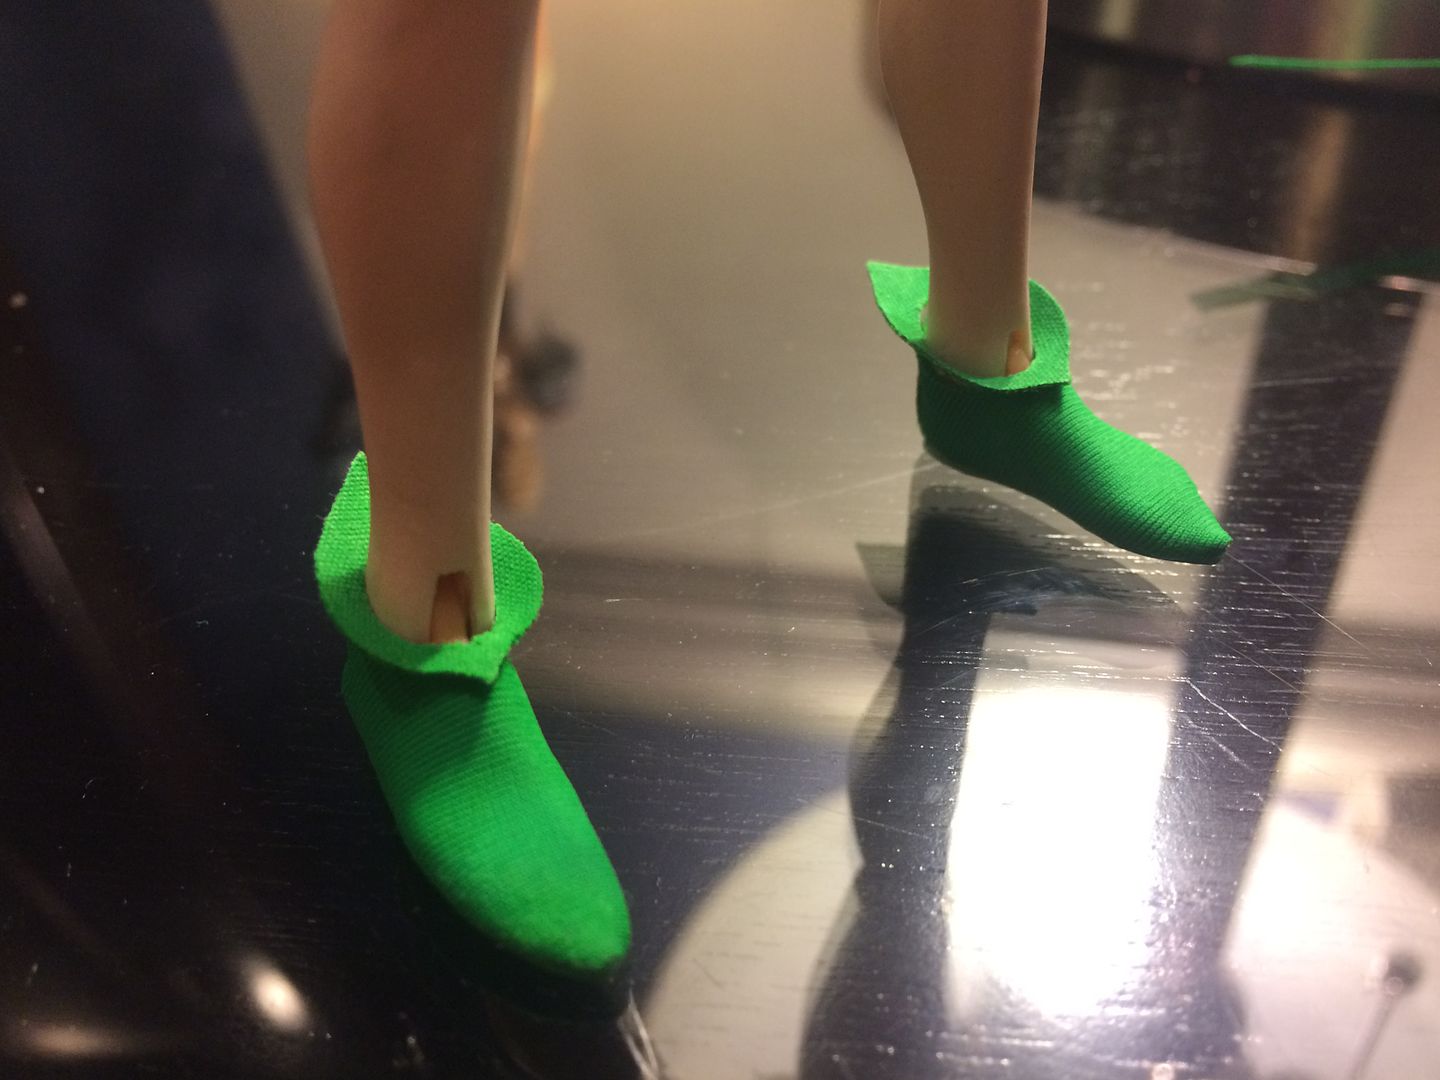
However, after careful consideration, I decided that I preferred footwear that was styled more accurately in the design of a taller, winged pixie boot…like the ones worn by Robin throughout the Bronze Age and into the 1980’s in the comics). I wanted the figure’s conspicuous ankle joints and top foot to be more concealed by his footwear.
As before, presenting the TEXTURE of the boots as FABRIC was very important to me. I wanted the boots to instantly recall the Medieval Age of Robin Hood in style and texture. This was a flavor that i simply did NOT feel was forthcoming from typical plastic / rubbery molded footwear.
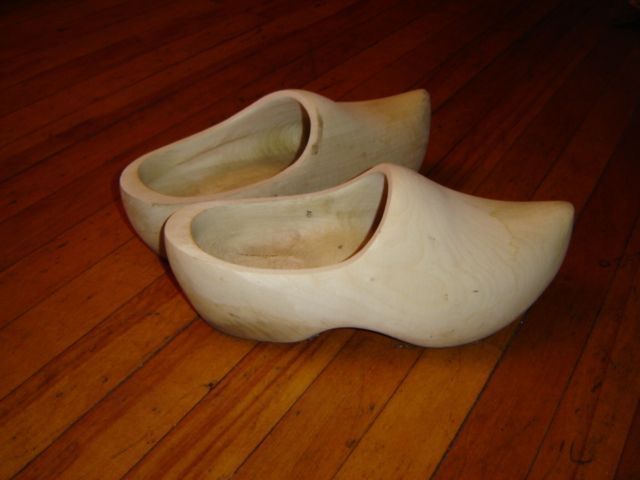
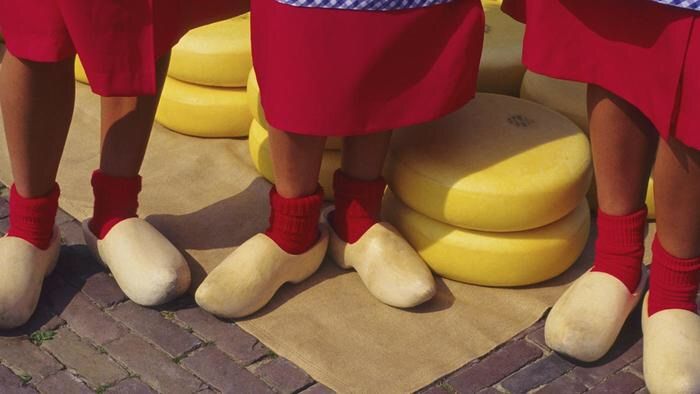
The other reason I ultimately became unhappy with my first attempt at Robin’s footwear was the fact that a few days after I completed them, they began appearing somewhat over-sized to me. As detailed earlier in this thread, I had fabricated the pixie shoes by wrapping (thick) milliskin fabric around an existing (MEGO Sue Ellen) "base" shoe. The resulting shoes had a slightly "swollen" look to them that I grew to dislike. In fact, I began to see a distinct resemblance to the wooden "clog" shoes worn by the Dutch!
Also (much to my disappointment), the MEGO Sue Ellen base shoe that i initially used as the basis for Robin's pixie shoes was compromising the figure's standing integrity. Sue Ellen originally wore those shoes with a pair of stockings filling them out on the insides. However, since Robin would be wearing these shoes over bare feet, his feet had a considerable amount of wiggle room inside. This made him topple over too easily.
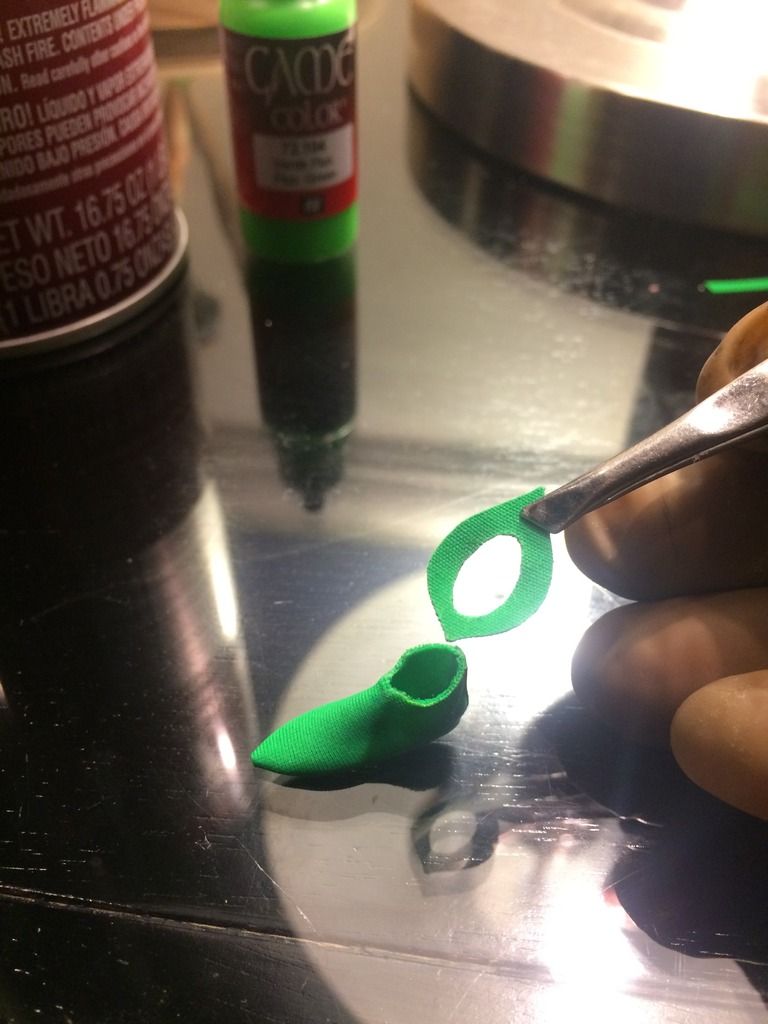
I realized that in order to correct all of these issues, Robin’s pixie boots would have to be fabricated like a GARMENT… patterned, cut, and assembled... almost entirely in FABRIC... form-fitted onto the figure’s feet!
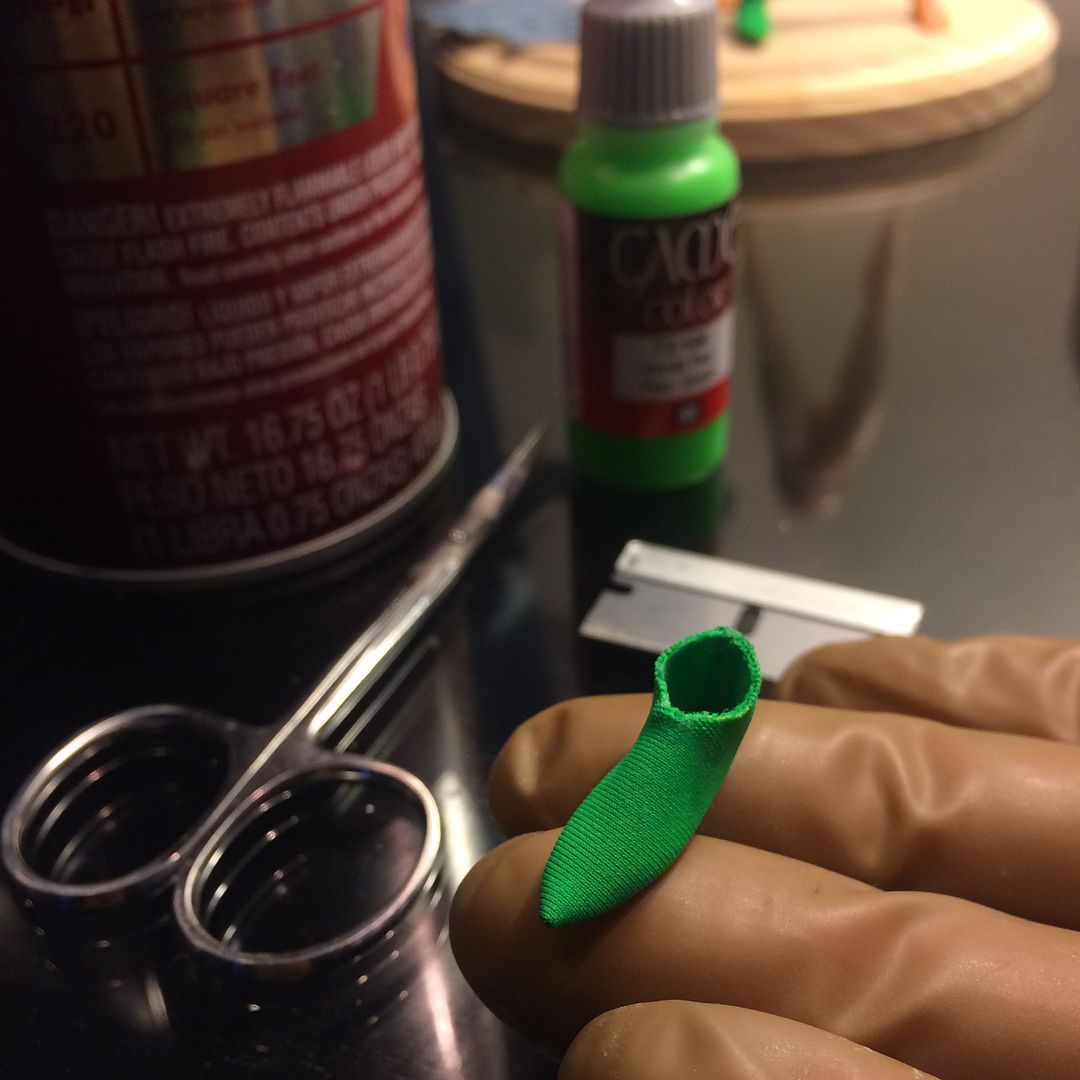
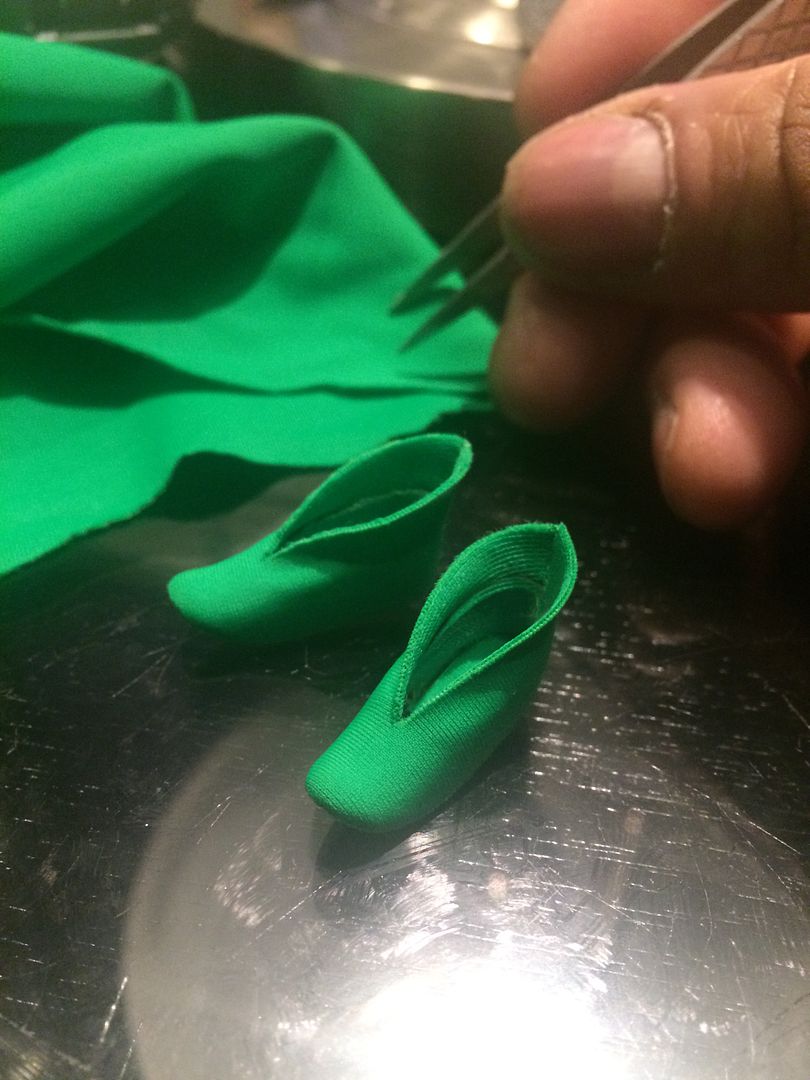
After a few days of trial and error (and several sleepless nights) I managed to come up with a footwear pattern that seemed to fit the character appropriately. I cut the fabric, folded and sewed it into a basic ankle "bootie" (with a slightly pointed pixie toe).
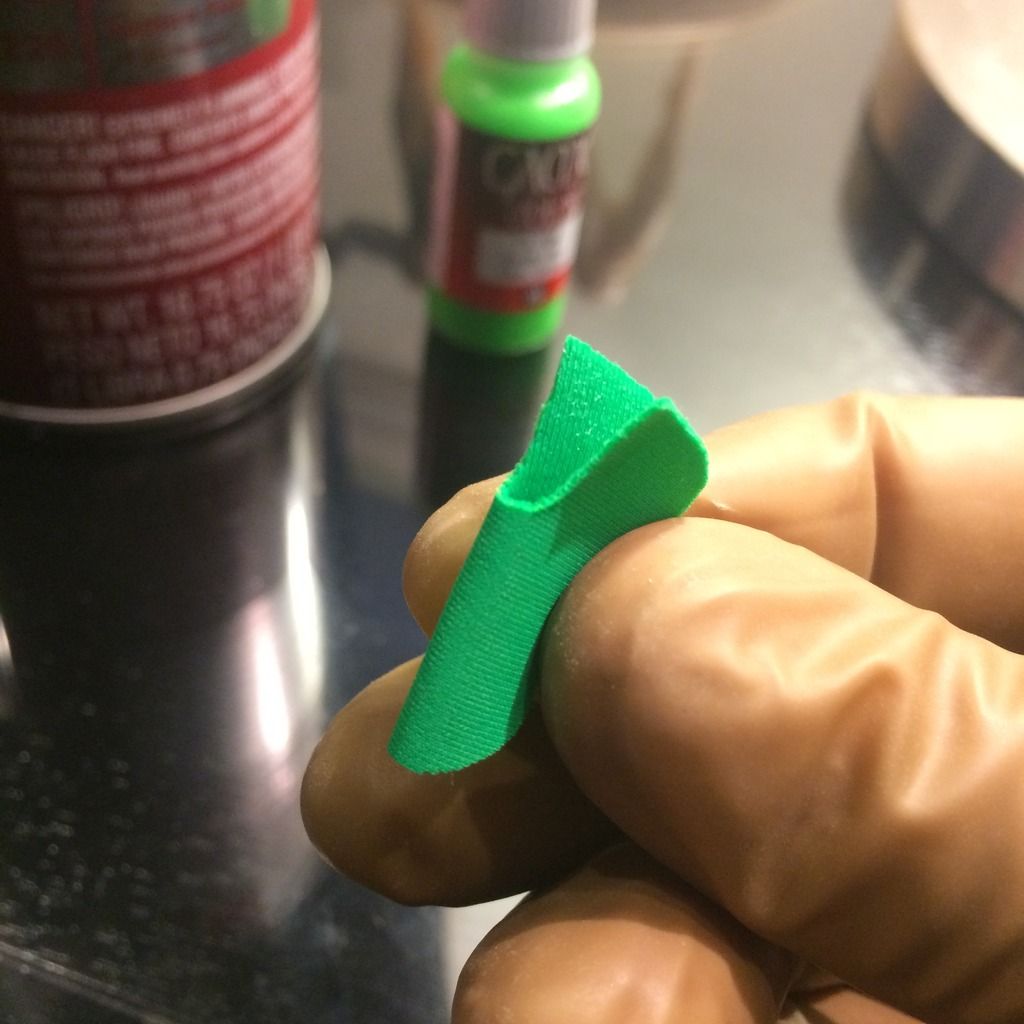
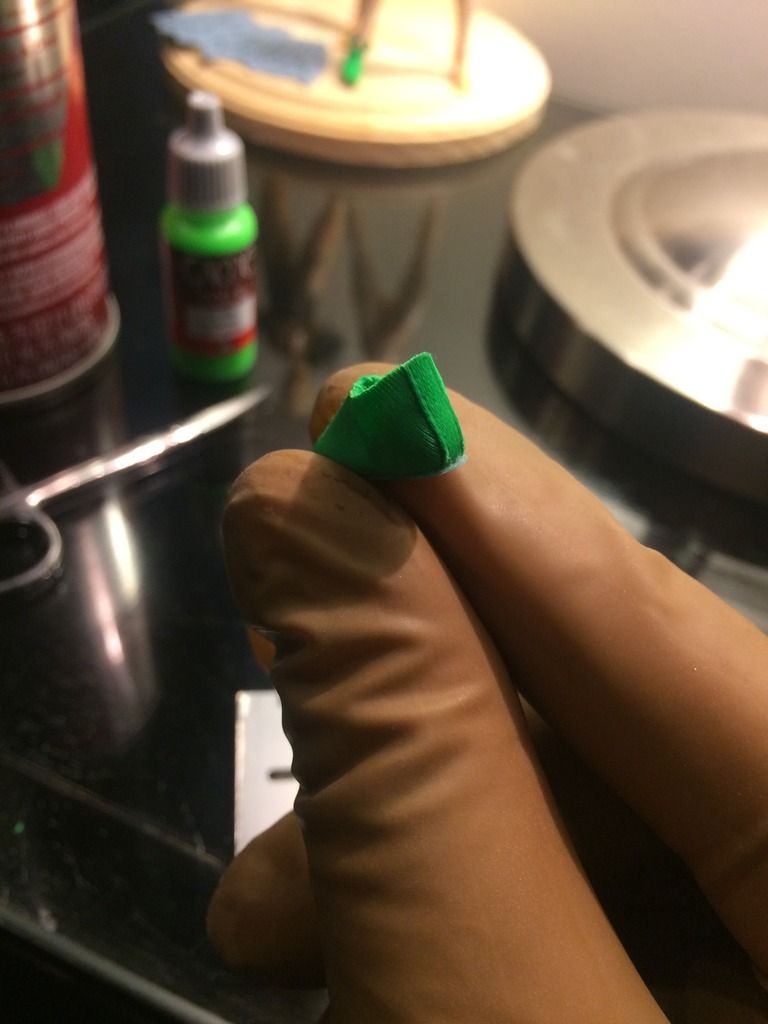
I next created a shaped boot sole from plastic sheet, painted and glued it to the underside of the fabric ankle boot.

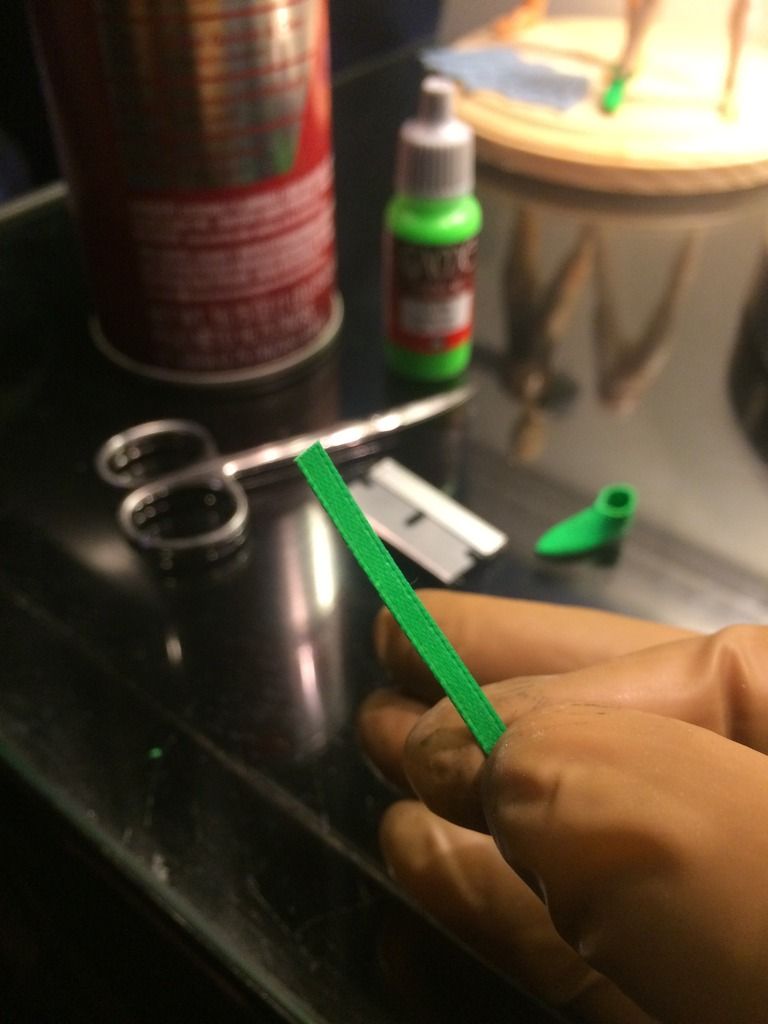
The unsightly construction seam on the rear of the boot required a conceal panel for a finished, neat appearance. A tiny length of 1/8”-wide ribbon glued into place fit the bill adequately. I painted the ribbon with some flat hobby acrylic to eliminate it's satin sheen and to more closely match the texture of the green stretch milliskin that I used for making the basic boot.
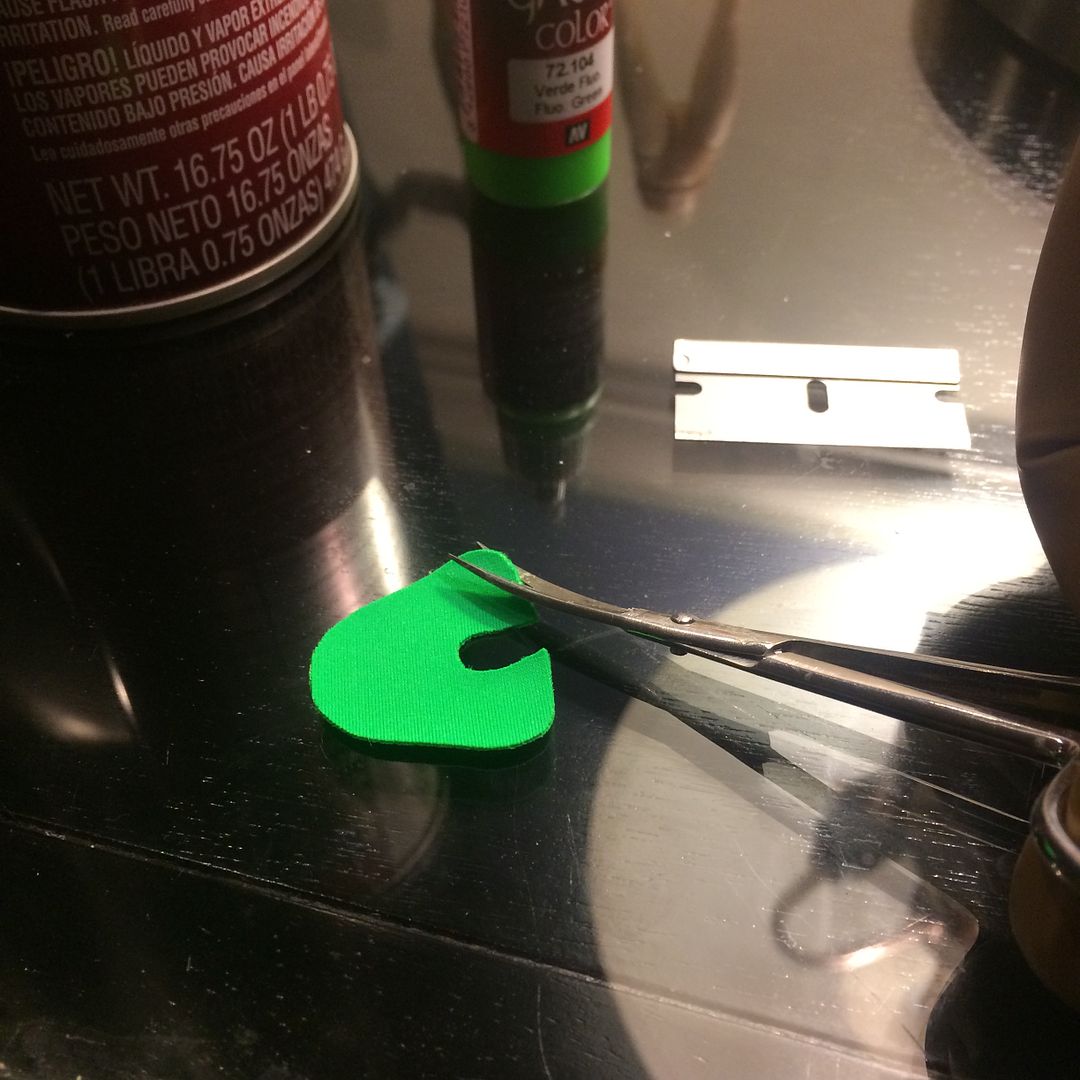
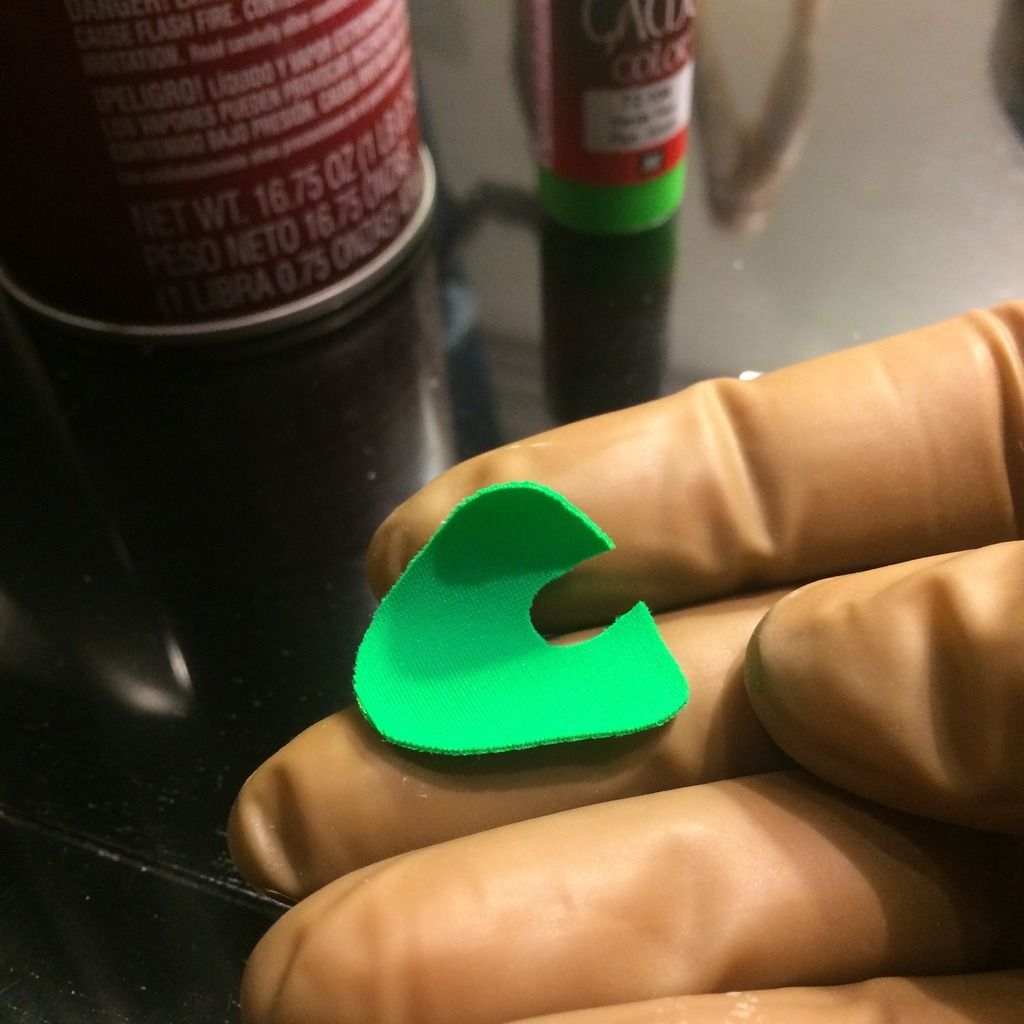
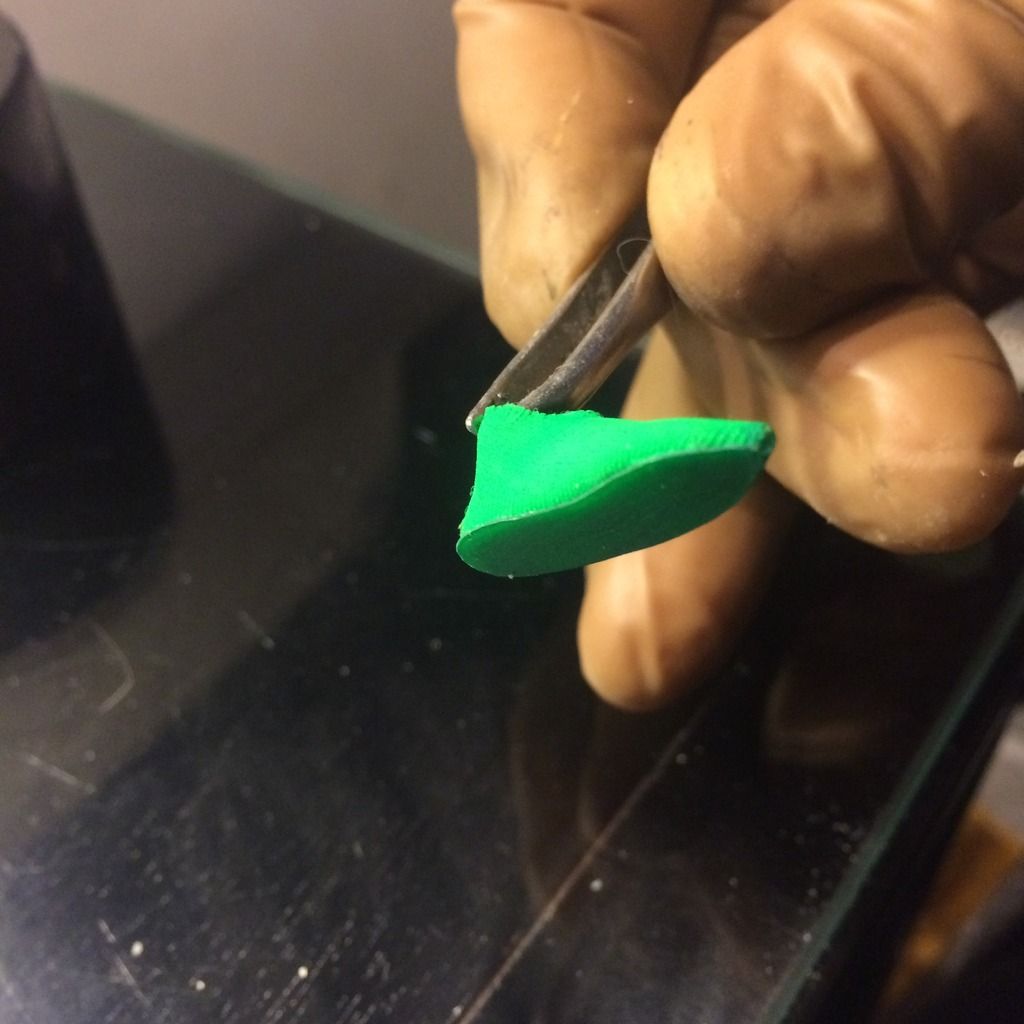
I created a winged pixie collar pattern in fabric and carefully glued it to the raw cut top edge of the boot to finish it off. It was absolutely VITAL to me that the cut edges of the winged collar be clean and razor sharp! I wanted absolutely NO FRAYING of those edges!
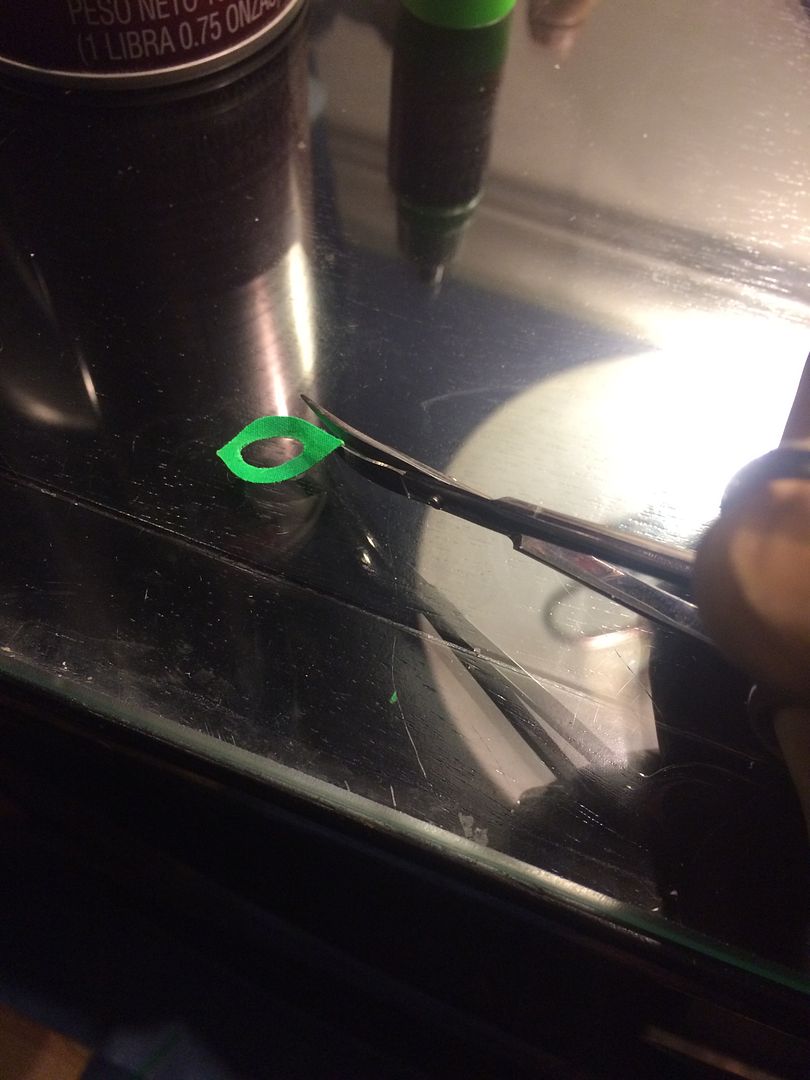
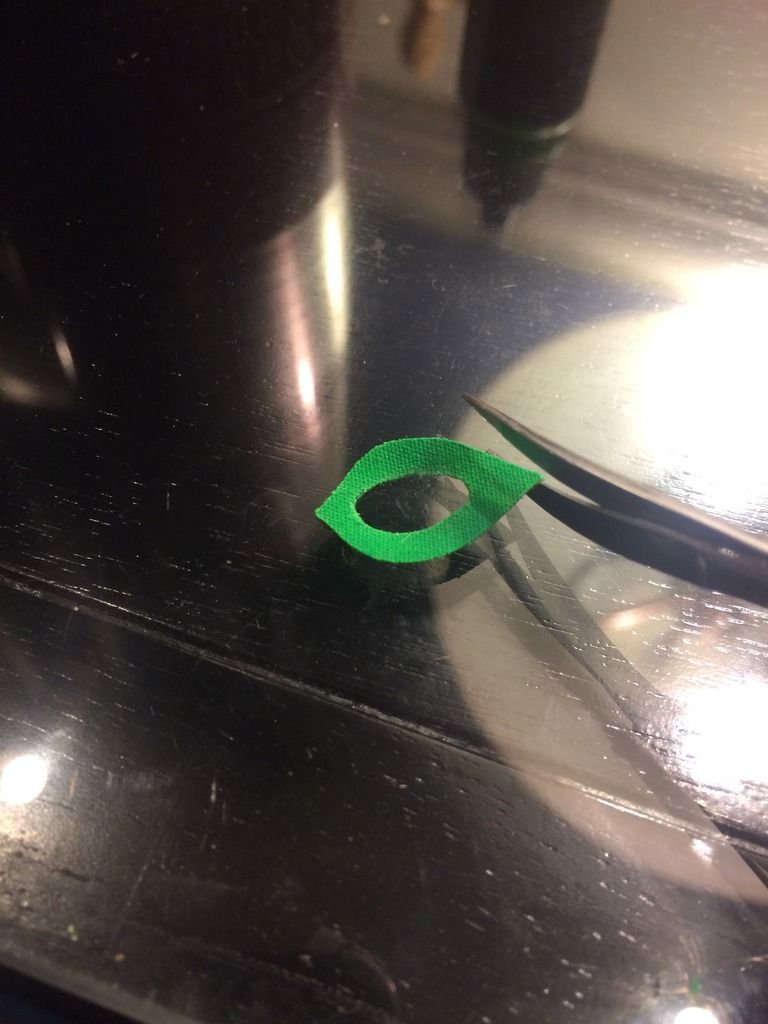
I discovered very quickly that the stretch milliskin fabric that I used for making the base booties was not suitable for making the winged collars. While straight cuts on this particular fabric turned out reasonably clean, rounded cuts tended to have a jagged, rough looking edge, regardless of how carefully they were cut. This was annoyingly evident on the sloped edge of the first pair of pixie shoes I made.
Also, I wanted a fabric that had some stiffness to it because I intended to fold the collars into a slight recessed depression, and I required them to hold these shapes permanently.
In the end, I used two layers of a simple green poly / cotton broad cloth. These layers were permanently bonded together with a light mist of spray adhesive. The fabric was then treated to five or six coats of green artist acrylic paint (to perfectly match the shade of the green milliskin fabric of the base booties) The glue and the paint upon the fabric served to do two other things as well: They stiffened the fabric adequately so that i could permanently shape the collar to my liking once installed on the boot. Also, they allowed me to cut the broadcloth fabric without worrying about rough edges that might fray later.
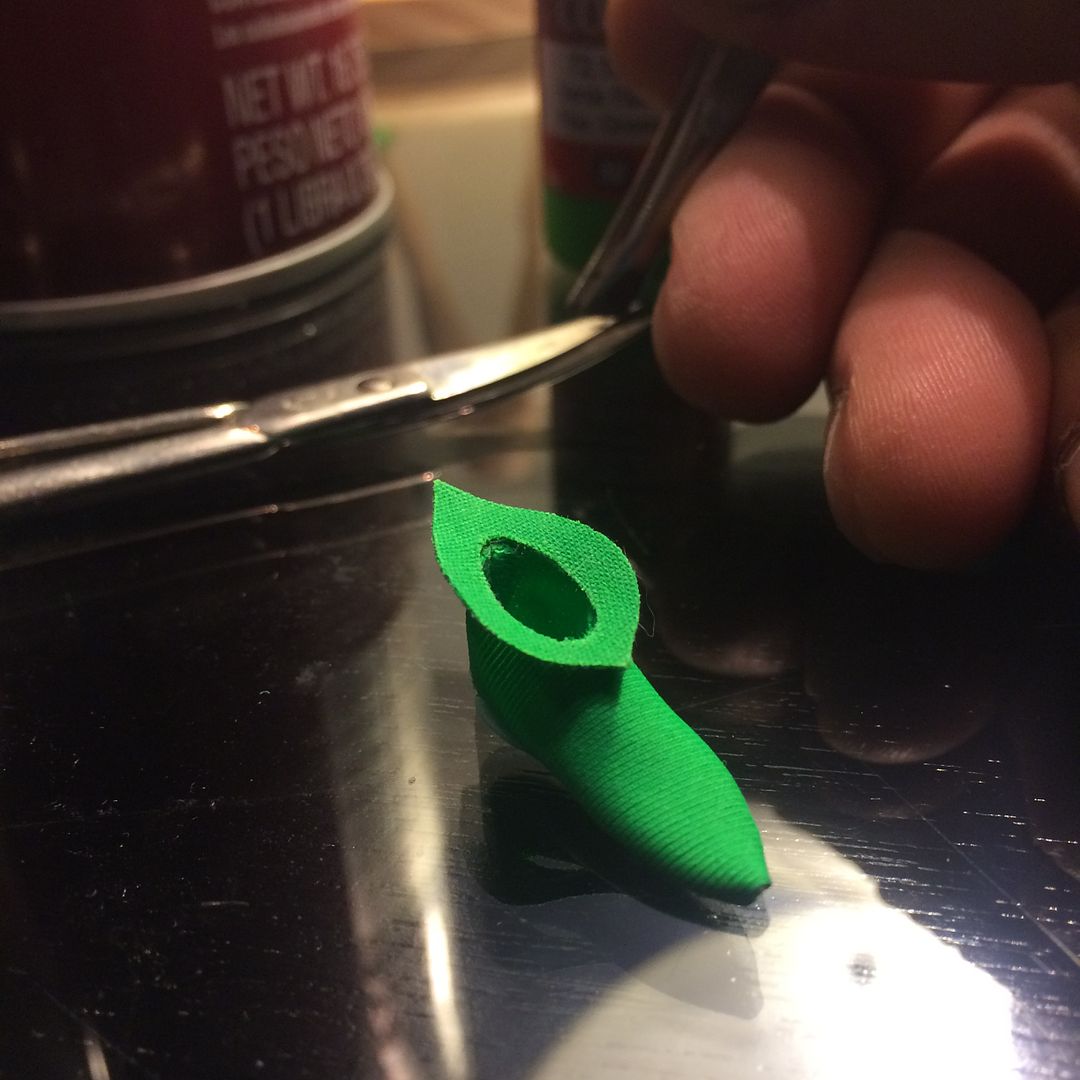
The finished boots look and fit MUCH more appropriately than my first versions, I think.
 Last edited by darklord1967; May 19, '17, 6:08 AM.
Leave a comment:
-
CHAINMAIL TRUNKS
I always intended that my custom Robin figure would wear shorts that would depict the scaley chainmail look as seen in the classic comics.
And while it is the typical MEGO / FTC tendency to represent scaley shorts with graphics silkscreened / printed directly on the fabric, I wanted to represent the chainmail with actual texture upon the fabric.
When gathering up the fabrics to create this figure, I searched pretty extensively for a fabric that could stand in for making Robin's trunks. I finally located some kelley green stretch spandex that had tiny little green dots embedded into it. It was not exactly the chainmail look I wanted, but I figured it would be close enough… especially at this scale.
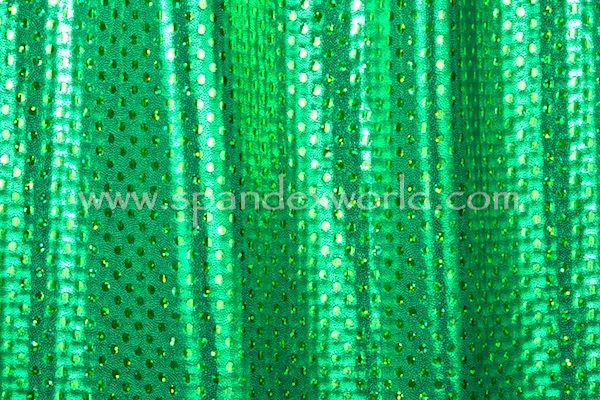
Unfortunately, when I began experimenting with making the shorts out of this fabric, I found their final texture to be too “glitzy” and shimmery. The shorts ended up looking more like the sequined / bedazzled trunks that might be worn by a flashy, flamboyant professional wrestler!
I was about to resign myself to just making The Boy Wonder's shorts out of plain green stretch fabric.
Then one day something very interesting happened:
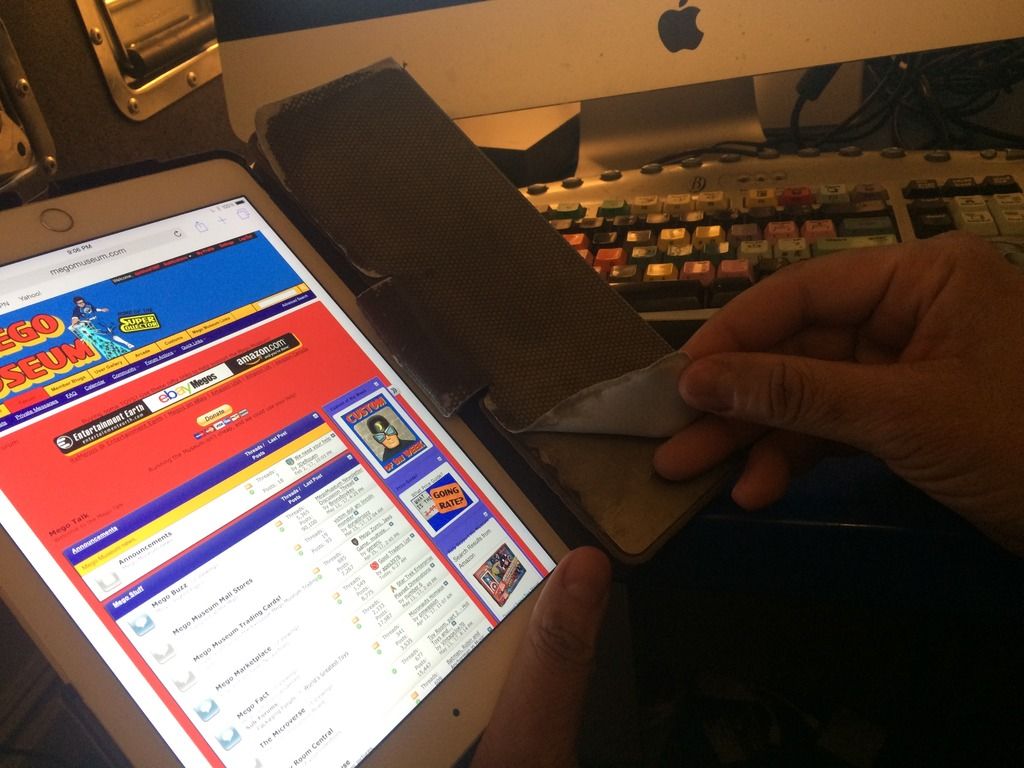
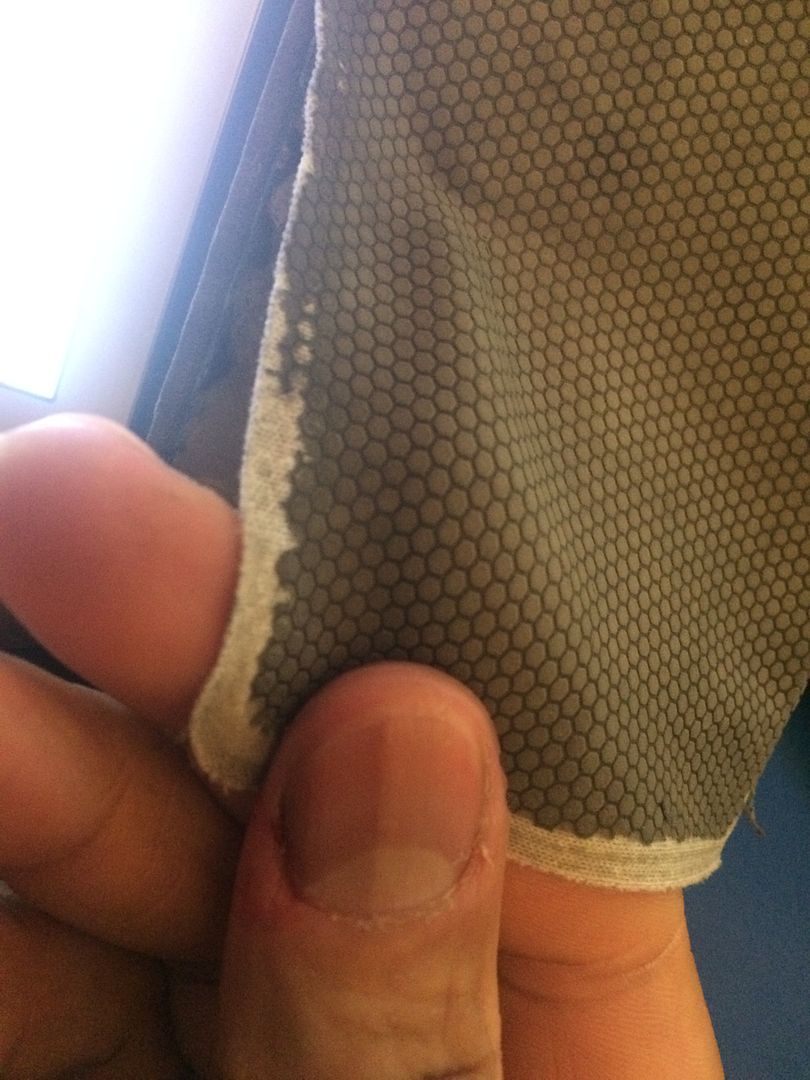
I was sitting around during a break from the work, reading the MEGO Museum forums page on my iPad. Suddenly, I took notice of the pattern on the old, worn, stretchy, rubber-grip carry case. In terms of scale, size, texture, and detail, this fabric would appear PERFECT to represent Robin’s detailed shorts!!

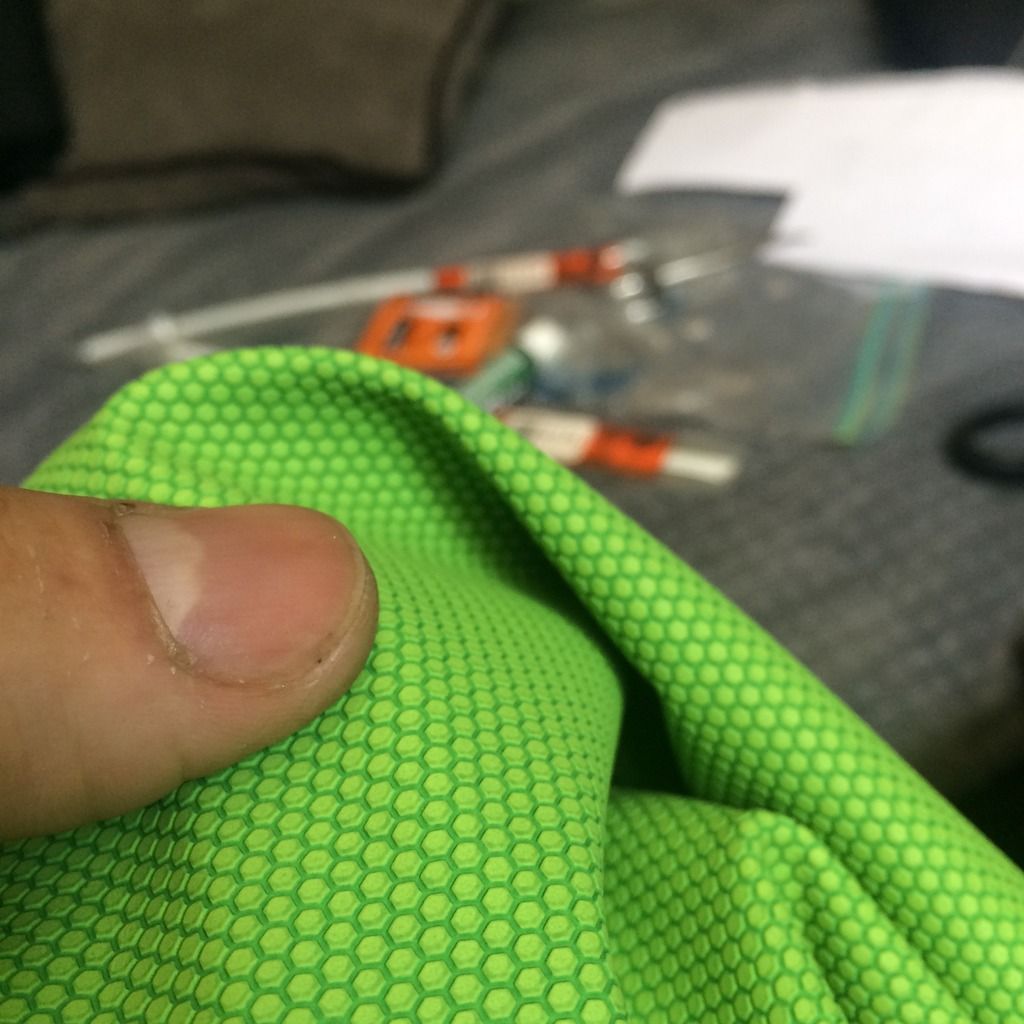
An online search helped me locate a retailer in china that sold this very same faux leather textured embossed grain surface stretch fabric in various colors… including in green!

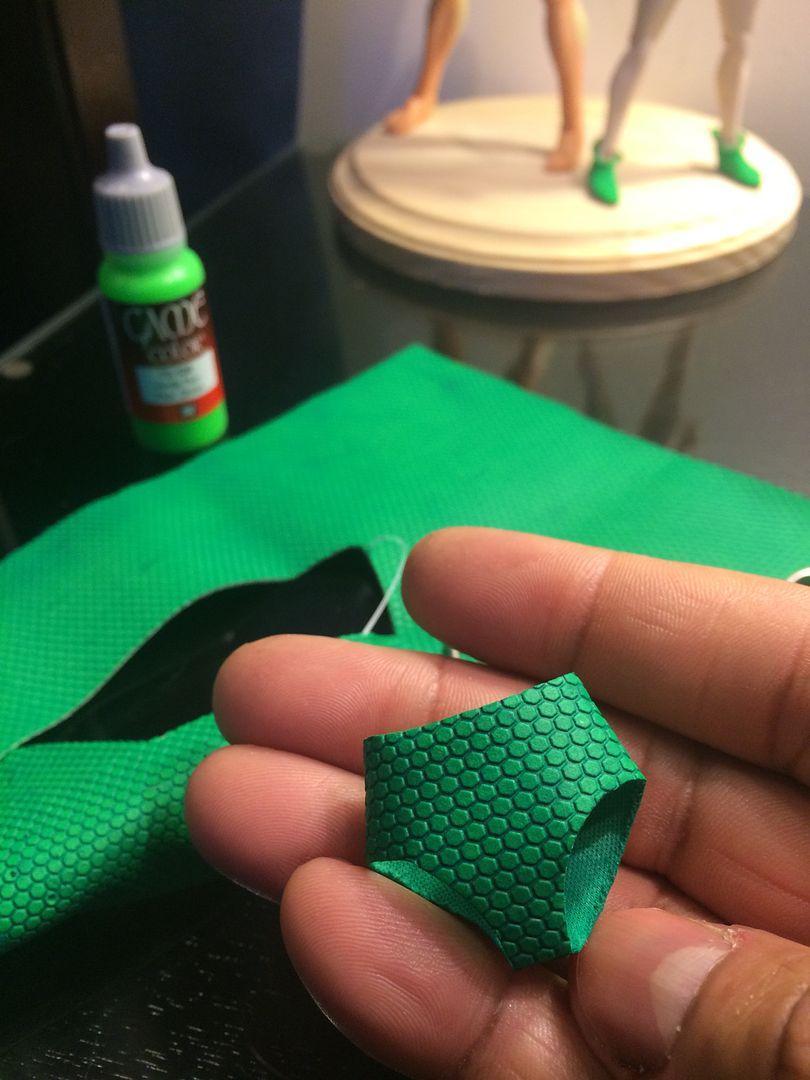
When the fabric arrived, I found that it accepted artist acrylic paint very well. This allowed me to convert the fabric into a PERFECT match for the shade of green which I had already established for Robin’s costume.
I quickly cut the colored fabric into the pattern I had established, and stitched them into a very neat set of shorts.
 Last edited by darklord1967; May 16, '17, 8:40 AM.
Leave a comment:
-
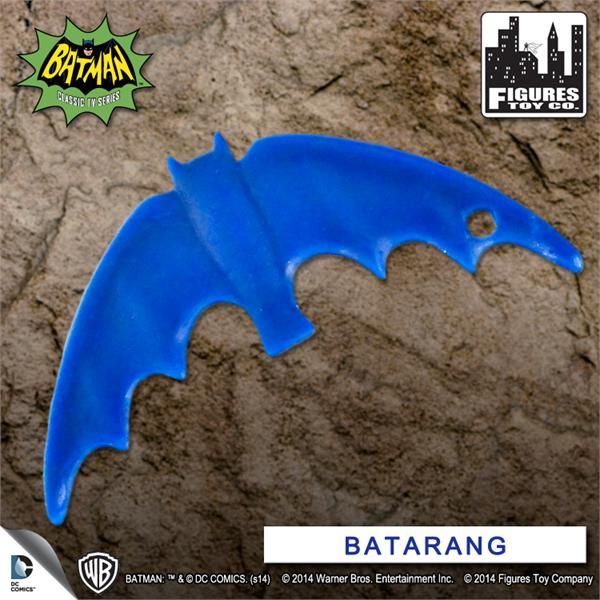
BAT-A-RANG
Let me just say that as a life-long Batman fan, I do NOT consider the 1966 Adam West version of the Bat-mythology as the definitive version.
I DO, however, freely admit to having a favored preference for a lot of the production design elements first introduced on that show, into the Bat- mythology (Re: The Batmobile, The Bat Cycle, Bat Boat, etc.)
One such design from the 1966 Batman TV show that I consider an all-time favorite... even over all of the later versions seen in the comic books, cartoons, video games, or films... are the BAT-A-RANGS!
To me, the 1966 versions look really cool. They looked dangerous, they were functional as weapons AND grappling hooks, they had a strong Bat-motif as part of their design… AND… more than any other design I can think of… they actually seemed to be based off the size, shape, and function of an actual BOOMERANG!
The kind folks at Figures Toys Company created a 1966 Bat-A-Rang for their 8 inch scaled Batman figures. They were the first (and only ones) to do this in that scale. The trouble is they created an accessory which was considerably under-sized. The sculpt appeared blunted and roundedly dull… not at all dangerous-looking.
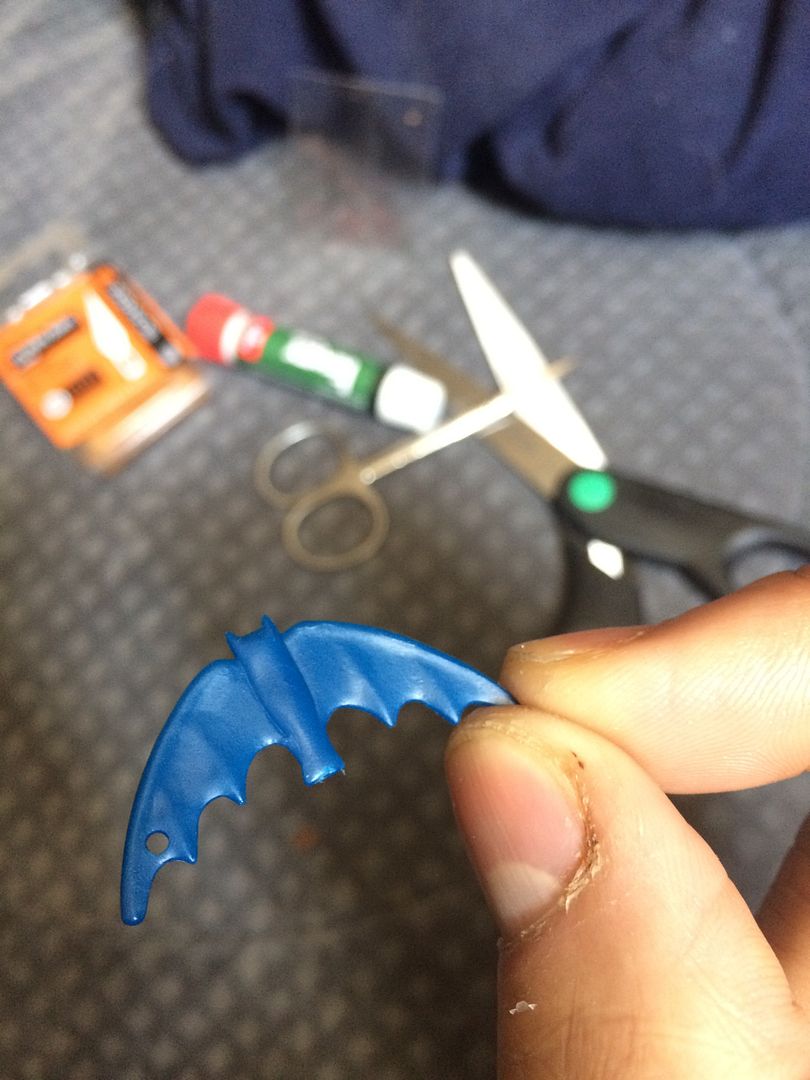
Most egregiously of all, FTC seemed to forget (or ignore) the fact that Robin (and Batgirl) both used much smaller “sidekick” Bat-A-Rang props as the weapons of their personal arsenals. These sidekick Bat-A-Rangs were a completely different design (although within the same style "family") as the Batman’s “hero” prop.
While I was lucky enough to get a “headstart” on the fabrication of The Batman’s Bat-A-Rang for this project (via a parts bin discovery from a model kit), I was NOT similarly fortunate when it came to creating Robin’s throwing weapon.
I had no choice but to create the sidekick weapon from scratch.
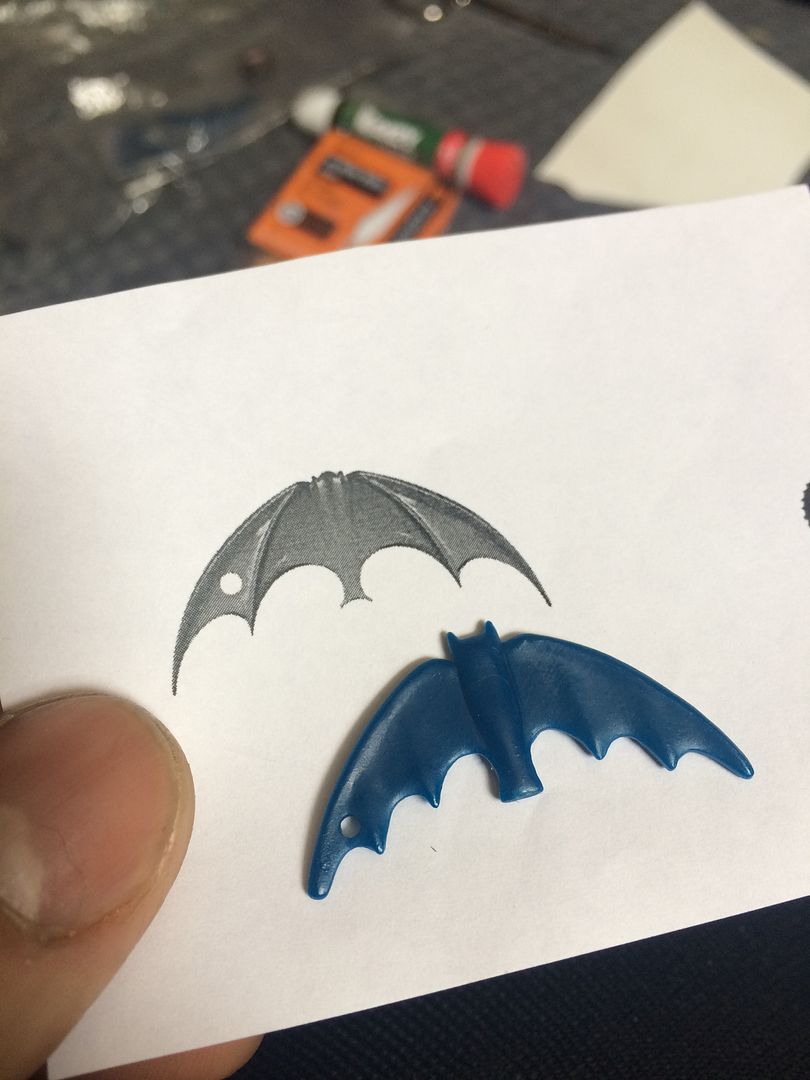
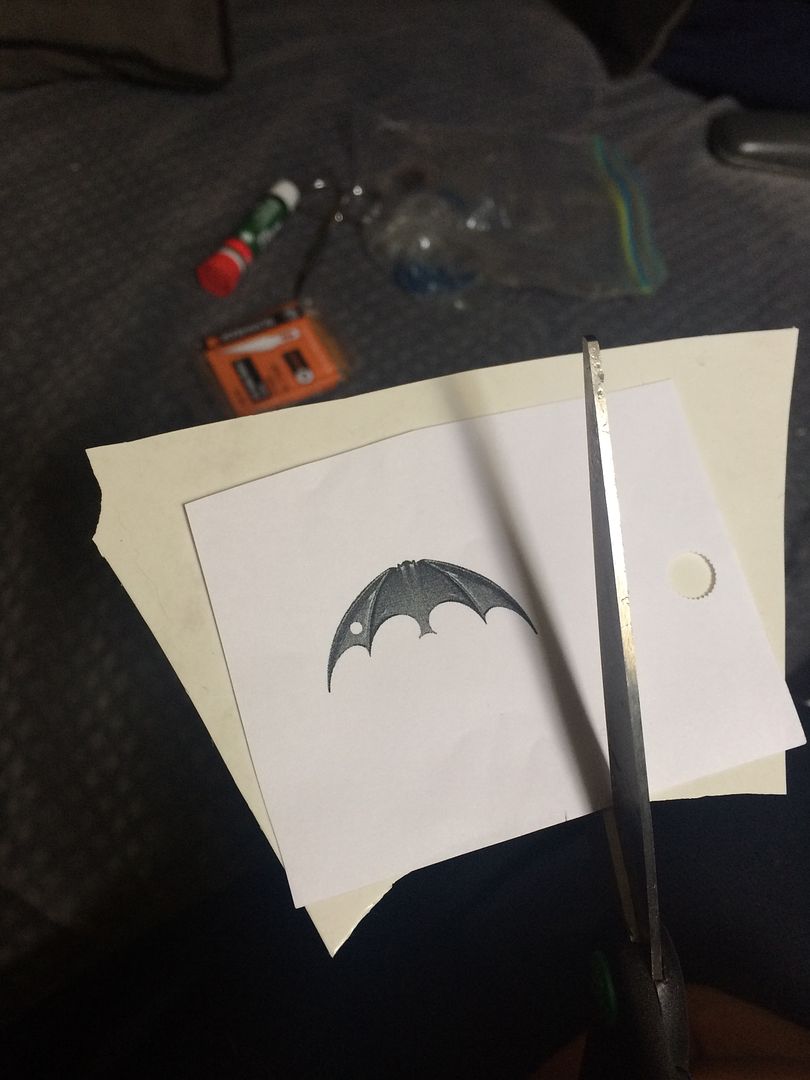
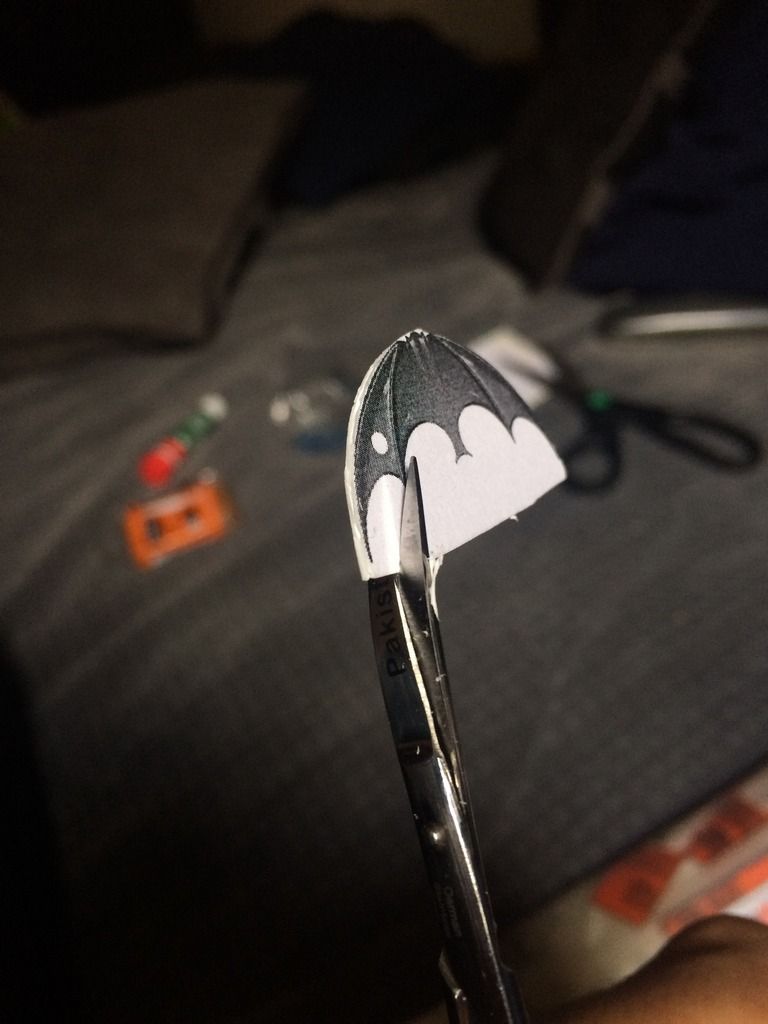
I downloaded an image of Robin’s 1966 Bat-A-Rang to my computer, and re-sized it to 1:9 scale in Adobe photoshop. This essentially allowed me to have a workable pattern that I could use for cutting some white sheet styrene into the Bat-A-Rang’s basic shape.
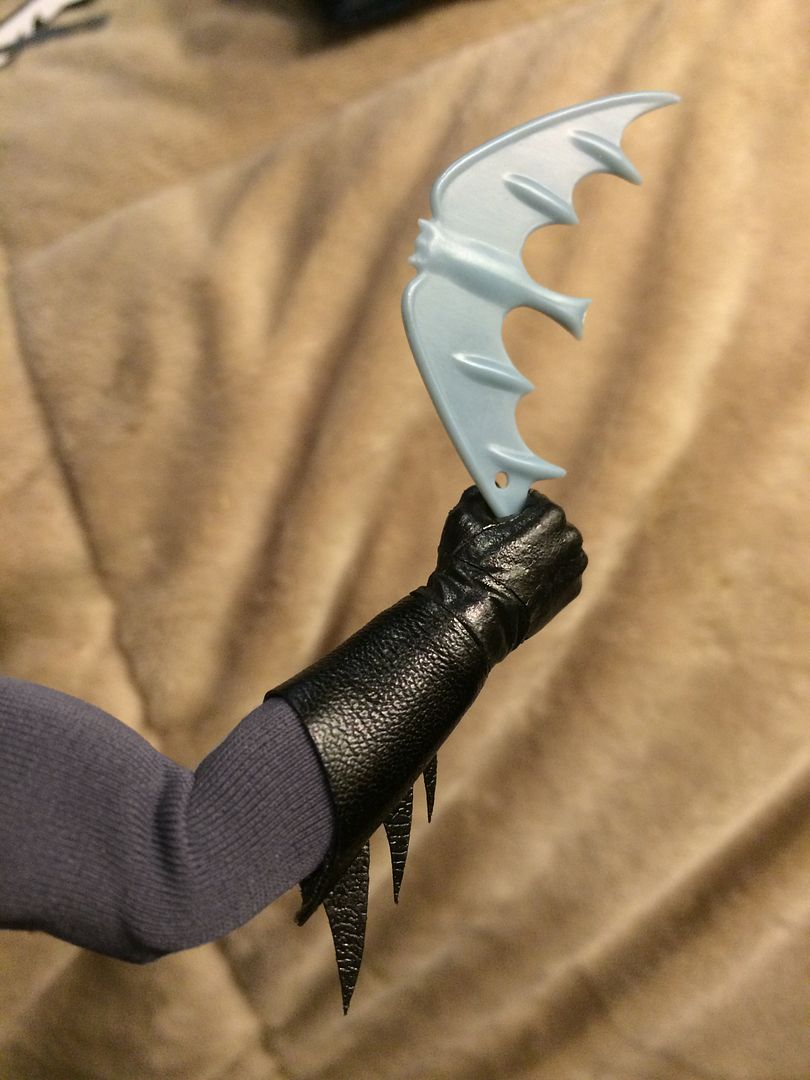
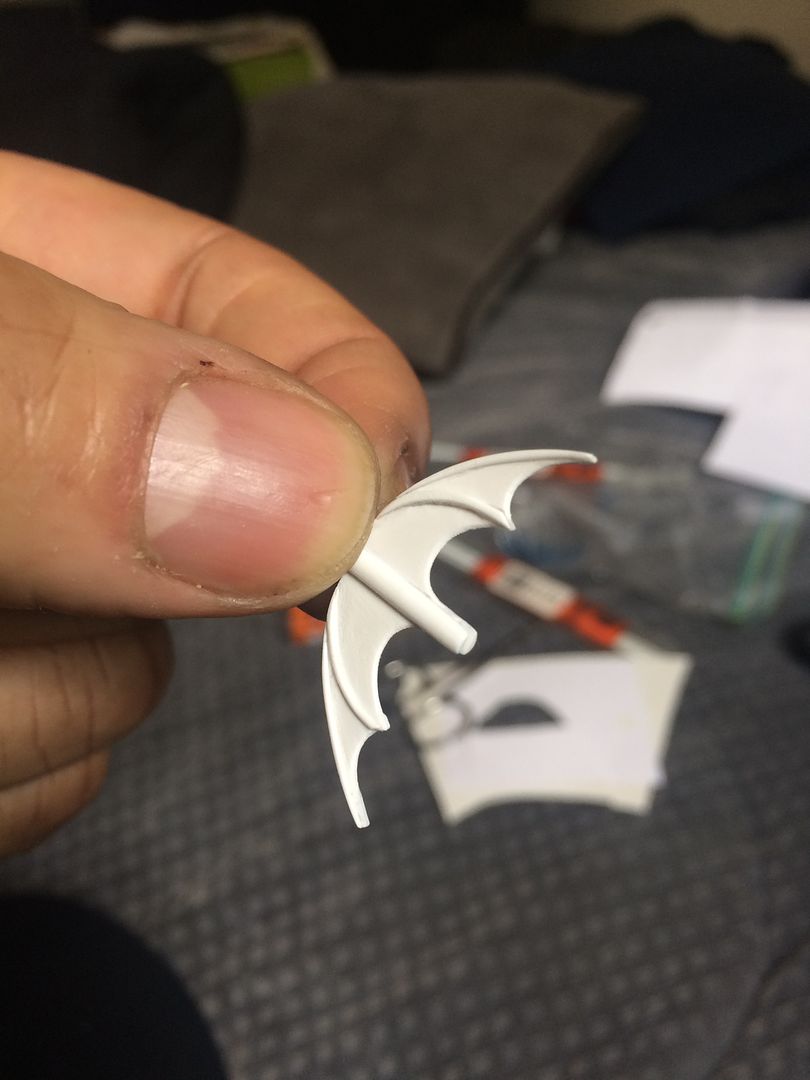
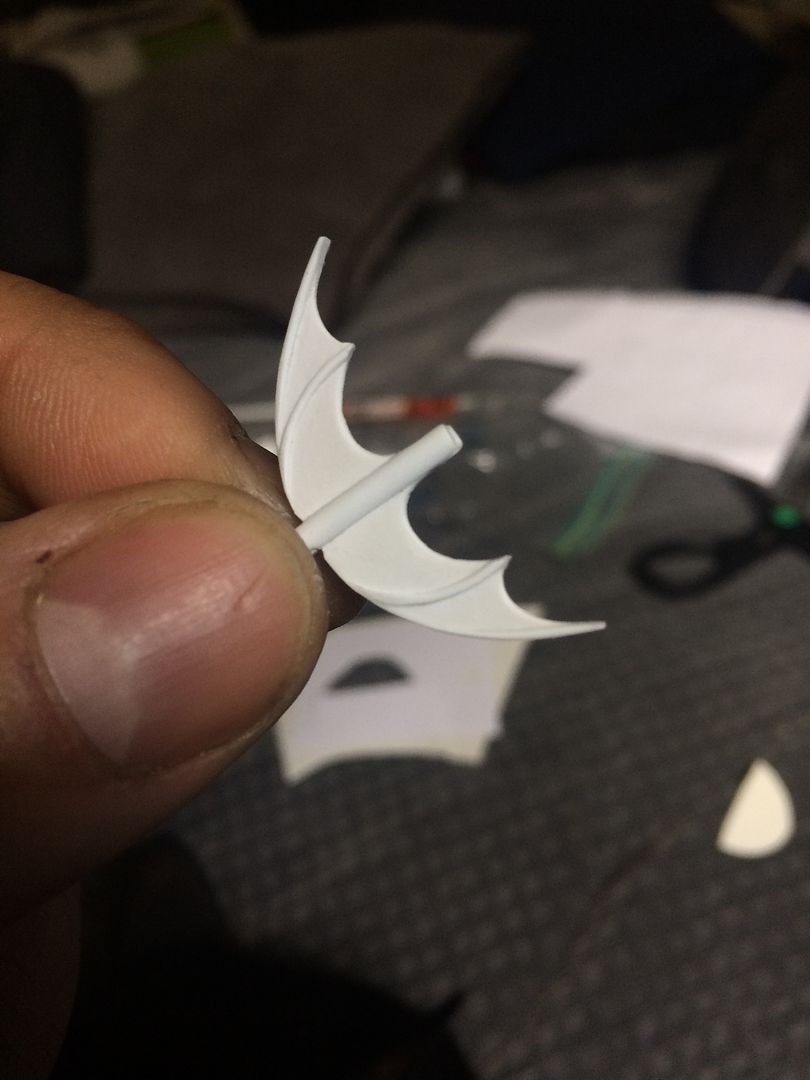
Using styrene rods, and modelling putty, I have managed to create Robin’s classic (1966-styled) sidekick Bat-A-Rang in precise 1:9 scale for my custom figure.

 Last edited by darklord1967; May 16, '17, 12:45 AM.
Leave a comment:
-
I don't care where you keep your camara but I offer thanks in advance for all the photos.Leave a comment:
-
Can't make Mego meet.. So please please someone take pictures of all of these awesome toys!!!Leave a comment:
-


Leave a comment: