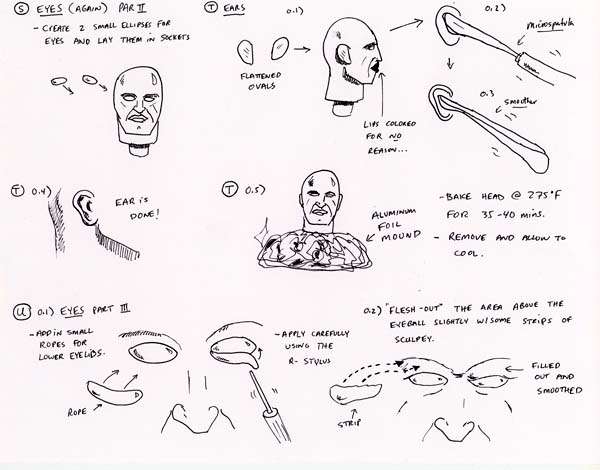
Now we will add in the eyeballs. Add two small ellipses into the eye sockets of the same size. Nothing looks worse that 2 different size eyes (fig. S). If these fall out while baking, they can be glued back in.
Make the ears by cutting flattened ovals of the shape as seen in (fig. T). Press these to either side of the head, then to make the outer ear cavities, use your microspatula to press in lightly. Then, going just inside of that (i.e. proceeding toward the face), press in again deeper with your small smoother (figs. T.2 and T.3). Your ear should now look like (fig. T.4).
Okay, it's time for the next baking stage! You'll want to bake this head upright so it doesn't rest on and deform any of the areas you've sculpted. Accomplish this by making a ball of aluminum foil. Flatten it on one side and then press your finger in the center to make a socket for the neck plug to rest in. Make sure this is nice and secure, then place this on a cookie sheet in the oven preheated to 275°F for 35 mins. again. (fig. T.5).
Okay, now that your head has cooled, it's time to add the final details of the eyes. Add small ropes of clay under the eyes foe the lower eyelids. Flesh out the area of the eye socket above the eyeballs using a thin strip of S.S. Define the lower edge of this (which would be the upper eyelid) using your R-stylus. Reference a Mego head other than Superman or Robin to see how this would look (they are kind of simplistic sculpts and ignored this anatomical feature, which is why they look so goofy) (fig. U.1 and U.2). Remove the fingerprints with a small smear of alcohol.
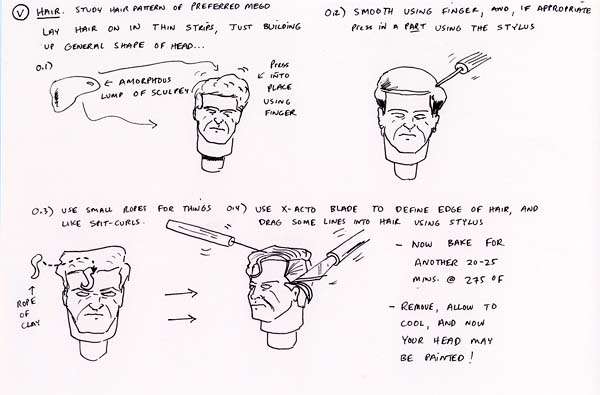
Now, many of you have probably made hair with me before, and it's the same as all of those other times. Just layer on amorphous strips of clay onto the head to build up the general shape of the hair (fig. V.1). Smooth this out using your finger or fin smoother, and if appropriate, press a part into the hair using the BP stylus (fig. V.2).
Use small ropes of clay for hair details like waves or spit curls (fig. V.3). Define the edge of the hair by cutting away and pressing with the blade of your X-acto knife. Drag some lines into the hair using your various size styluses. Remember, hair lines are not short and all uniform in length--many times they are long and flowing. Study other Mego heads to get an idea. To get rid of the little clay shavings that build up in the hair lines, paint the head lightly with alcohol. Place this head back in the oven at 275°F for about 15 mins. Remove and allow to cool (fig. V.4).
Use your sandpaper, files and Dremel to make any final revisions or to remove any imperfections.
Your head is now ready to be painted!

