Using the pointer, lightly trace lines for the placement of the eyes and nose and mouth (fig. M). Don't make them so deep, that they can't be rubbed out later.
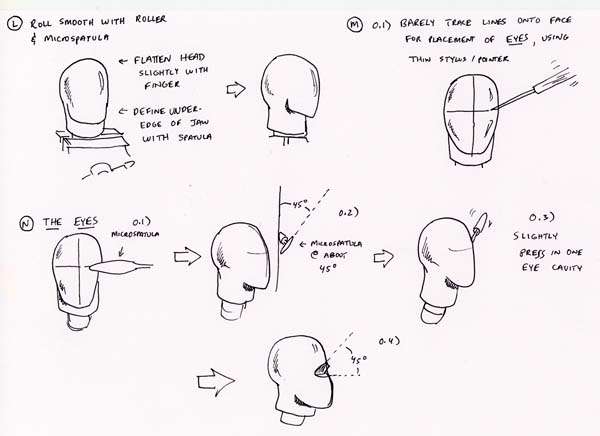
To make the eye sockets. Take your microspatula and place it with the beveled tip almost touching the vertical line of symmetry (fig. N). Rotate it at about 45°, (fig. N.2) and lightly press in the eye cavity to an appropriate depth (figs. N.3, and N.4). Your head will now look as shown in (fig. O.1 and O.2).
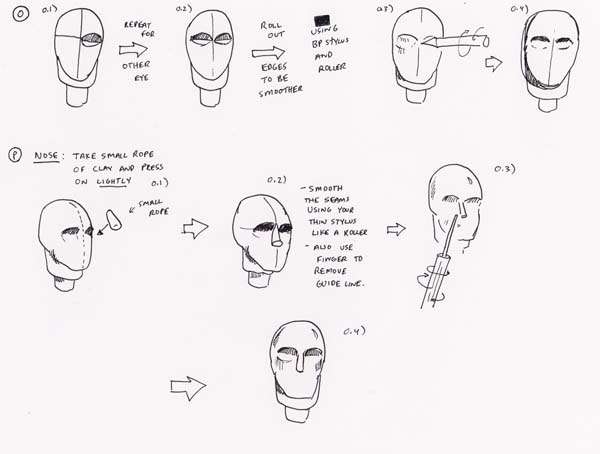
Using your BP-stylus and your roller, gently roll out the cavities of the eye, so that the edges aren't as sharp (fig. O.3 and O.4). That' s all we're going to do for the yes for now... Onto the nose.
Take a small rope and lay it on lightly along the line of symmetry, onto the head (fig. P.1). Using your pointer (aka thin stylus) like a roller, roll the seams where the clay of the nose meets the clay of the face, smooth (fig. P.2). You can use the R-stylus for this as well. If you mess this up, simply cut the nose off and try again. You can now remove the guide lines with your finger or roller (figs. P.3 and P.4). To make the nostrils, add little balls of clay to either side of the nose, and roll the seams with the pointer tip as seem in (fig. P.5). Take your BP-stylus and press in little indentations for the nostrils (fig. P.6). In profile, your head should now look like that seen in (fig. P.7).