If this is your first visit, be sure to
check out the FAQ by clicking the
link above. You may have to register
before you can post: click the register link above to proceed. To start viewing messages,
select the forum that you want to visit from the selection below.
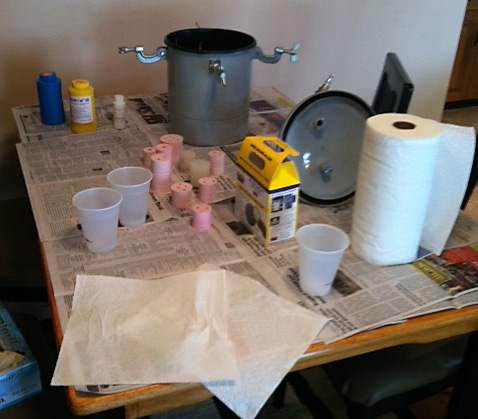
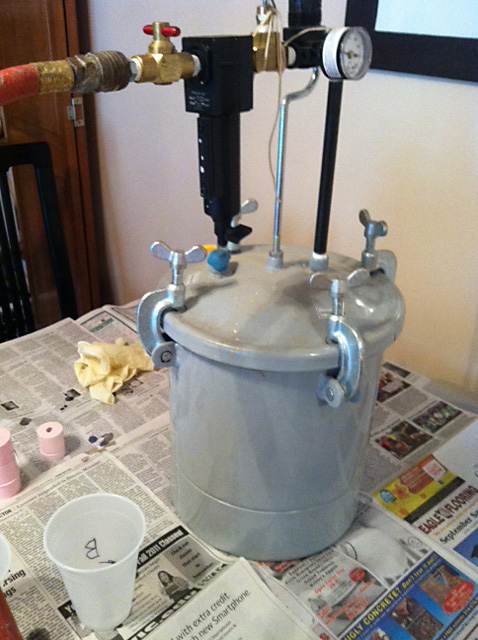
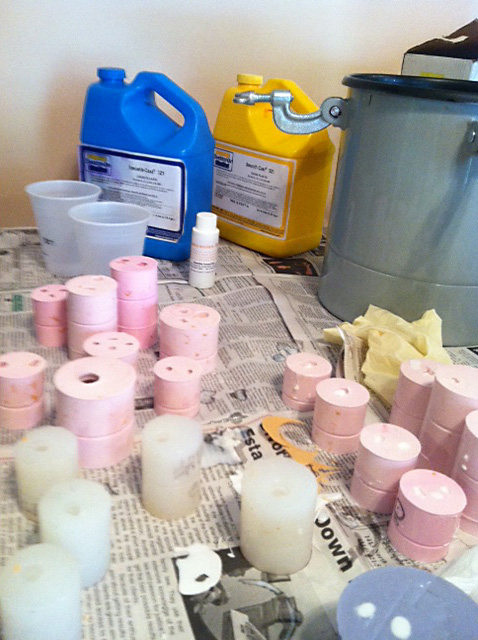
The yellow and blue bottles are the casting material (smooth on is the brand and you mix equal parts A and B). The pink and whitish things are the various molds for each body part. With two body styles there are a lot of molds. The big grey tank is my pressure pot.
The process goes like this: pull every mold out that I'm planning on casting. Then mix together the appropriate casting material (today I mostly did white, but I have other stuff that pigment can be added to). Carefully and quickly pour the casting material into the molds. Place molds in pressure pot, clamp the lid down, turn on the compressor and wait 10-15 minutes. At that point, I release the air pressure and remove the molds.
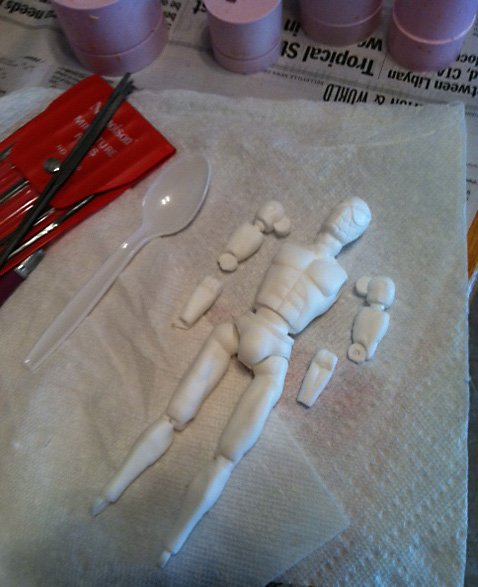
When the parts are solid enough, I pop them out of the molds. I usually do this when they're still slightly soft so I can tweak any problems.
Interesting! Thanks for sharing Boss! We can only learn from the Pro's.
Originally posted by boss
The yellow and blue bottles are the casting material (smooth on is the brand and you mix equal parts A and B). The pink and whitish things are the various molds for each body part. With two body styles there are a lot of molds. The big grey tank is my pressure pot.
The process goes like this: pull every mold out that I'm planning on casting. Then mix together the appropriate casting material (today I mostly did white, but I have other stuff that pigment can be added to). Carefully and quickly pour the casting material into the molds. Place molds in pressure pot, clamp the lid down, turn on the compressor and wait 10-15 minutes. At that point, I release the air pressure and remove the molds.
When the parts are solid enough, I pop them out of the molds. I usually do this when they're still slightly soft so I can tweak any problems.
Bryan,
Top notch. Really dig your stuff. Great peek at your factory and thank you for letting us see. Always great to share with others so others can learn.
In the third picture down, you can see white "dots" on the tops of some of the molds on the right. that's the casting material. This particular mixture is clear when it goes in and turns white when the chemical reaction takes place. because the rubber molds are so strong, I can pop pieces out of the tiny holes on top (thus avoiding the dreaded seam mark). I've gotten 40+ casts out of some of the molds and they're starting to show their age.
I'm debating on whether or not to get the original parts remolded or just ride these out a little longer and quit when they're shot.
The yellow and blue bottles are the casting material (smooth on is the brand and you mix equal parts A and B). The pink and whitish things are the various molds for each body part. With two body styles there are a lot of molds. The big grey tank is my pressure pot.
The process goes like this: pull every mold out that I'm planning on casting. Then mix together the appropriate casting material (today I mostly did white, but I have other stuff that pigment can be added to). Carefully and quickly pour the casting material into the molds. Place molds in pressure pot, clamp the lid down, turn on the compressor and wait 10-15 minutes. At that point, I release the air pressure and remove the molds.
When the parts are solid enough, I pop them out of the molds. I usually do this when they're still slightly soft so I can tweak any problems.
Rinse and repeat ad nauseum.
Thanks for the info Bryan. When you say it like that it all seems so easy, but I bet it isn't
"...The agony of my soul found vent in one loud, long and final scream of despair..." - Edgar Allan Poe
 Tweet
Tweet


Comment