Help support the Mego Museum

Announcement

Collapse
No announcement yet.

Kit bashed Boba Fett (has anyone done one?)

Collapse
X
 
  • Time
  • Show
Clear All
new posts
  • darklord1967
    Persistent Member
    • Mar 27, 2008
    • 1550

    #31
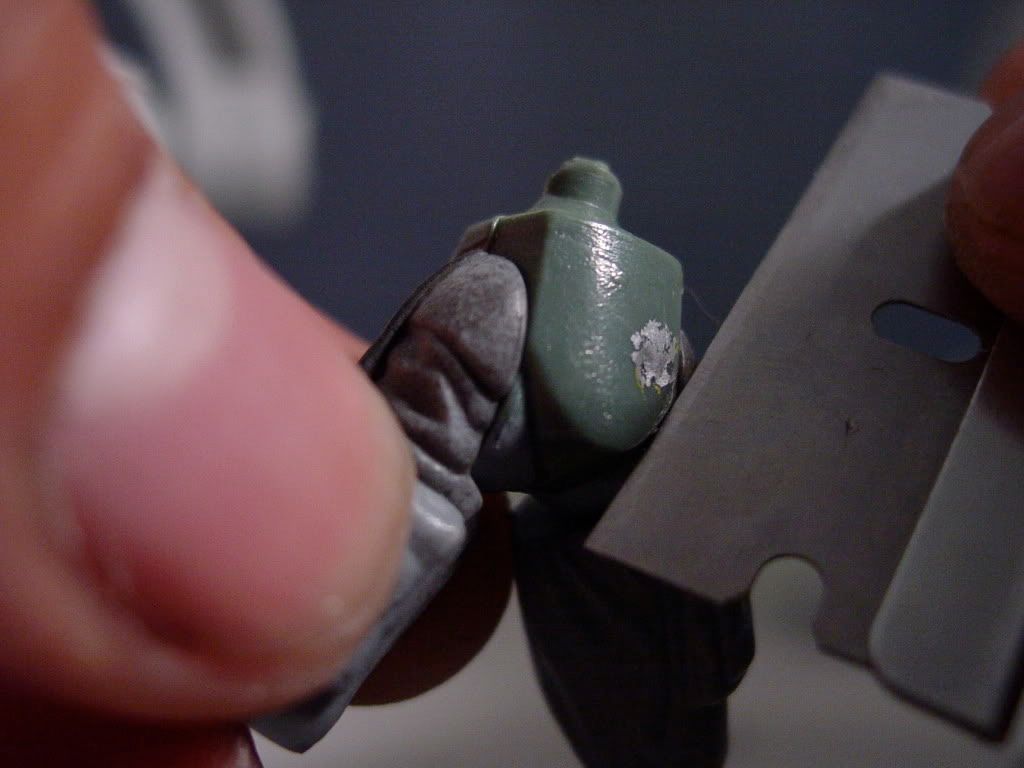
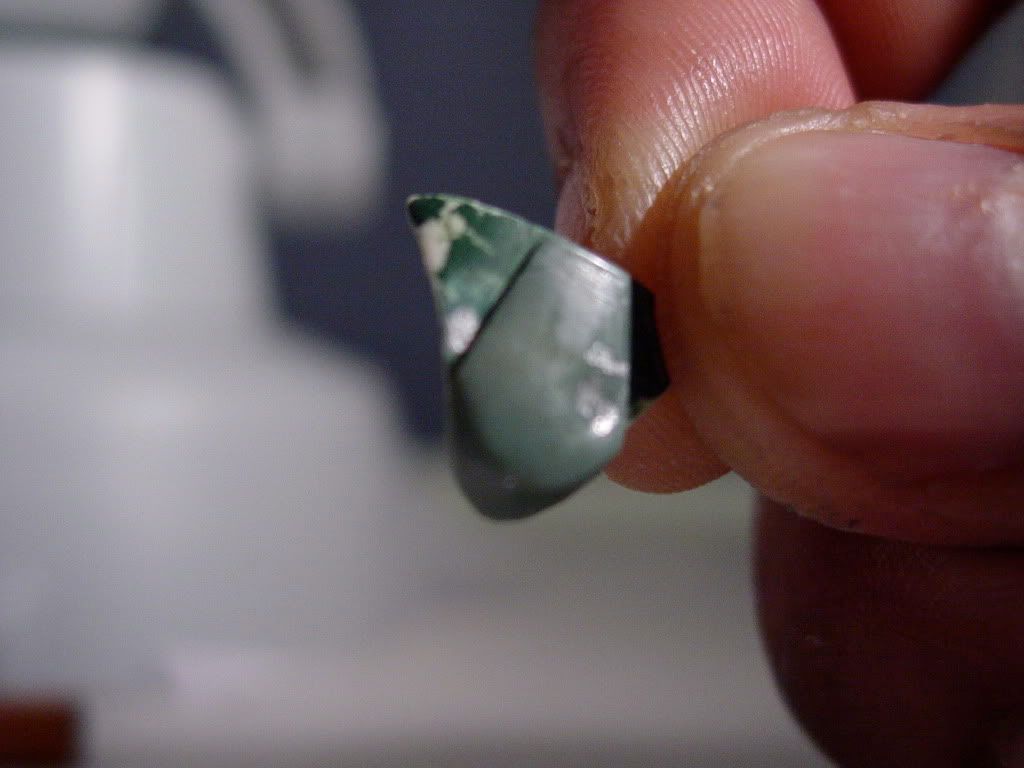
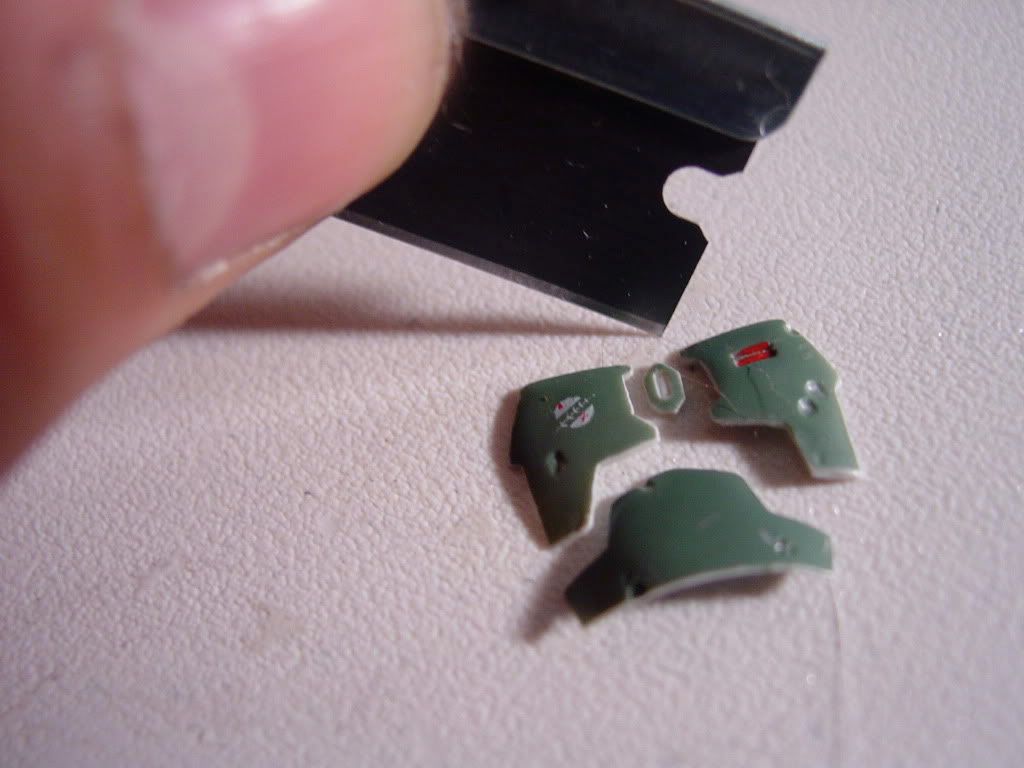
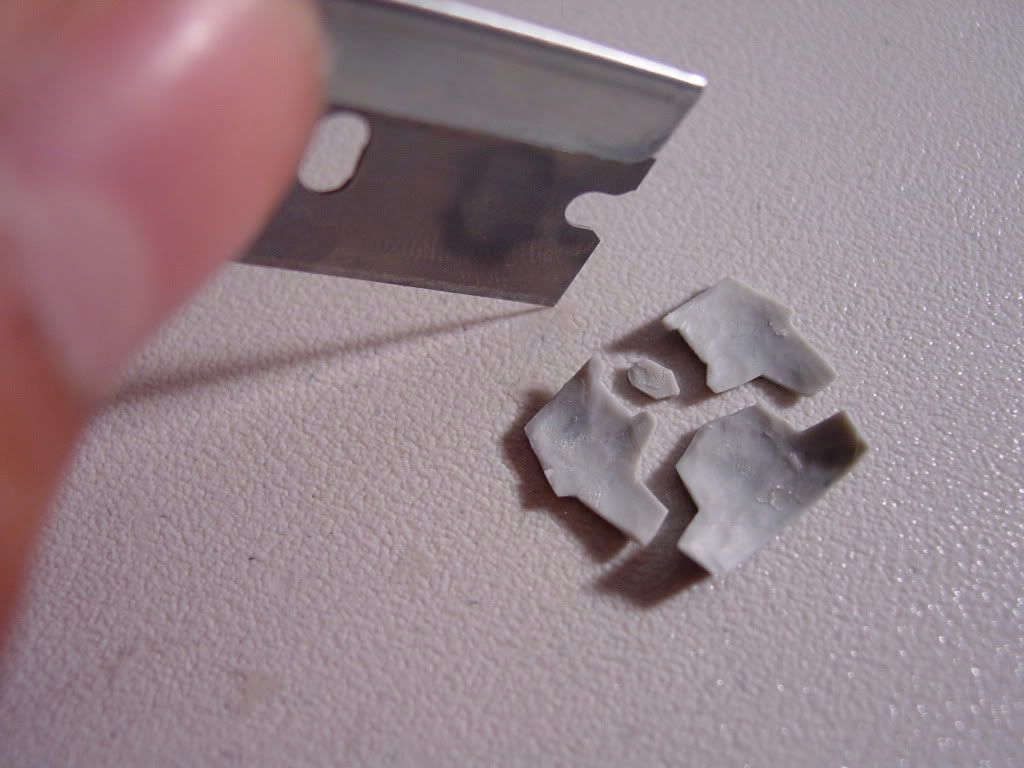
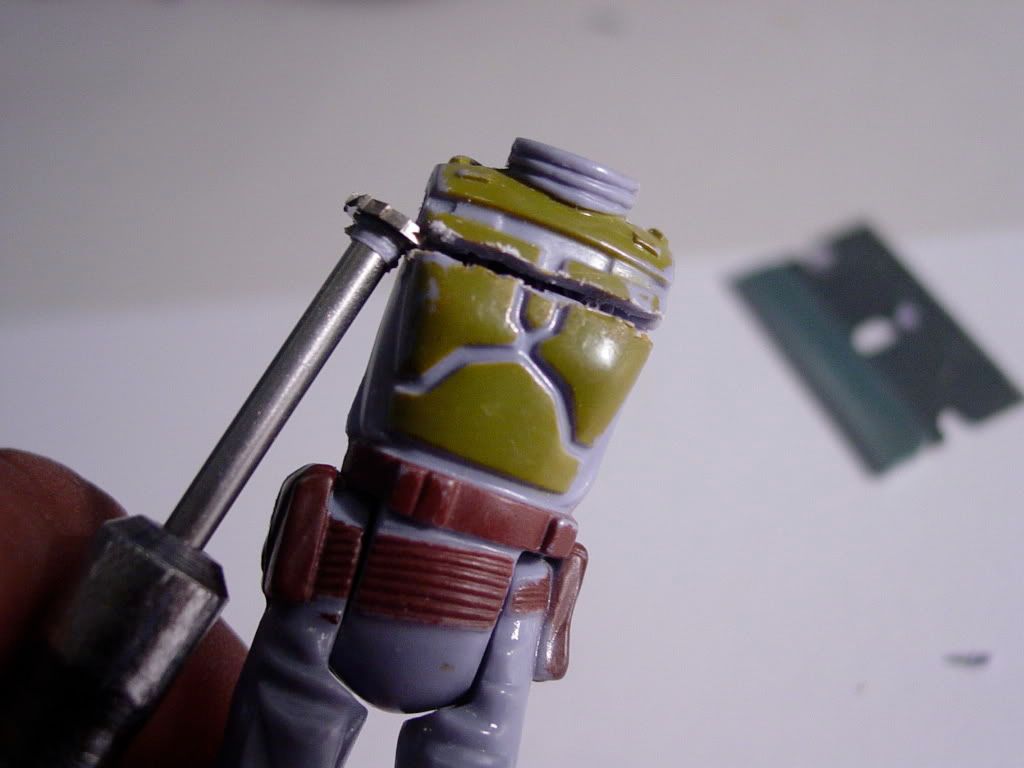
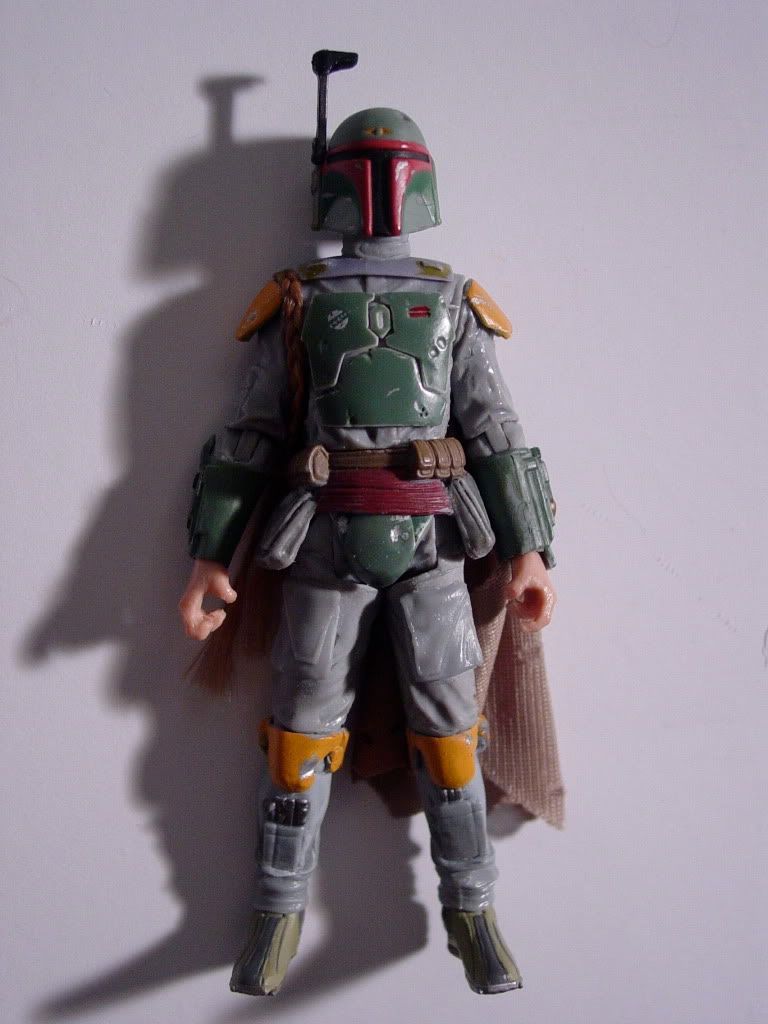
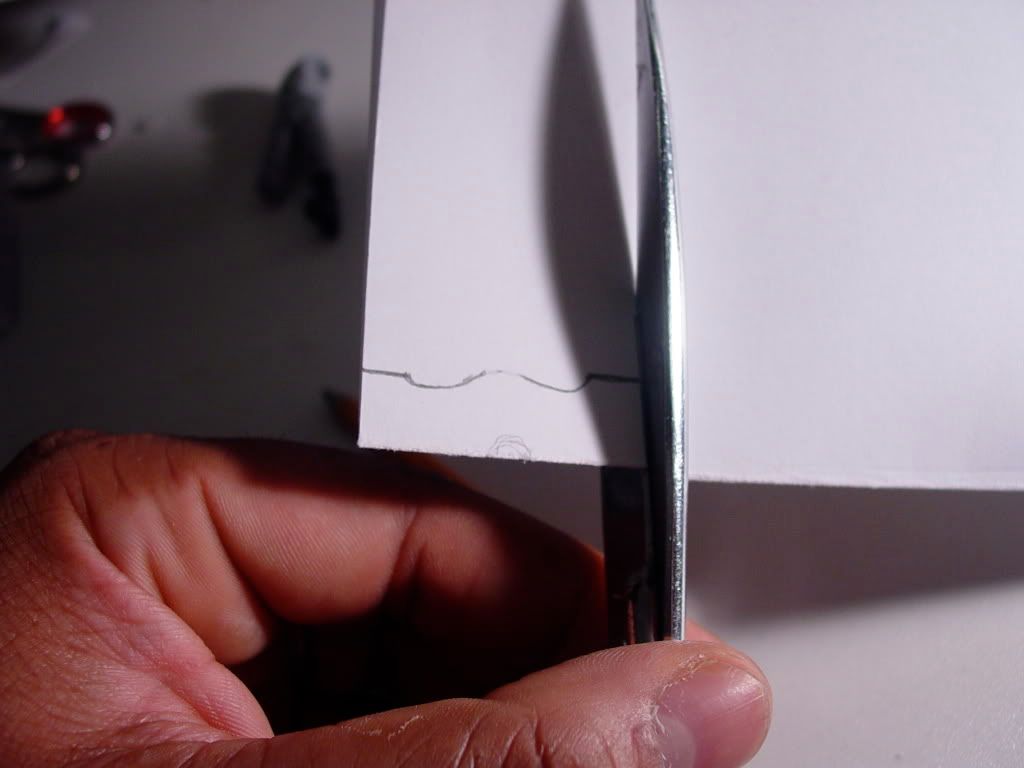
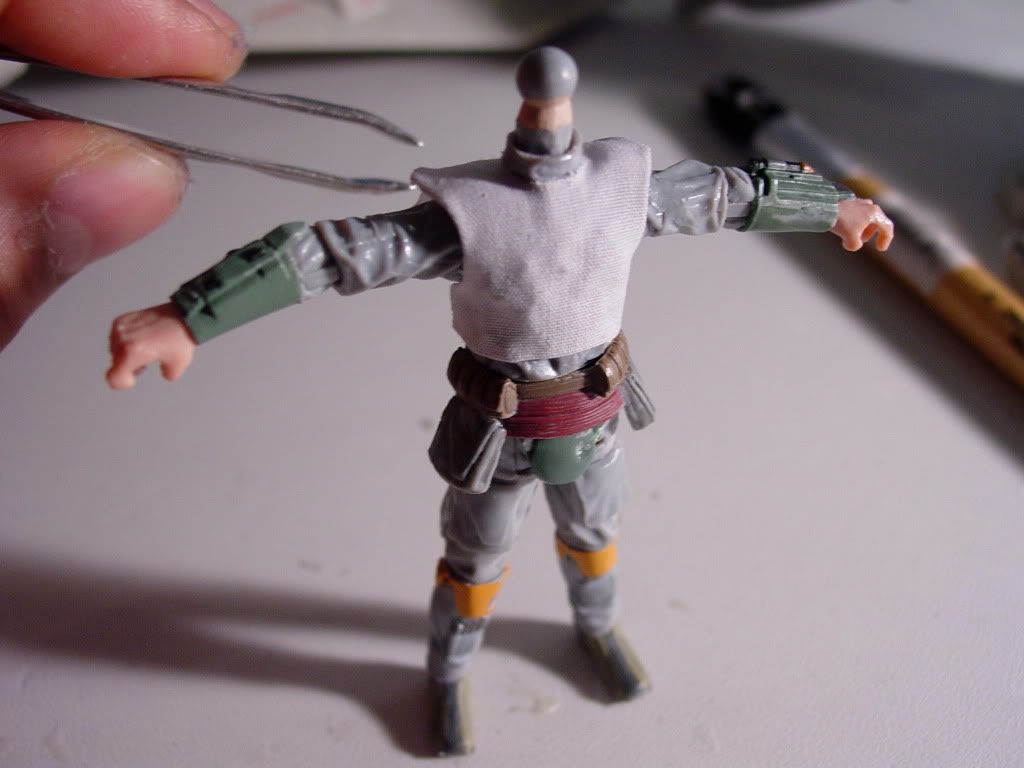
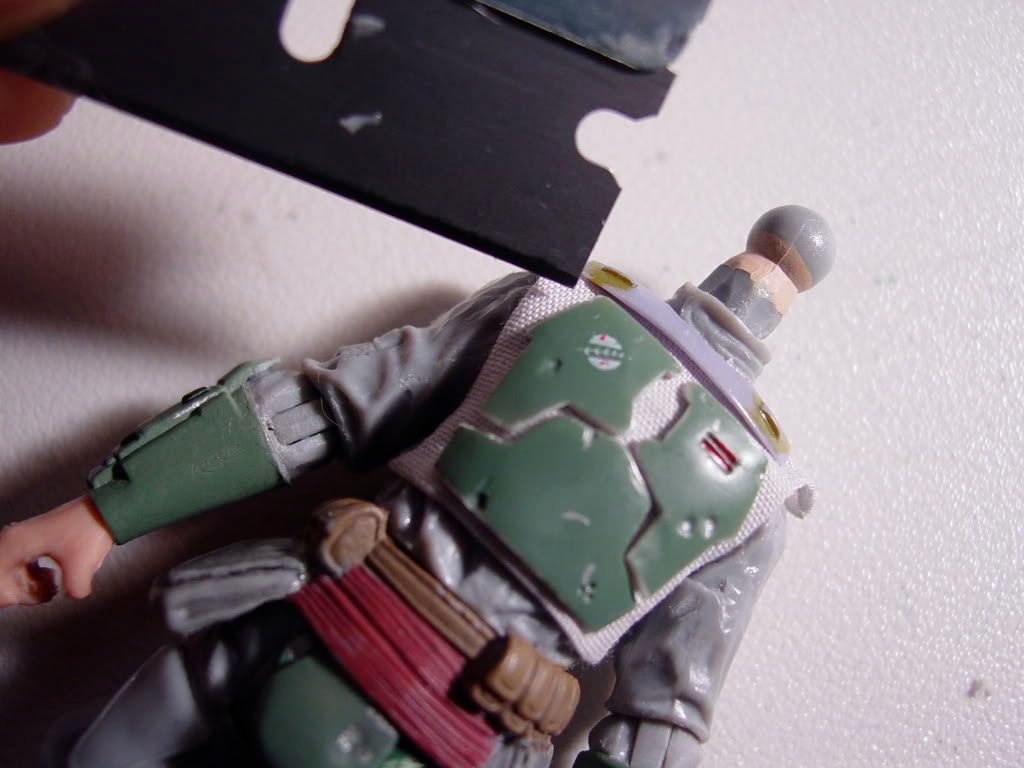
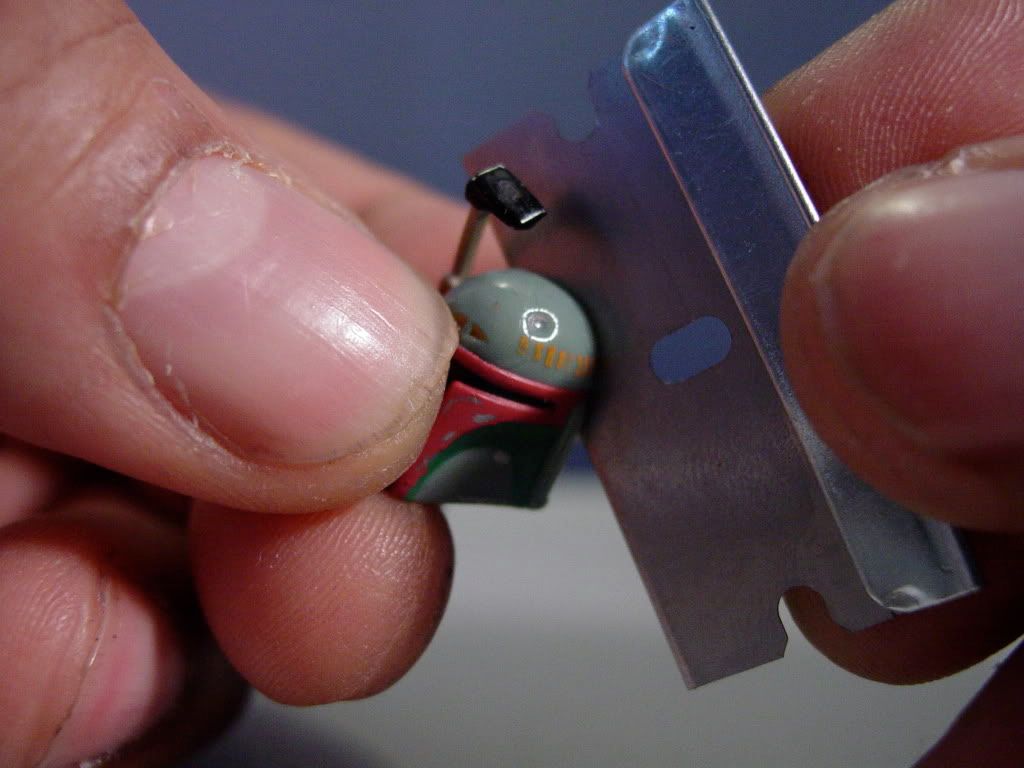
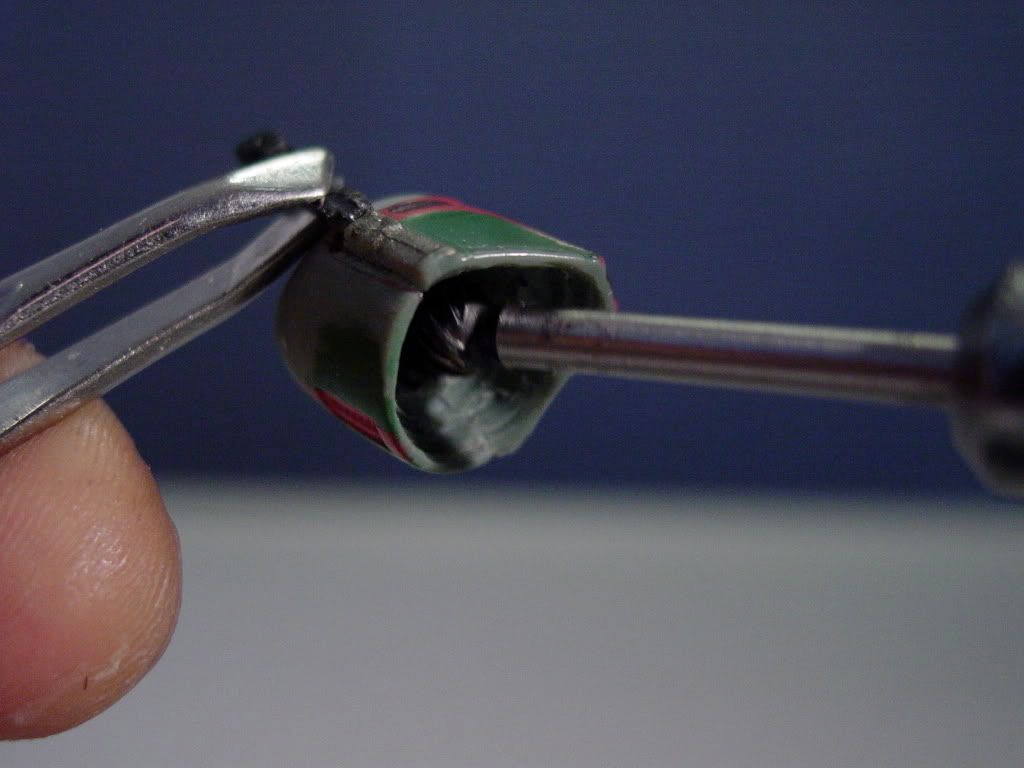
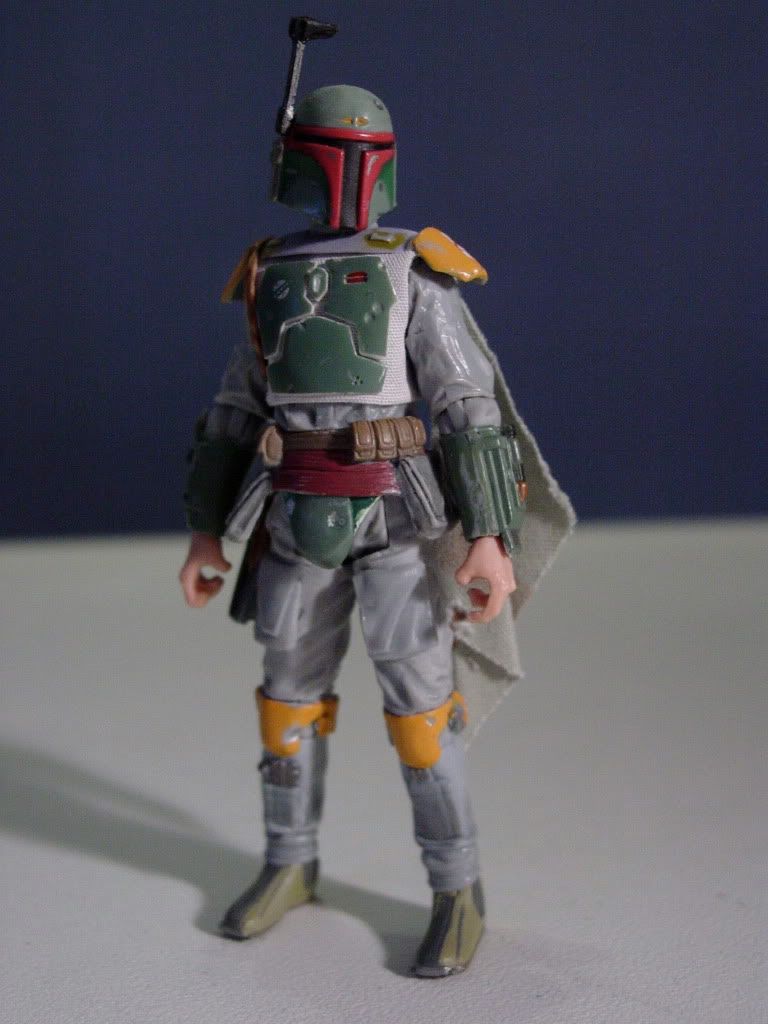
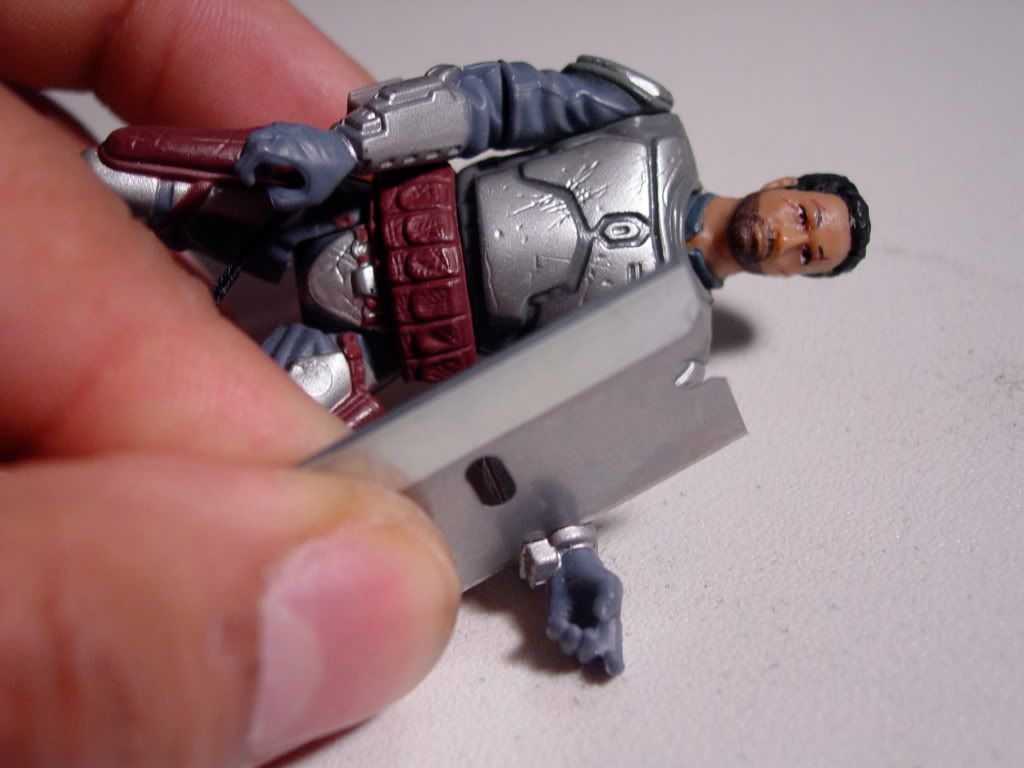
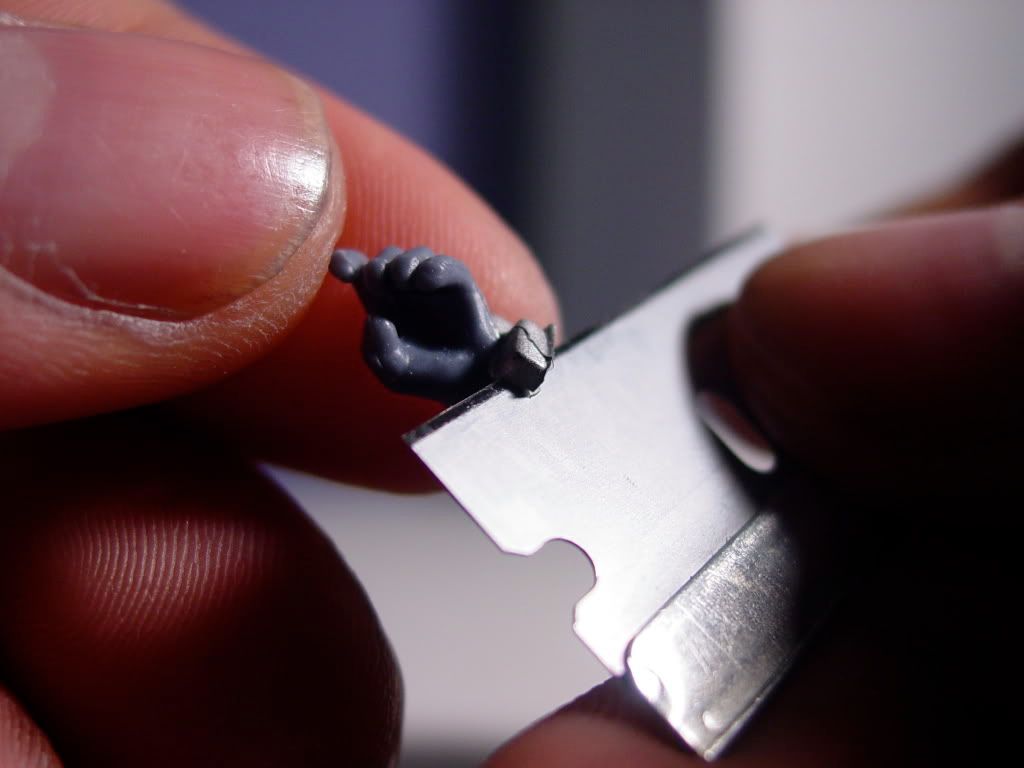
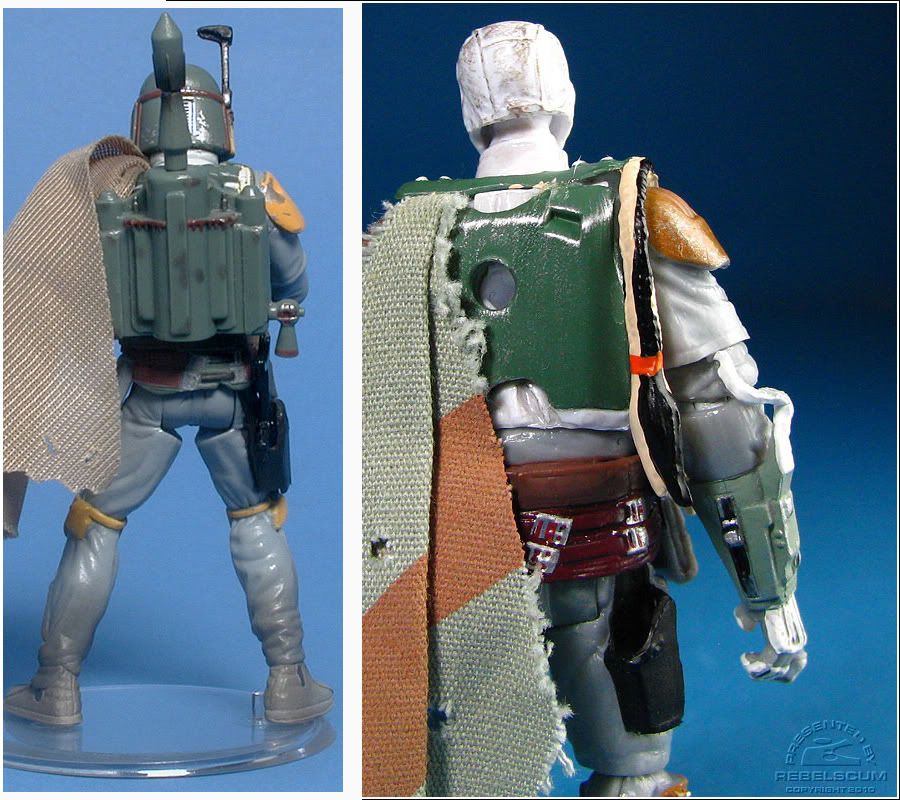
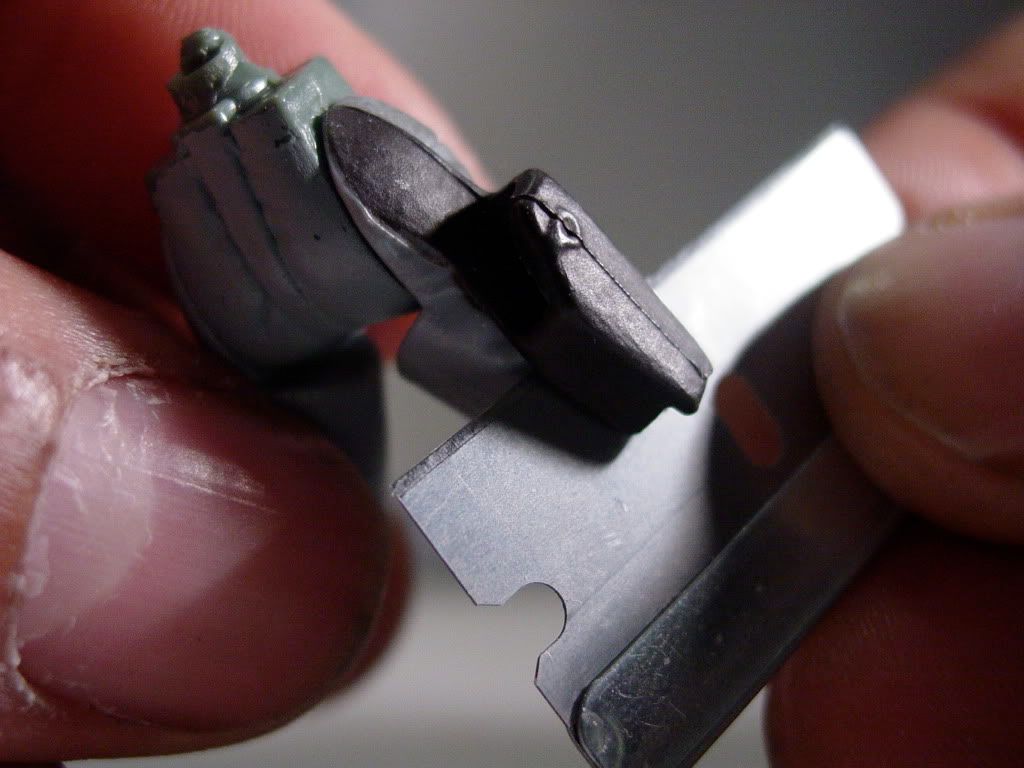
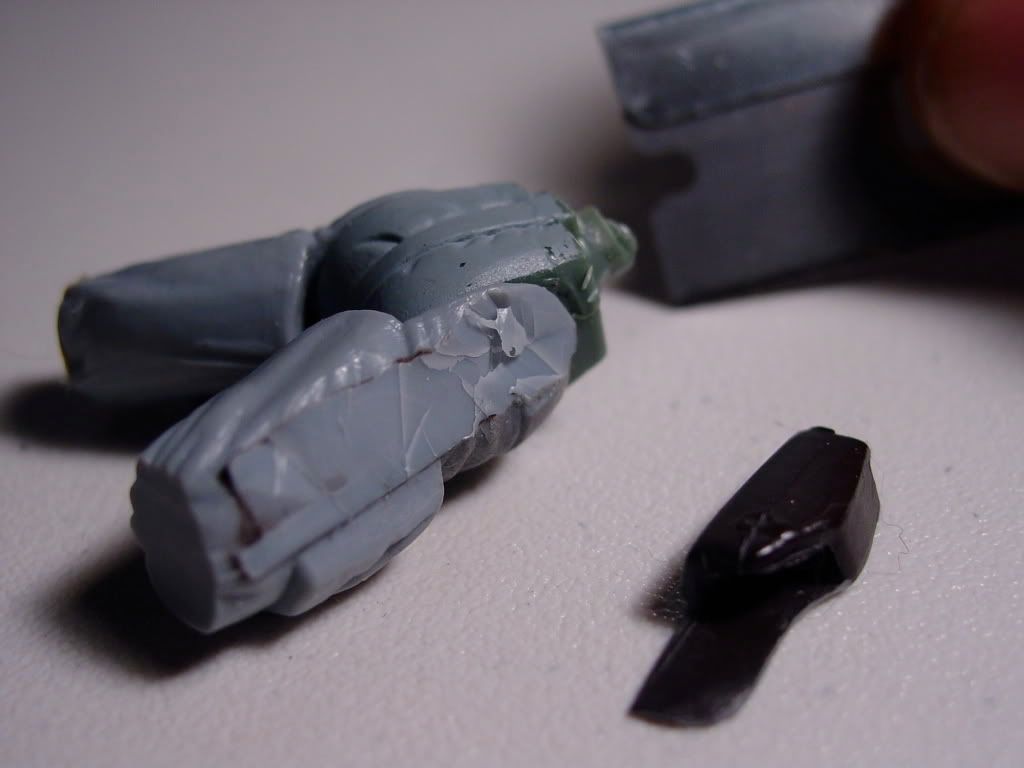
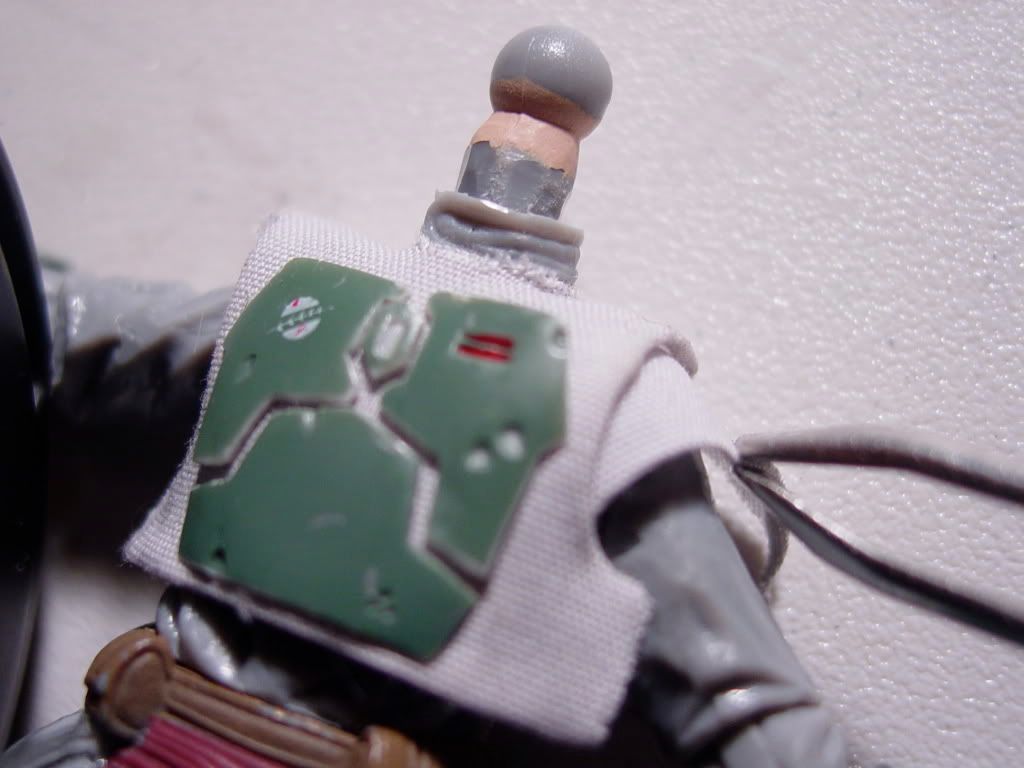
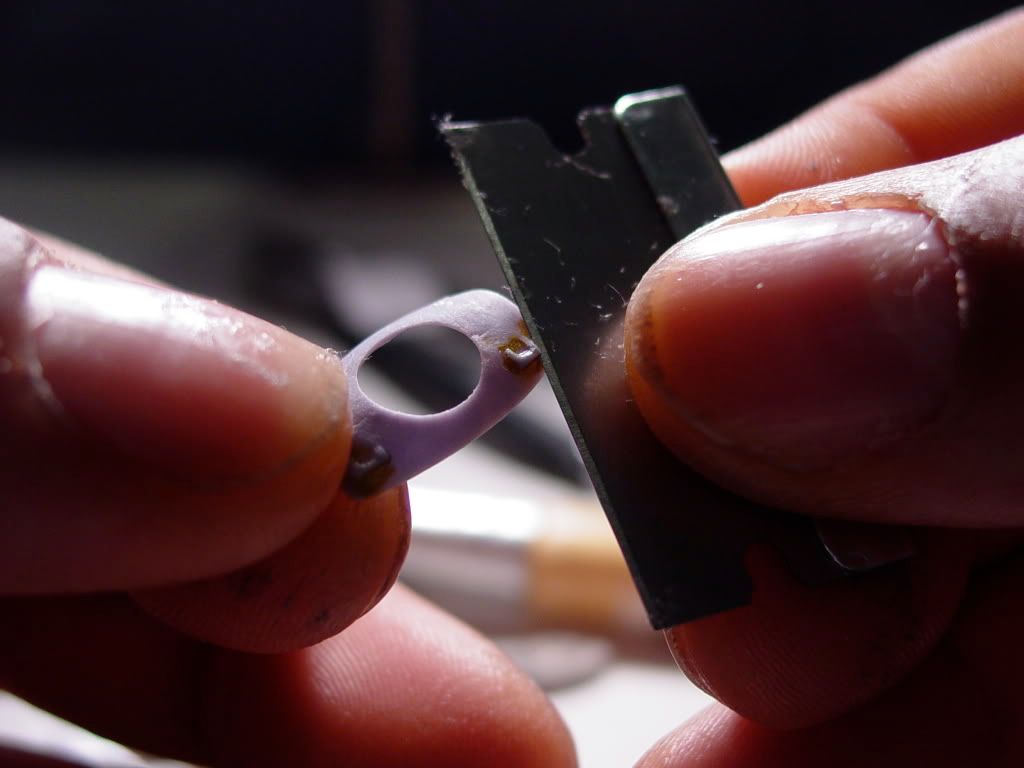
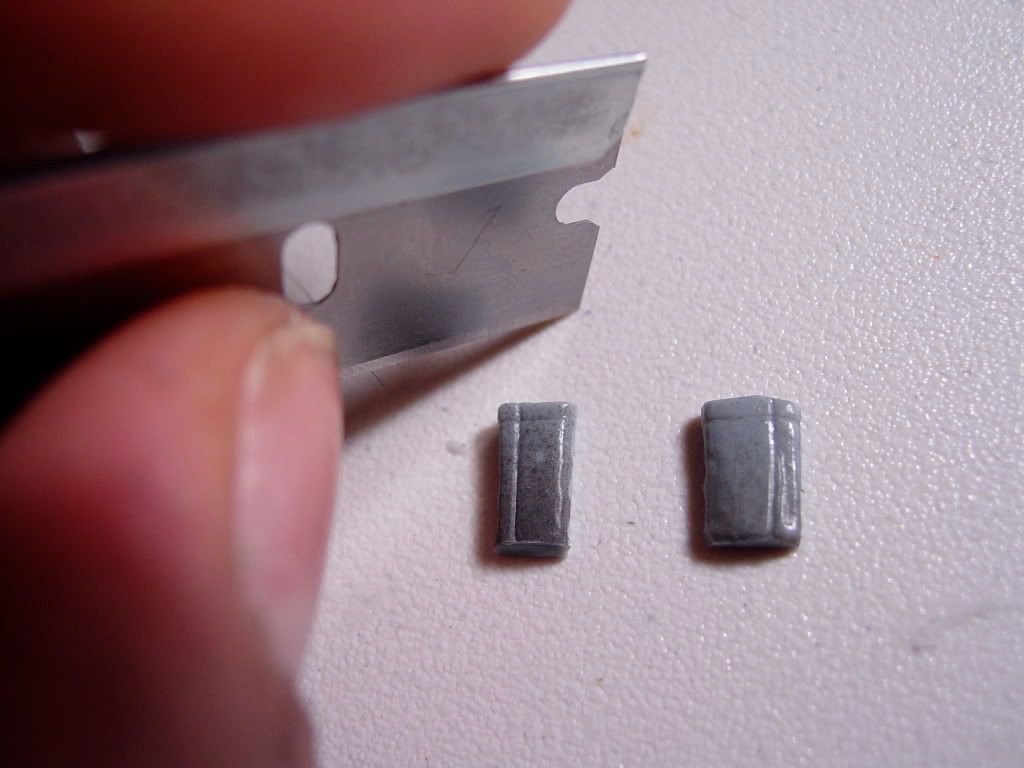
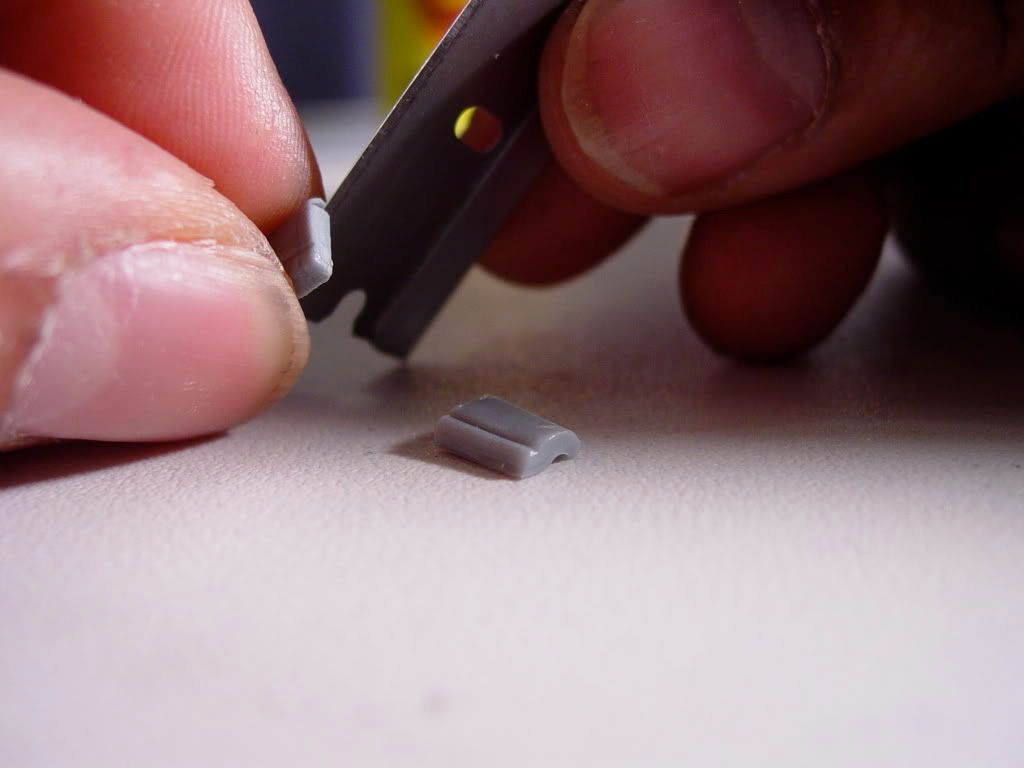
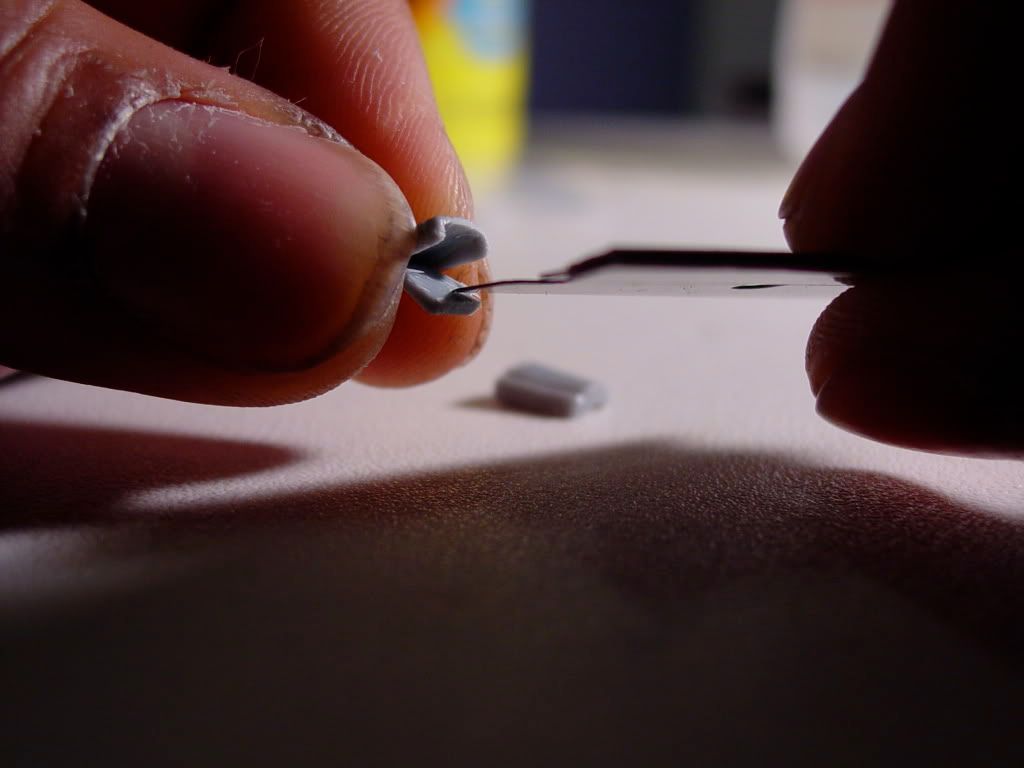
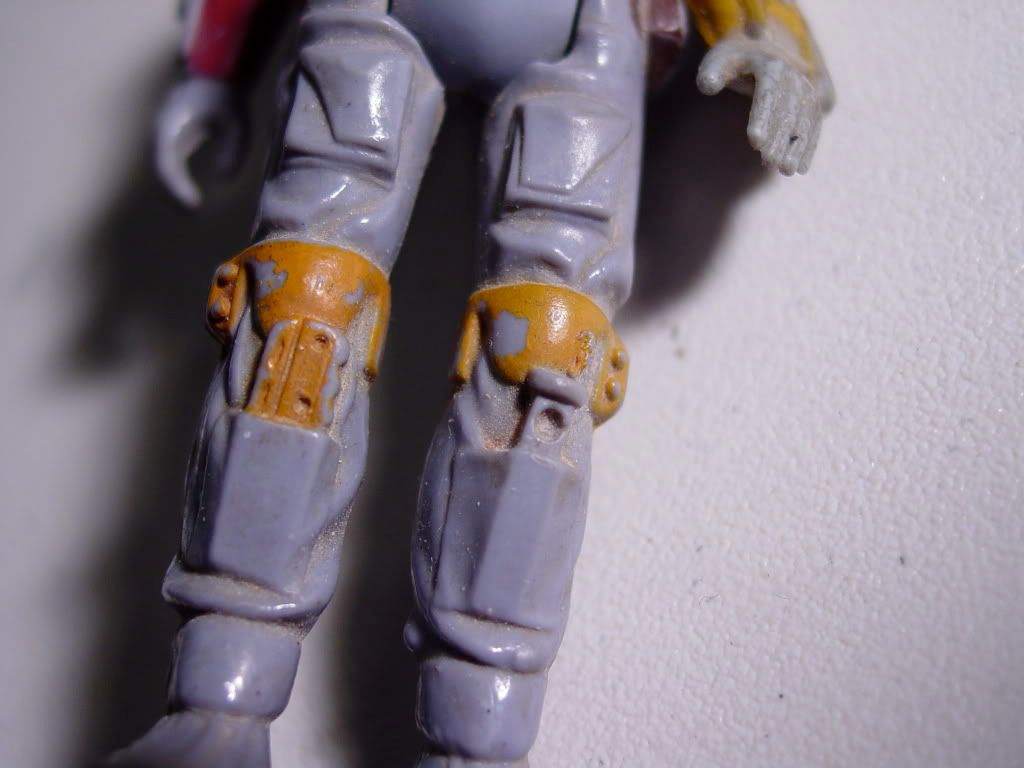
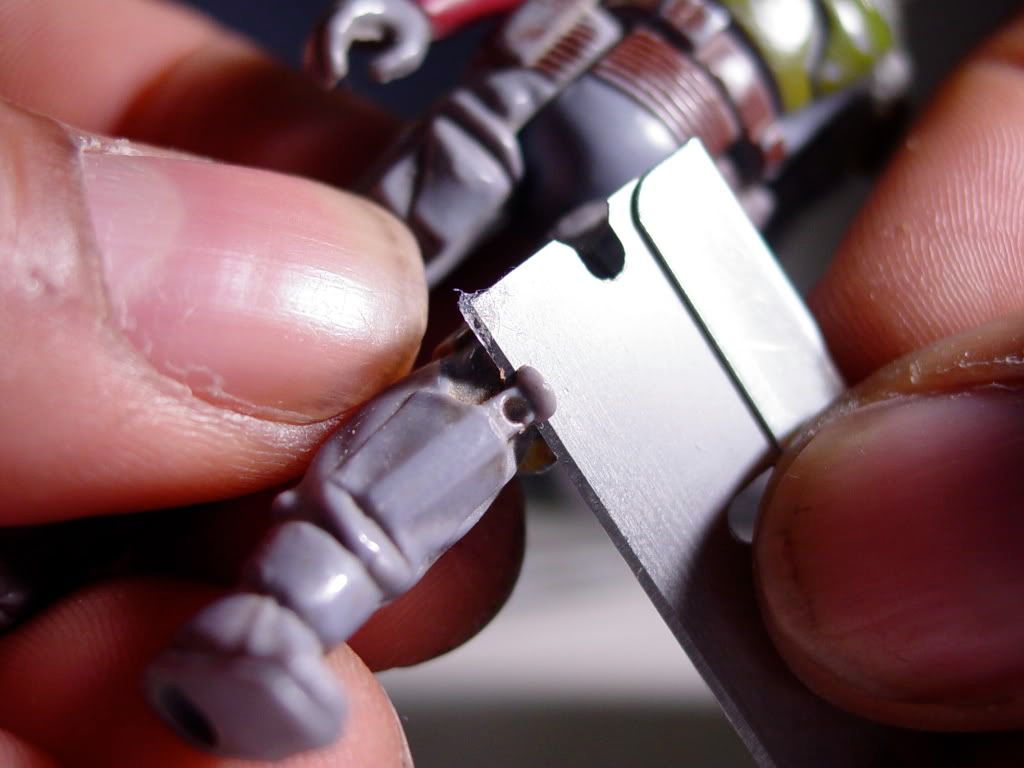
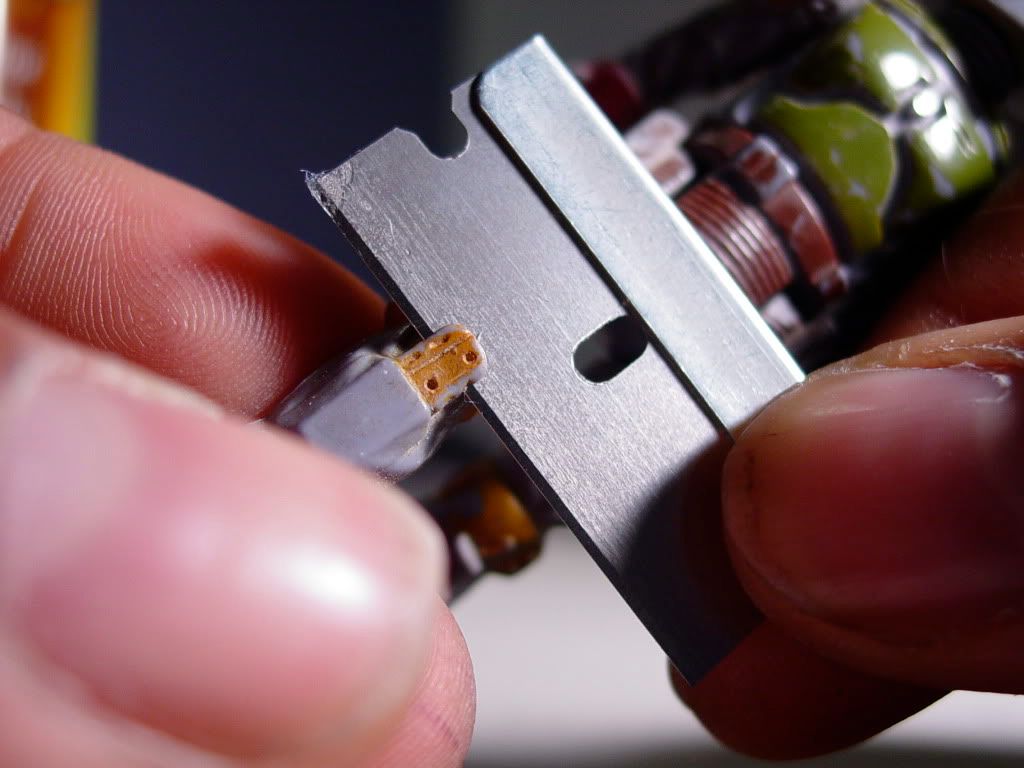
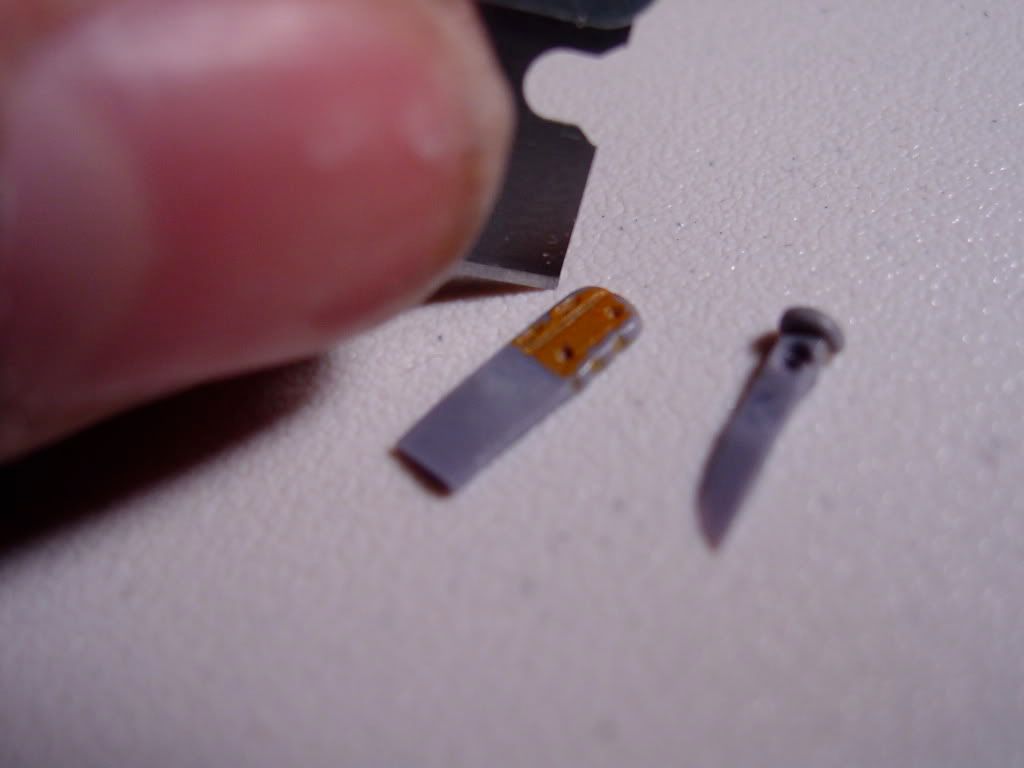
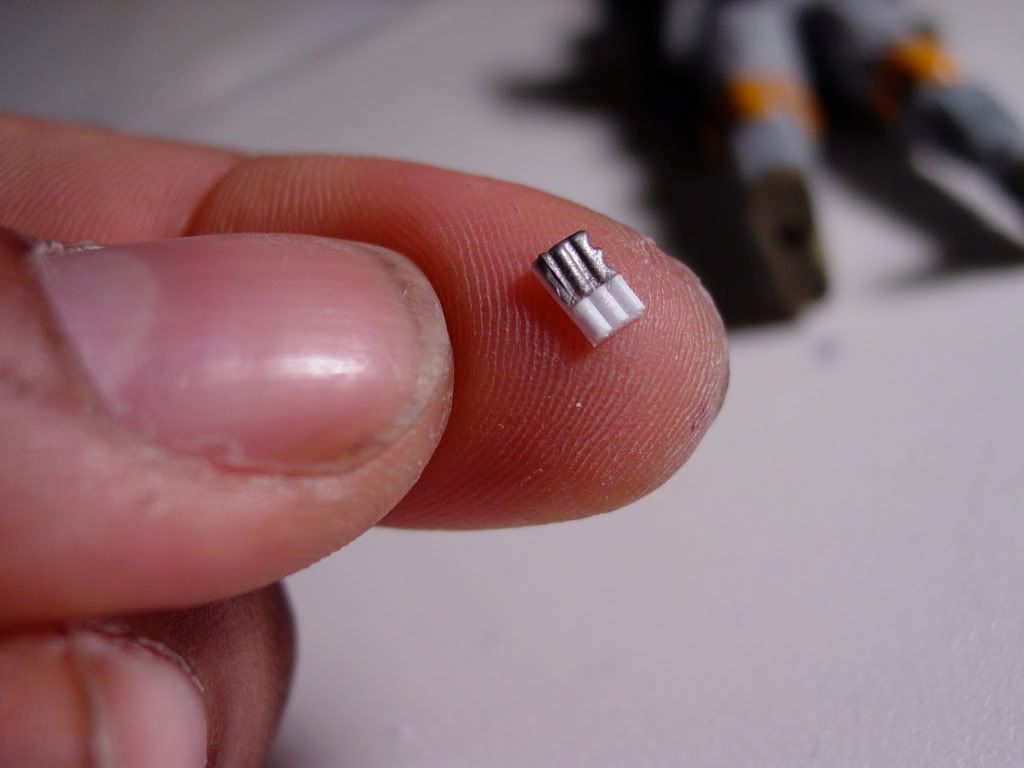
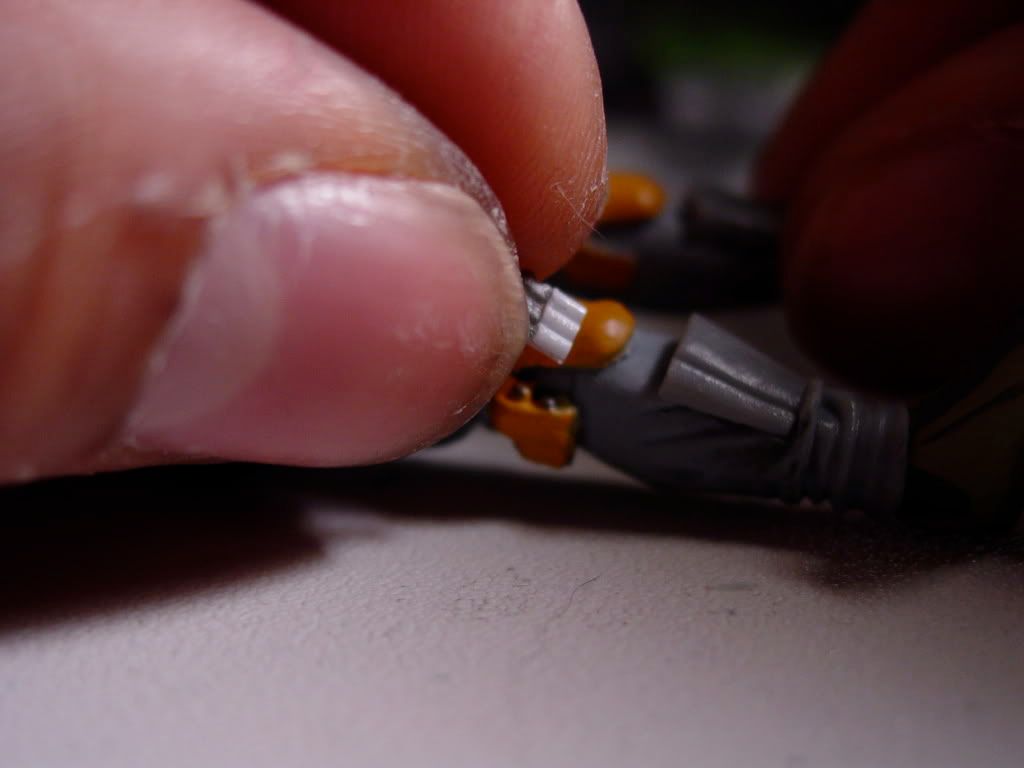
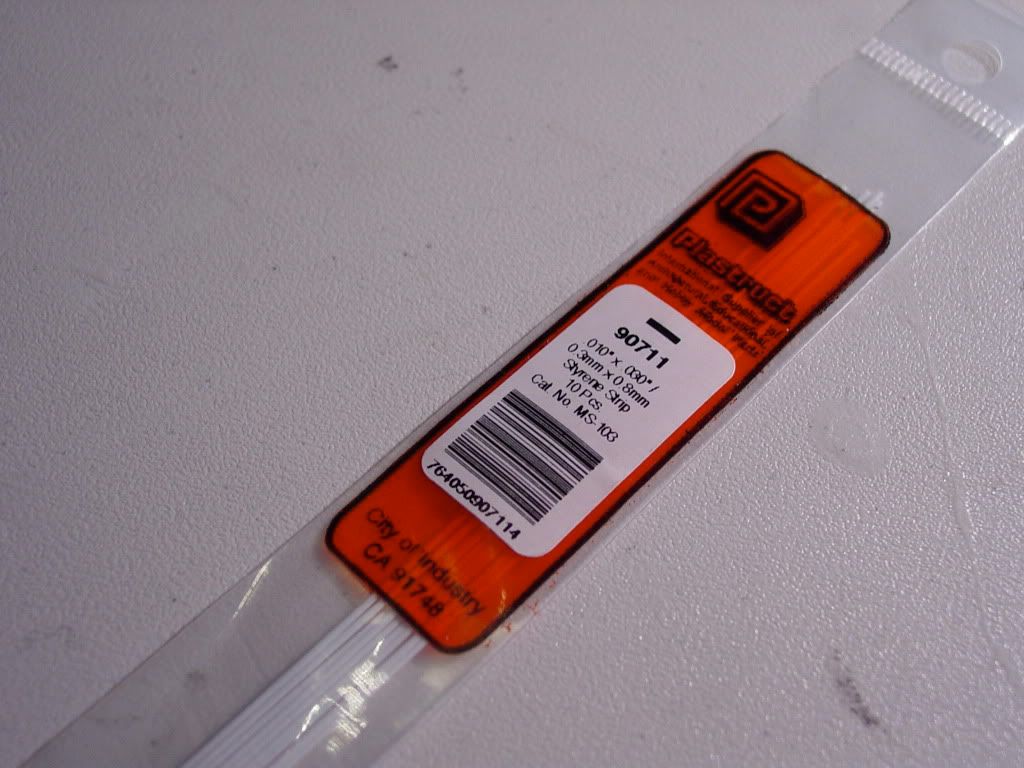
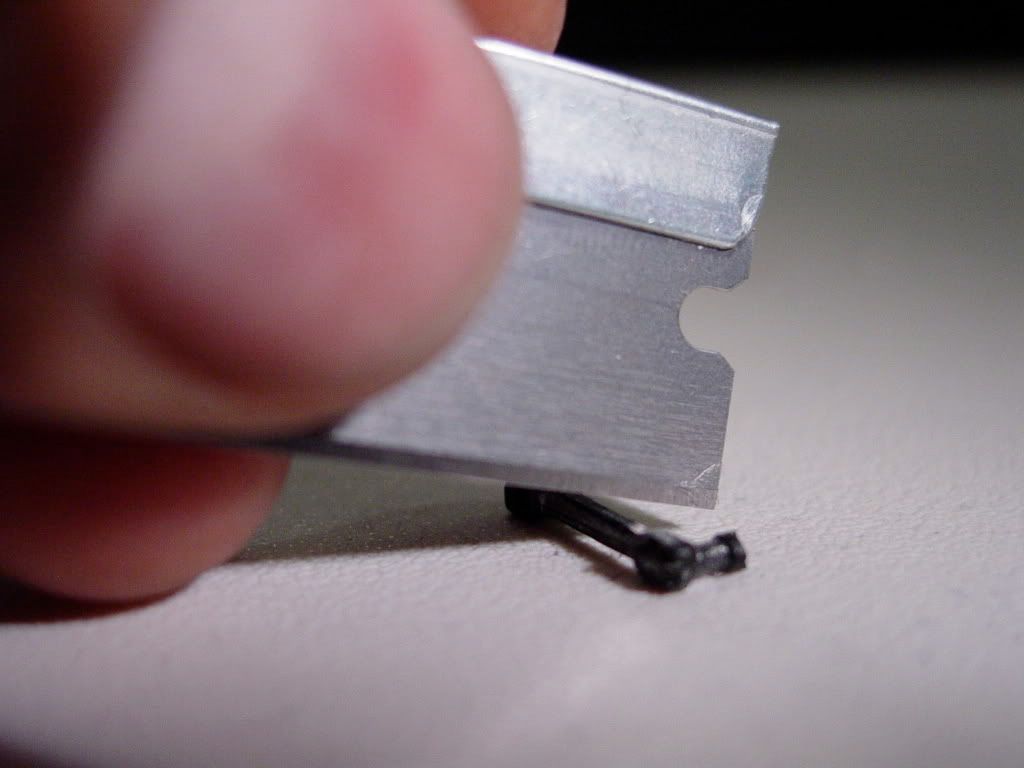
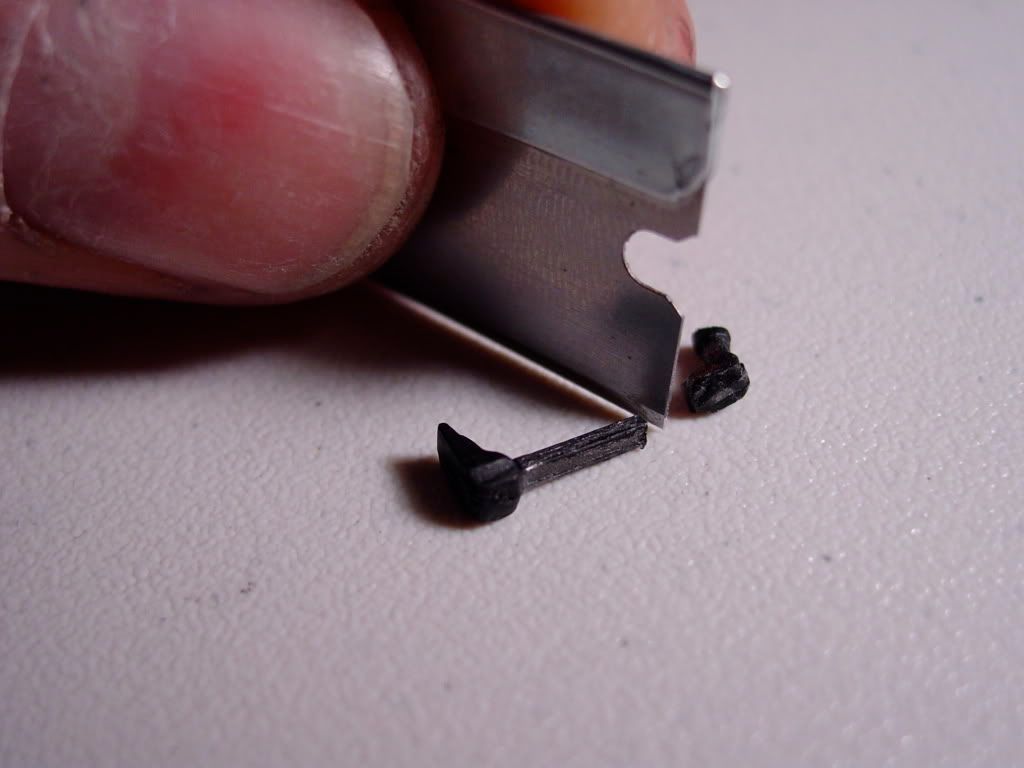
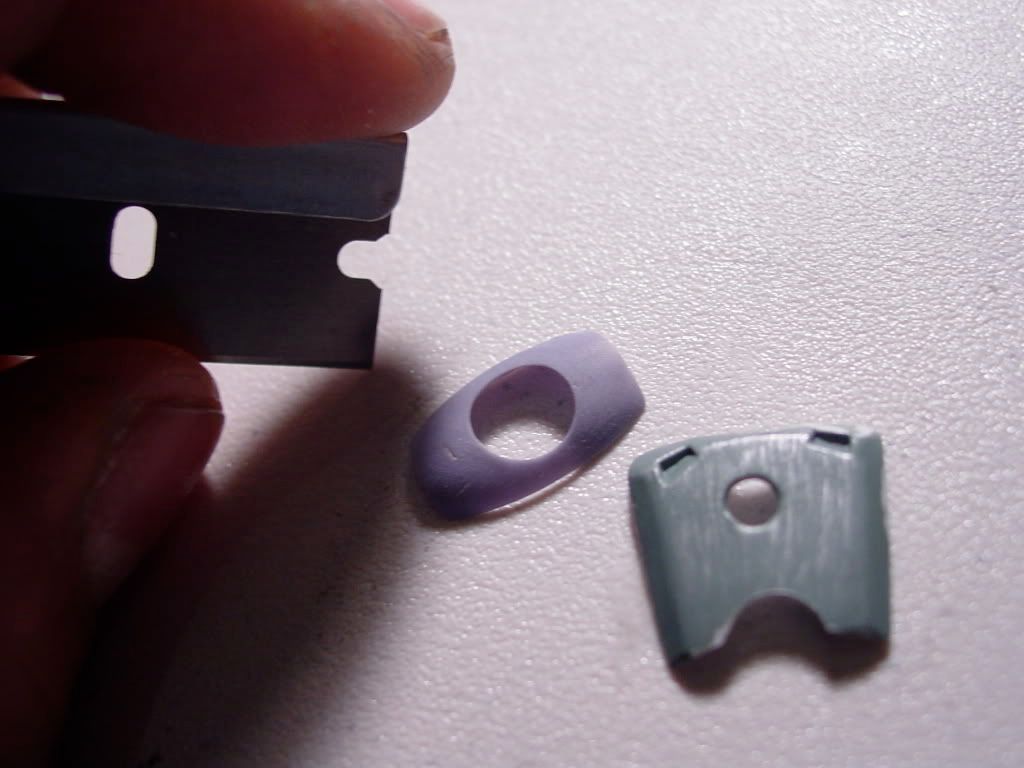
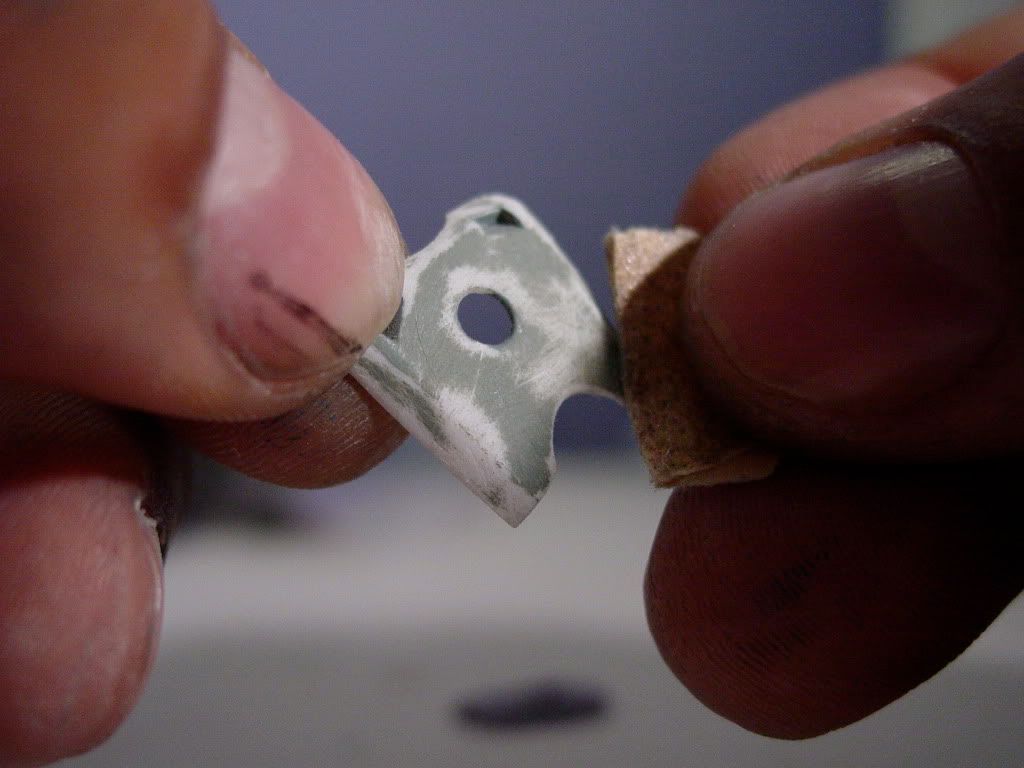
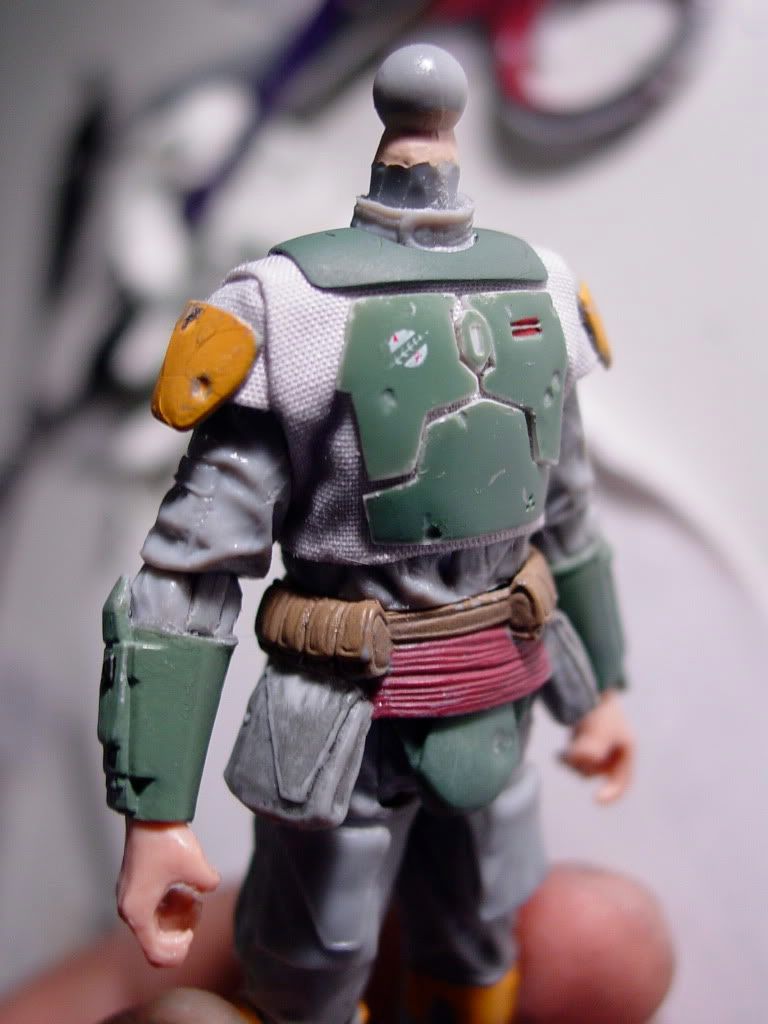
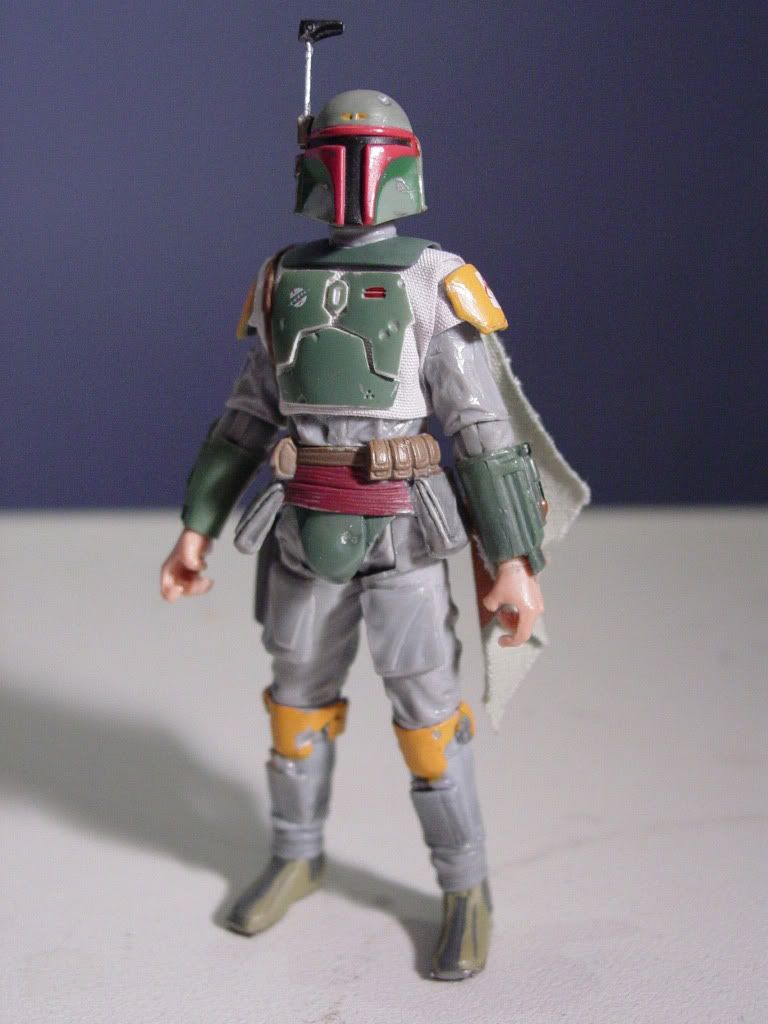
    VOTC Boba Fett provided the armored torso plates of the bounty hunter’s flack vest, and the armored cod piece came from POTJ 300th Figure Fett. Once again, each section was carefully cut out of the molded action figure and Dremelled down into separate plates of an appropriate thinness for a figure of this scale. The crotch armor actually needed to be completed with sheet styrene since the figure only provided the raised center section of the cod-piece.


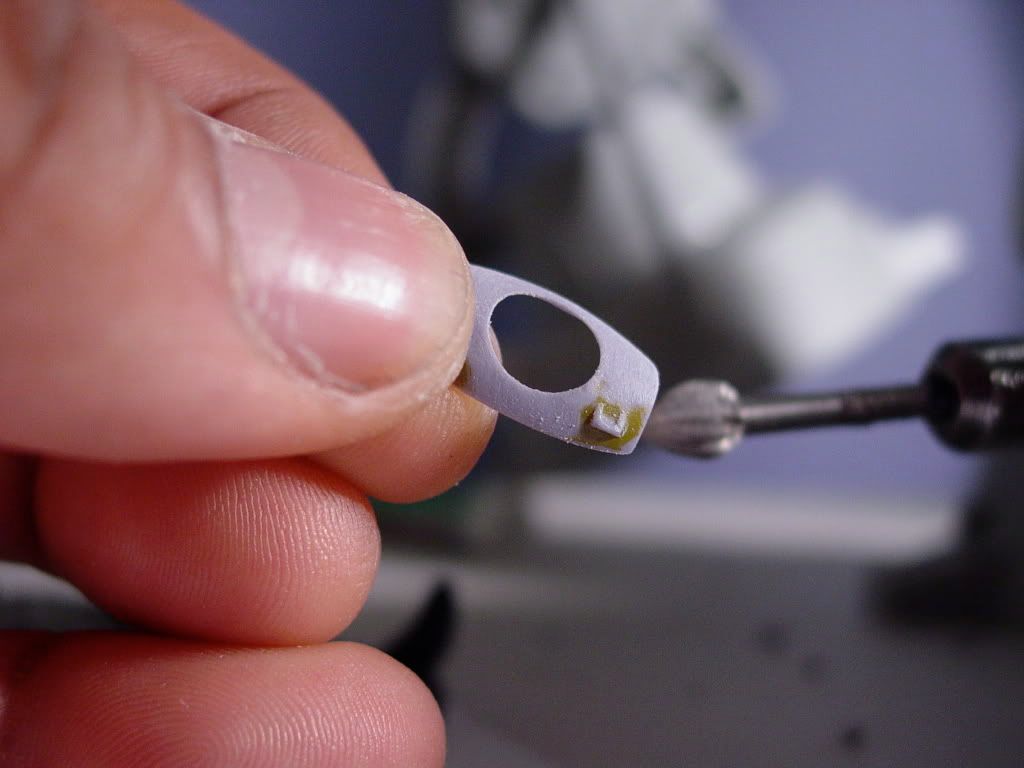
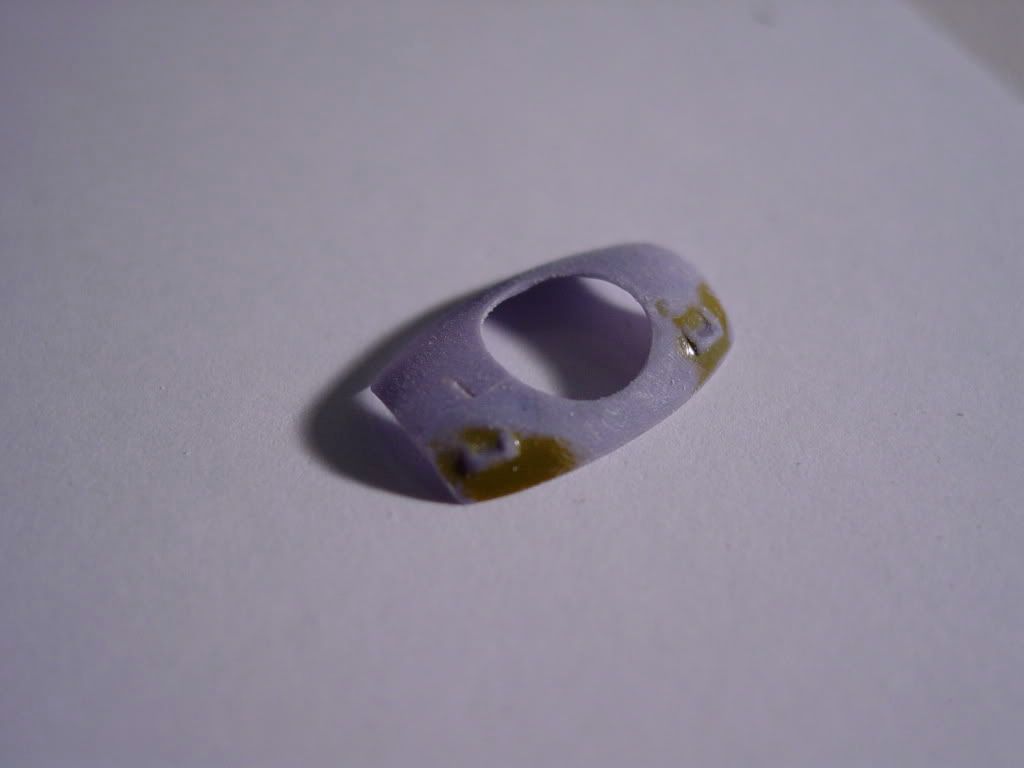
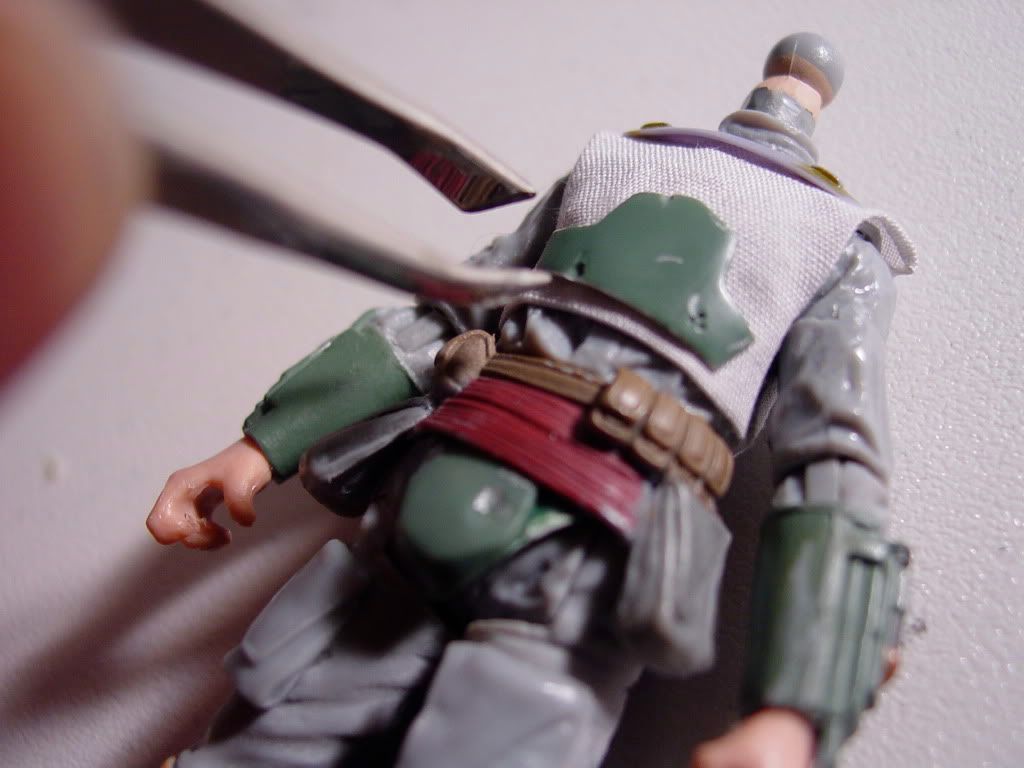
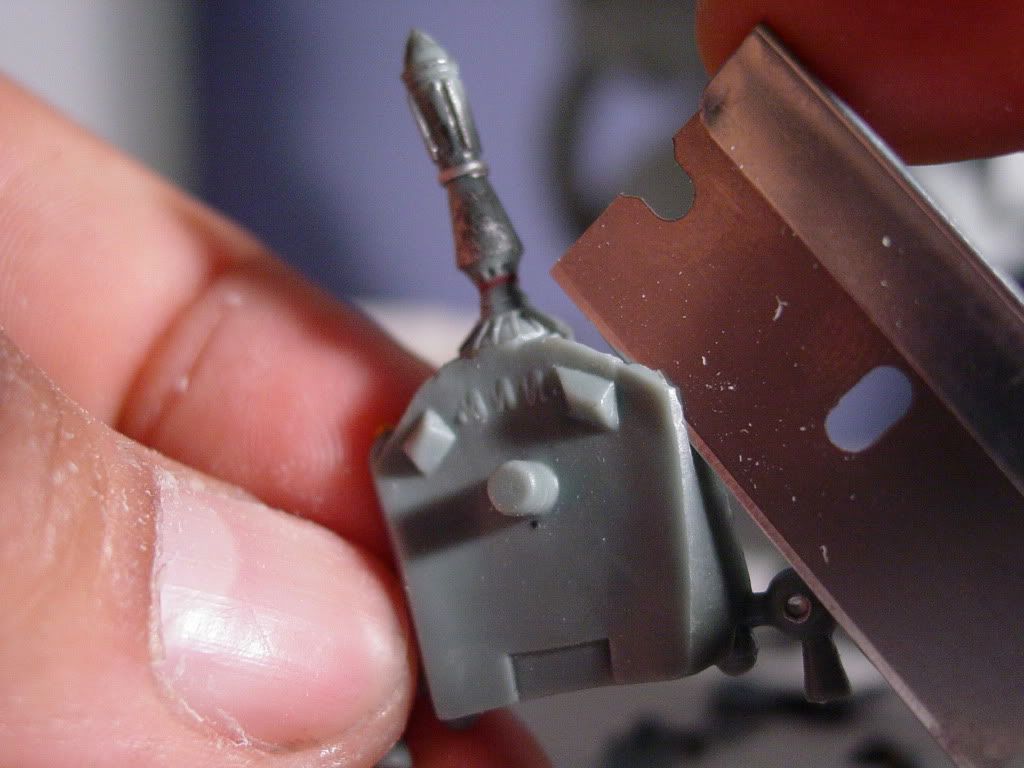
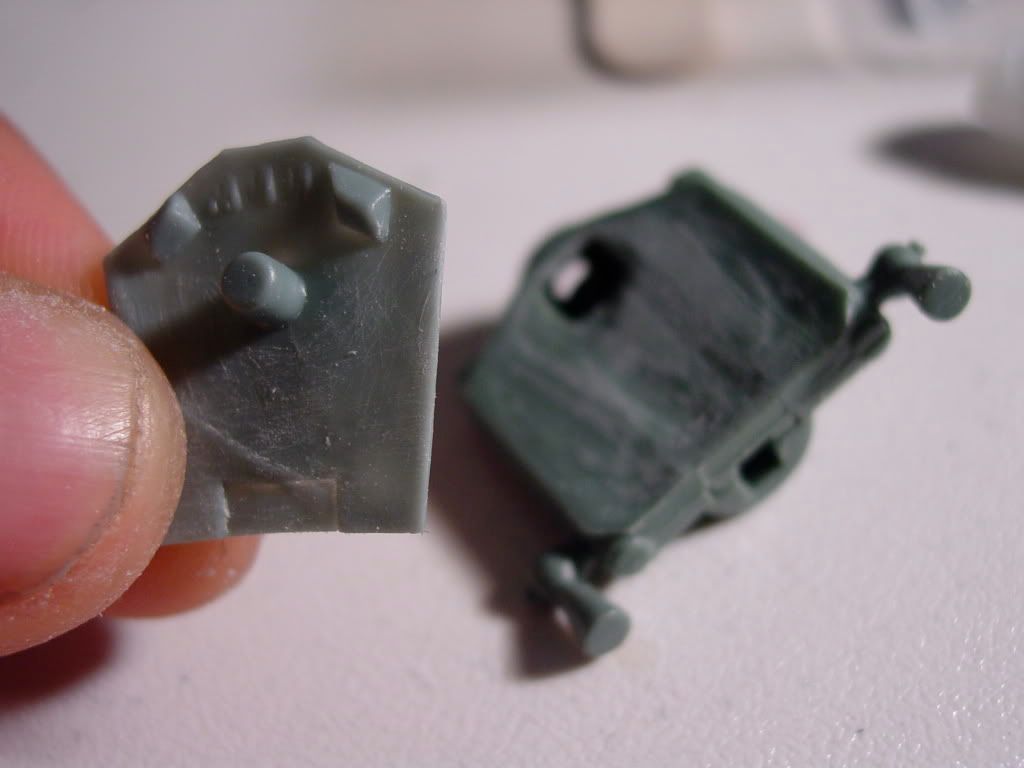
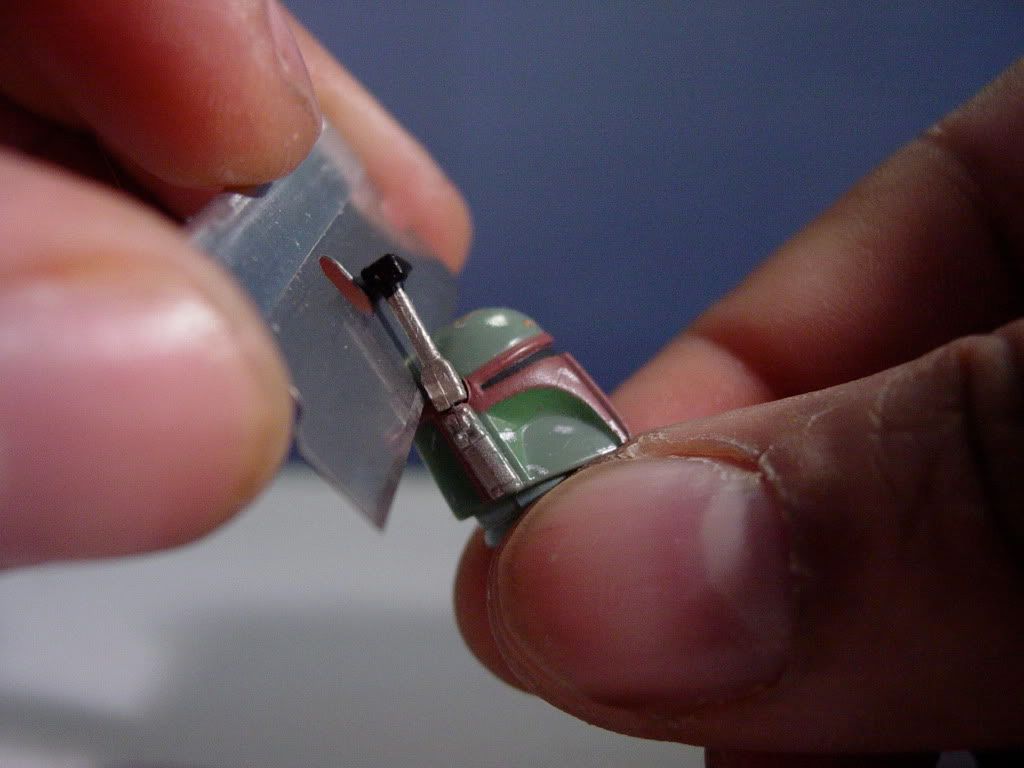
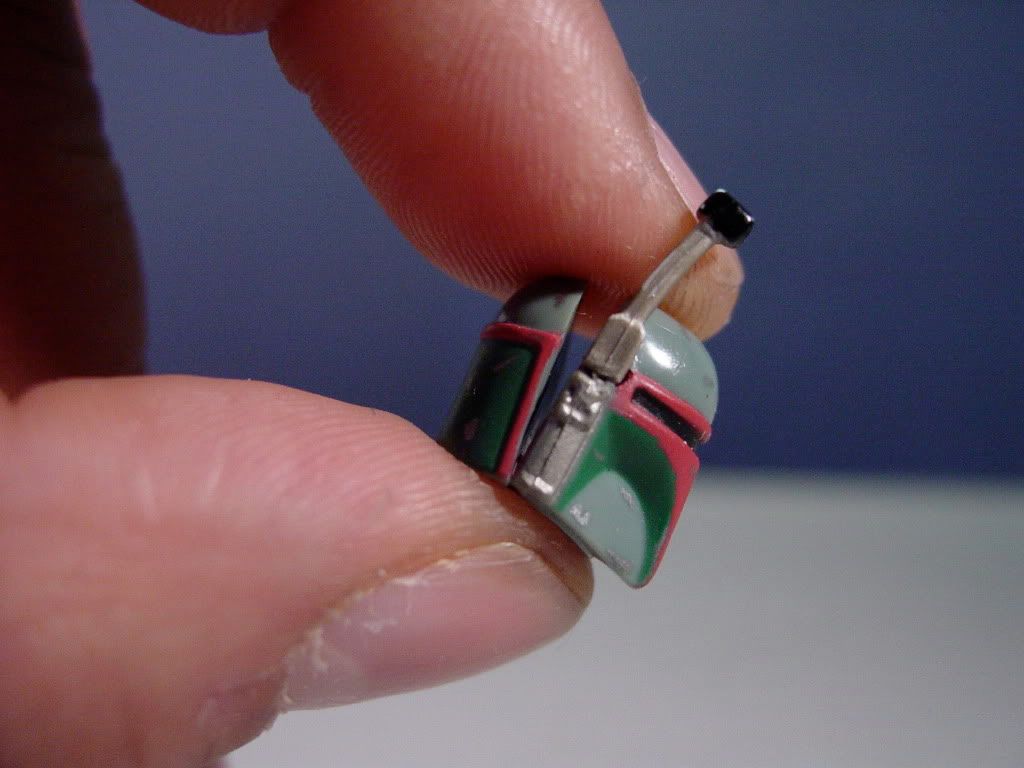
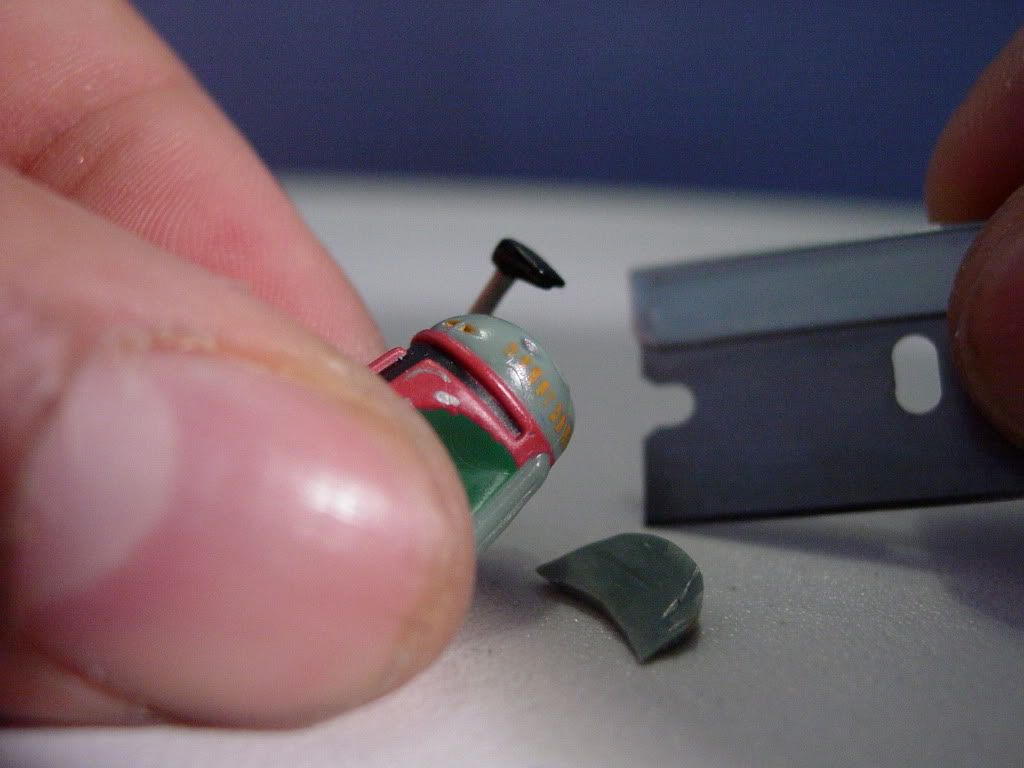
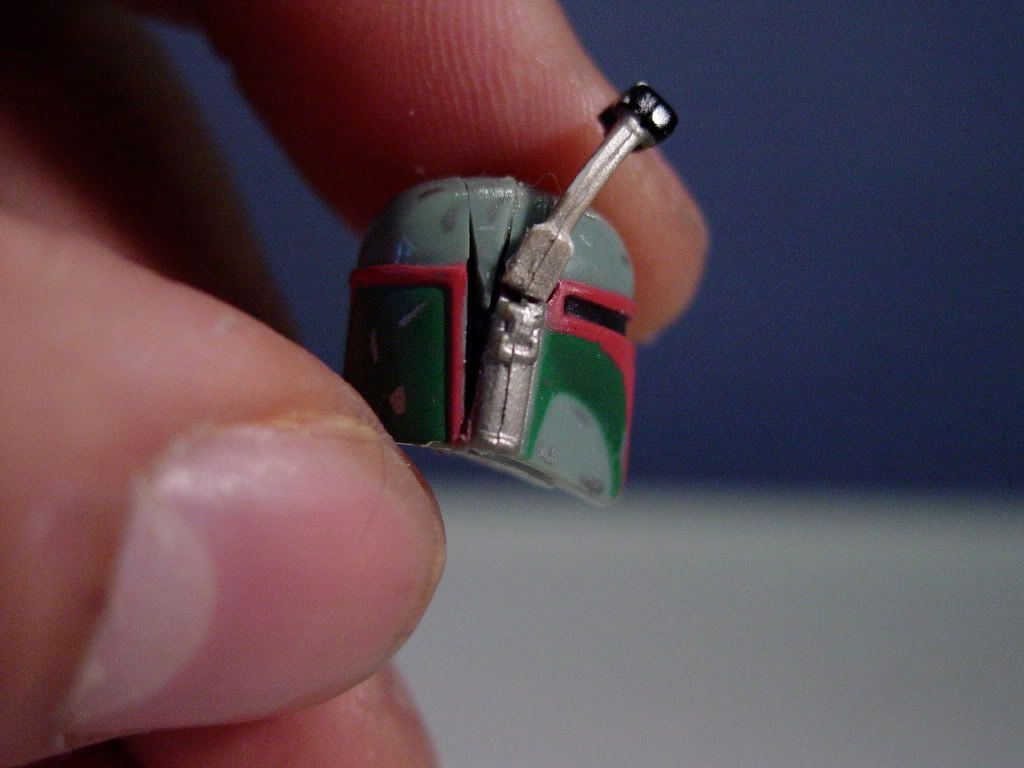
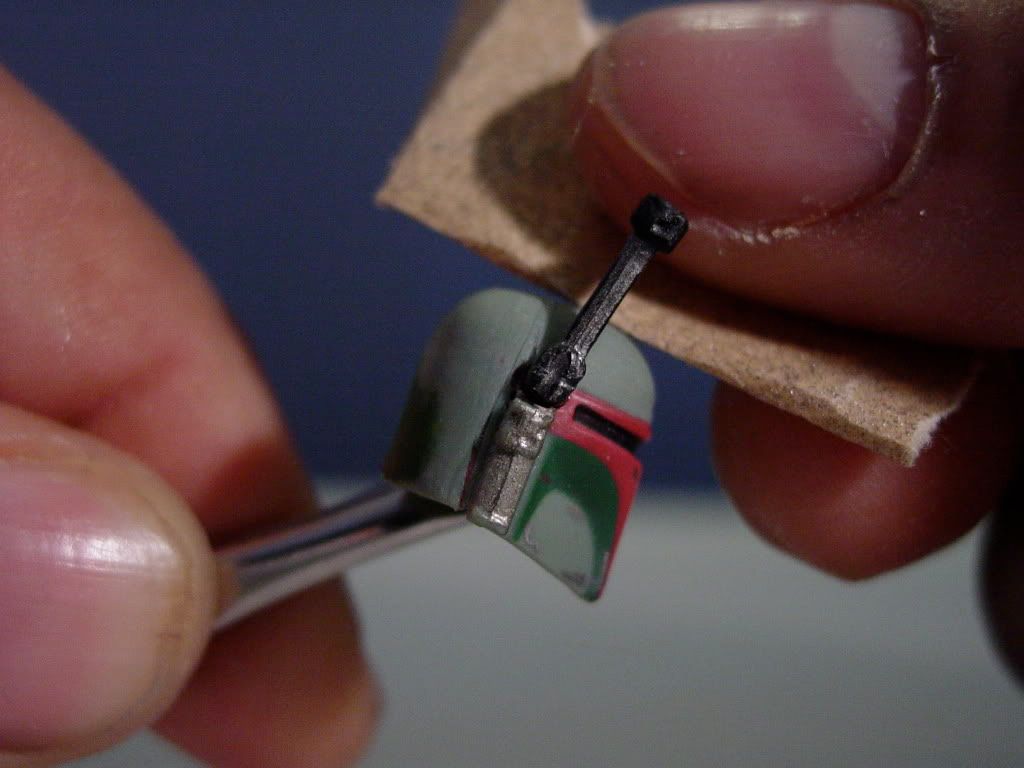
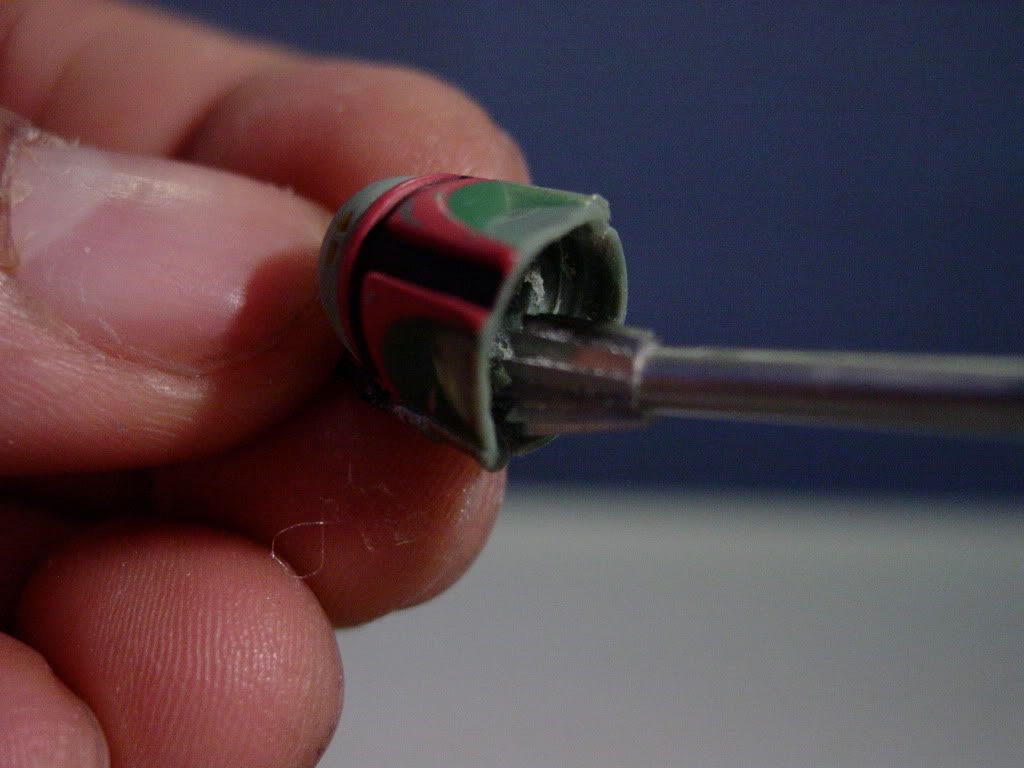
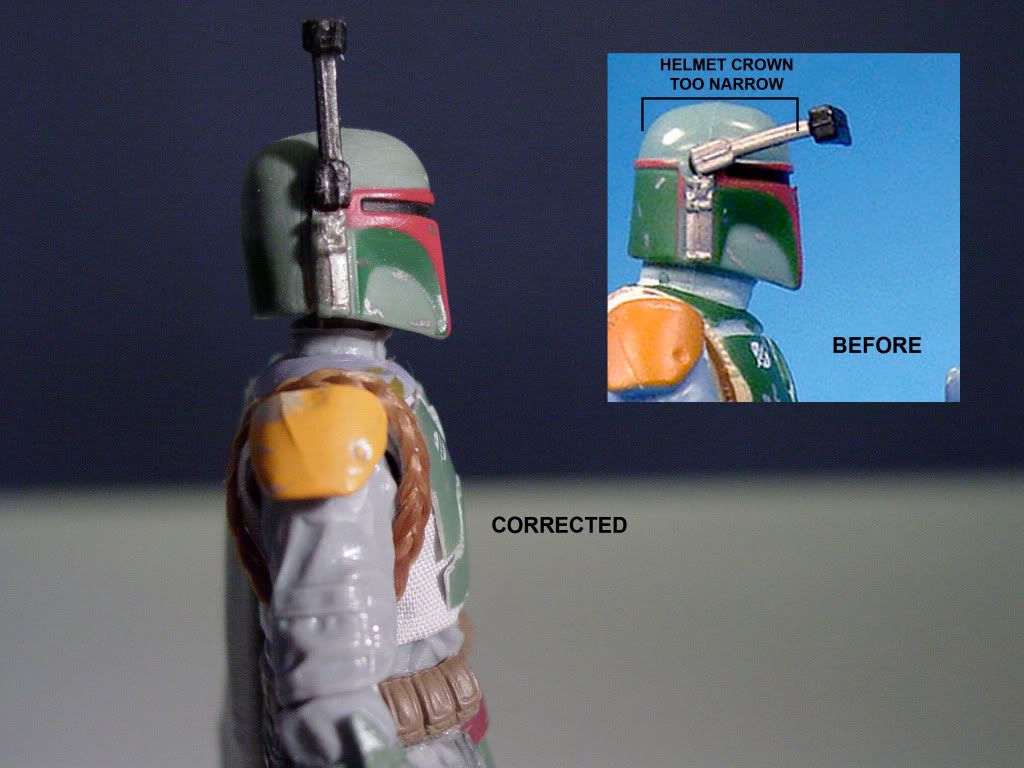
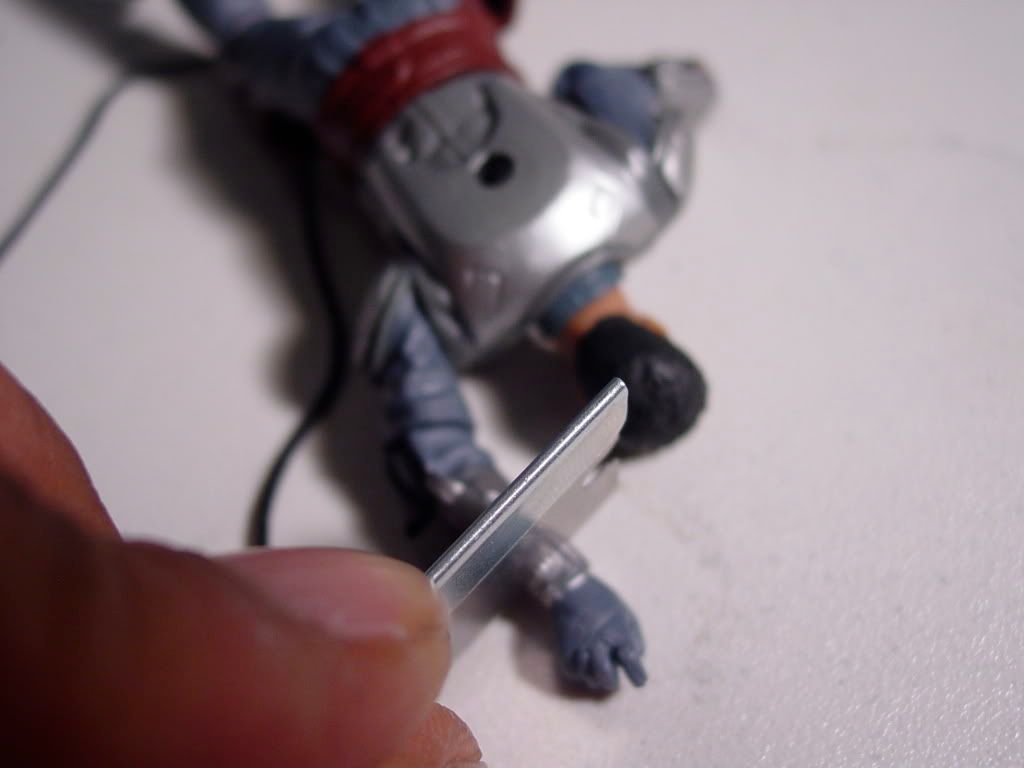
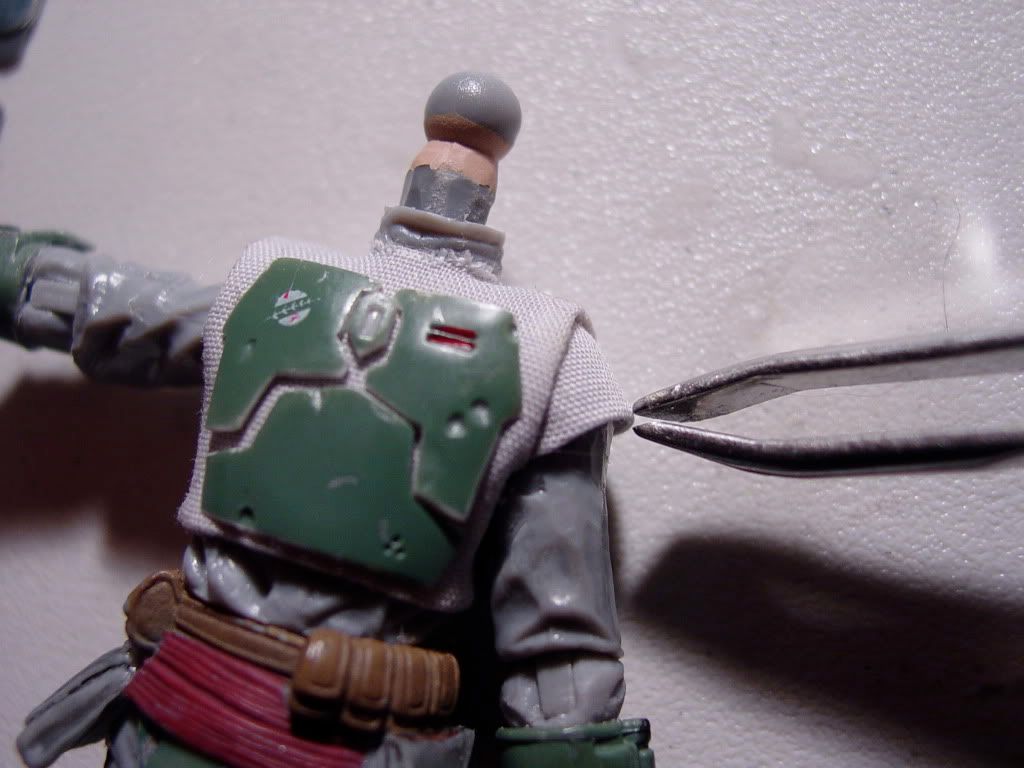
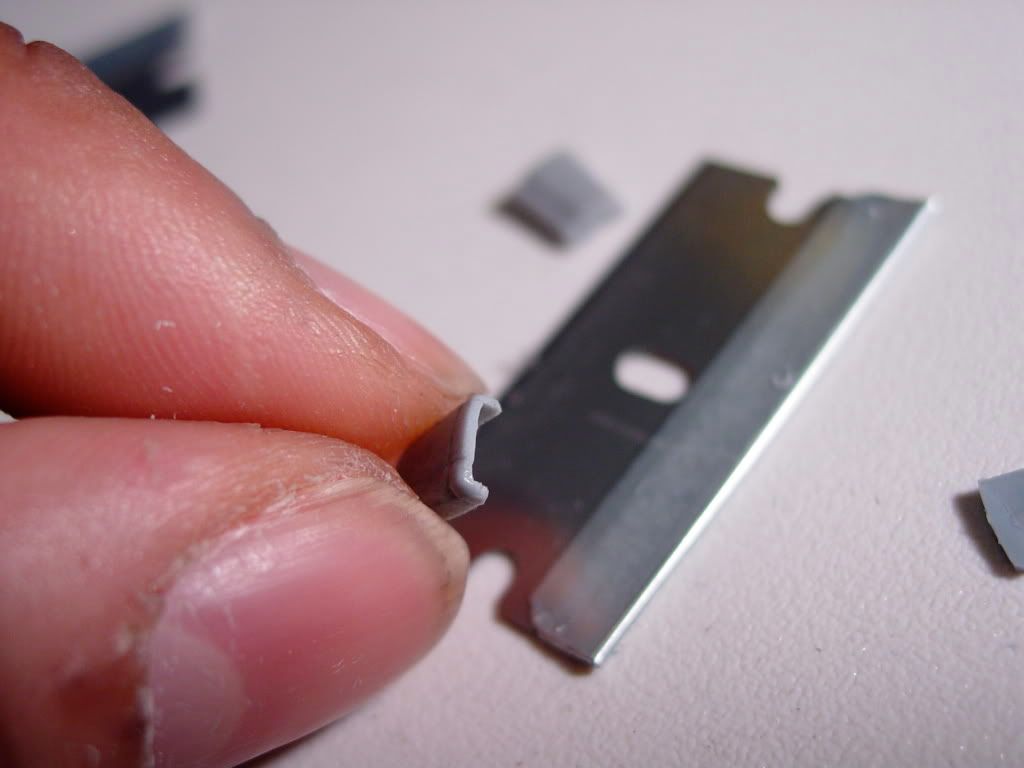
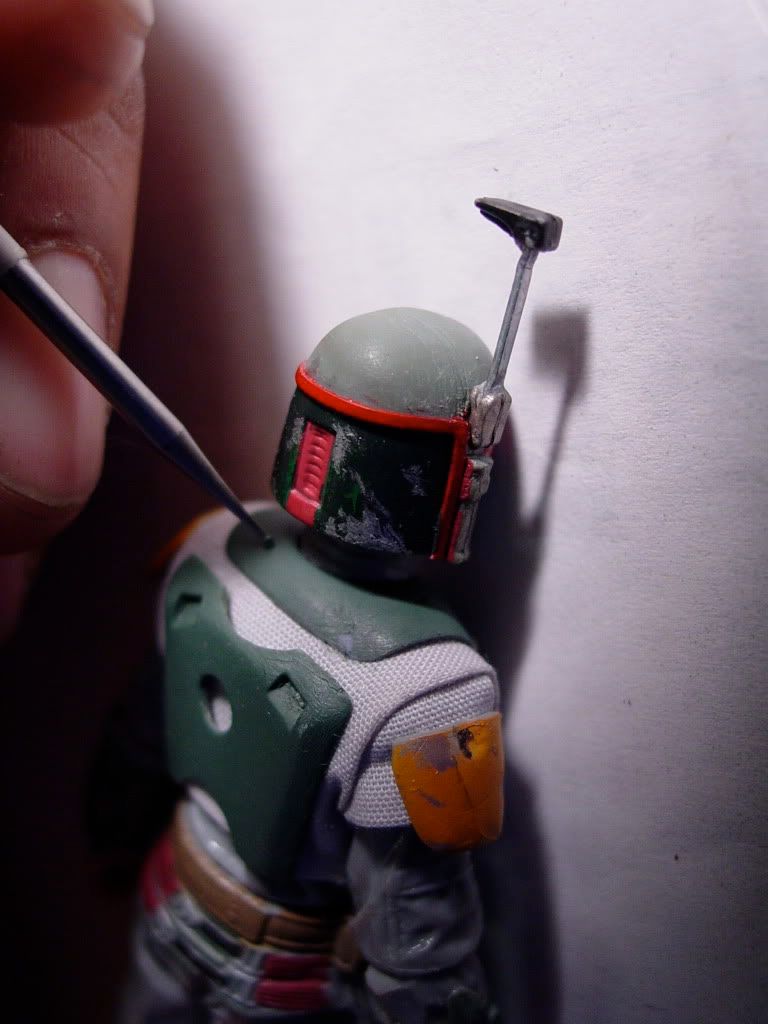
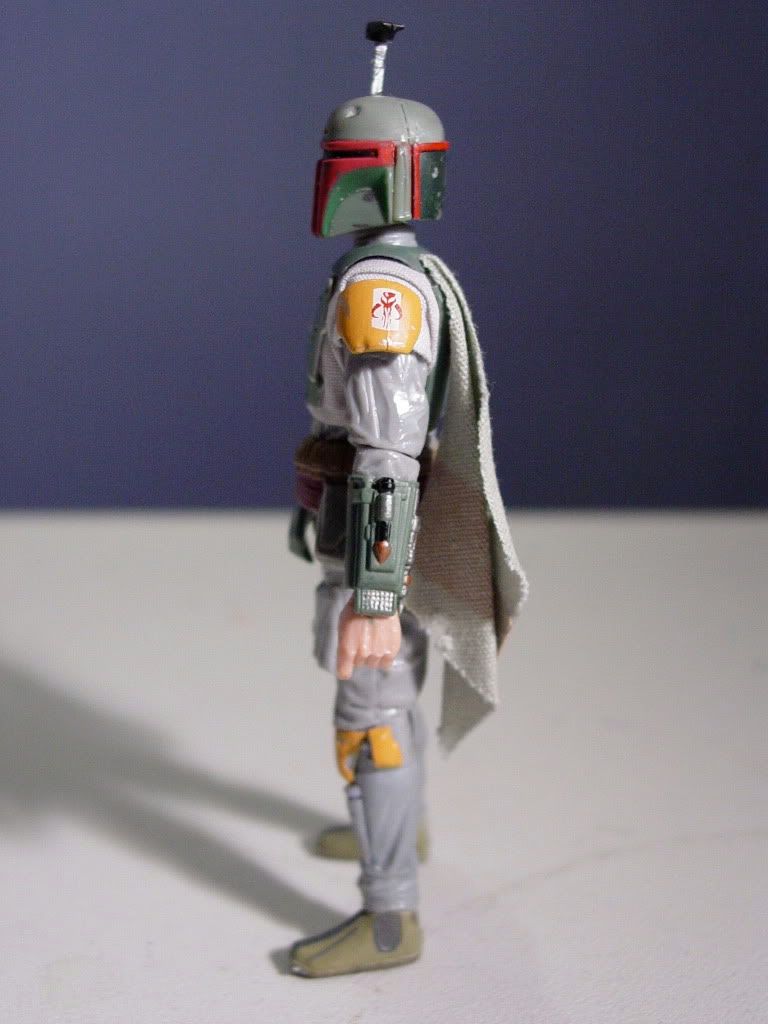
    After looking at every single Boba Fett figure ever released, I came to the conclusion that vintage Kenner Fett had the best, cleanest detailed, and most solid collar armor. After cutting the armor off of a spare Kenner Fett body, I Dremelled it down to an appropriate thinness and cleaned the edges up into a really nice wearable plate.


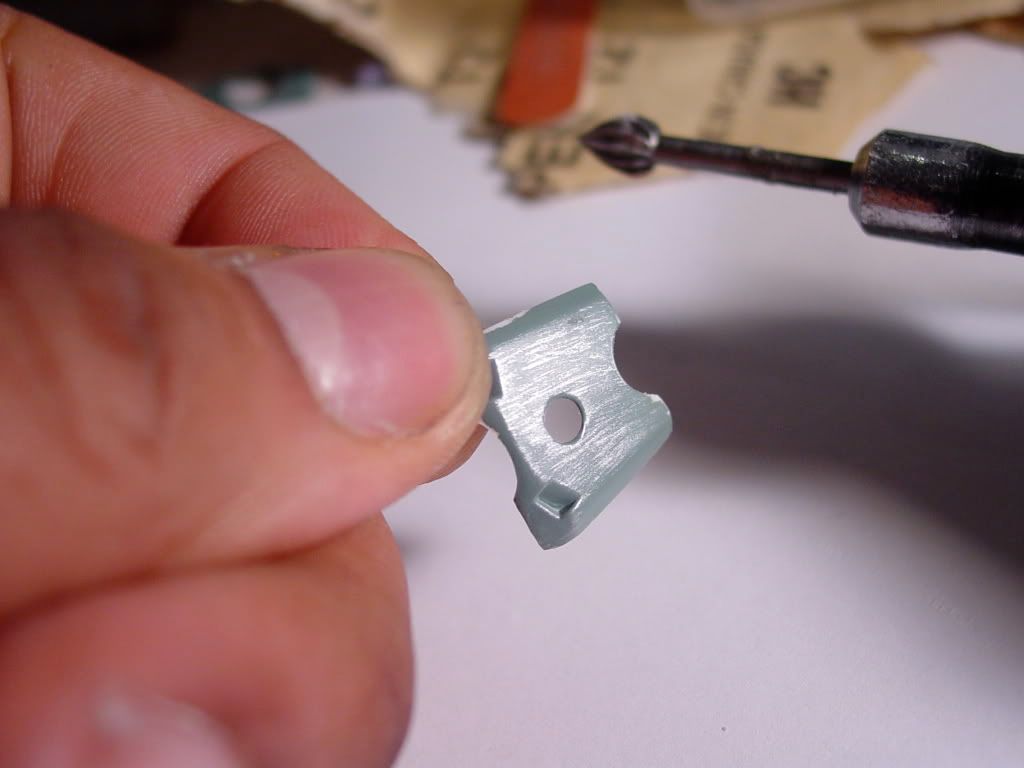
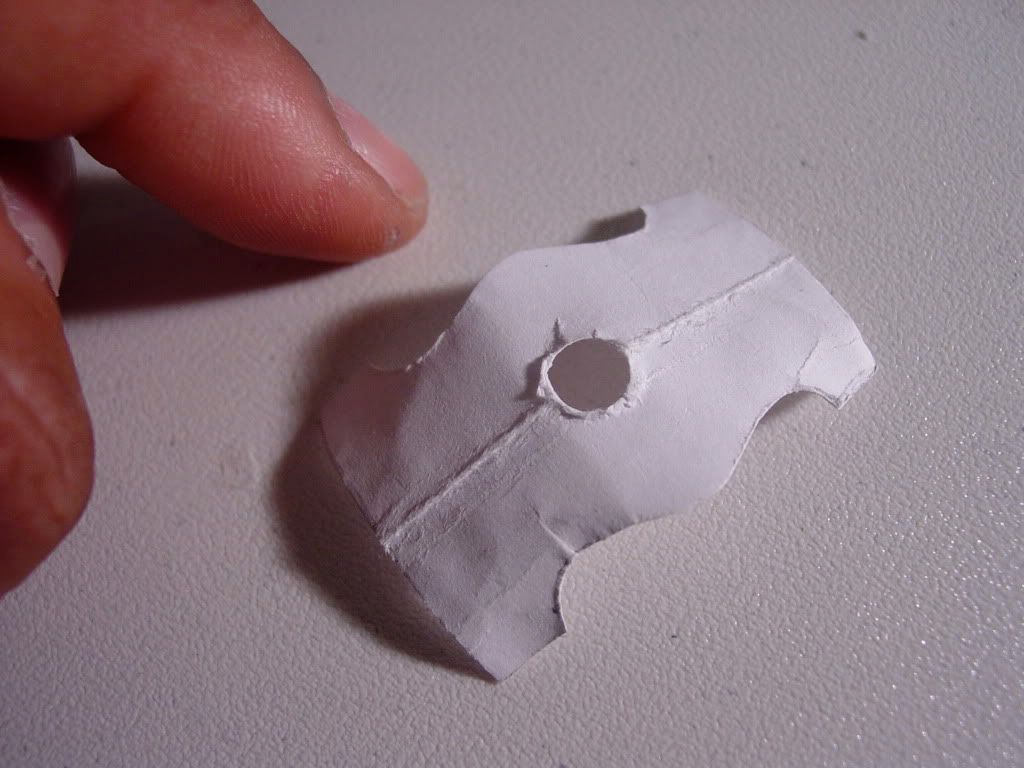
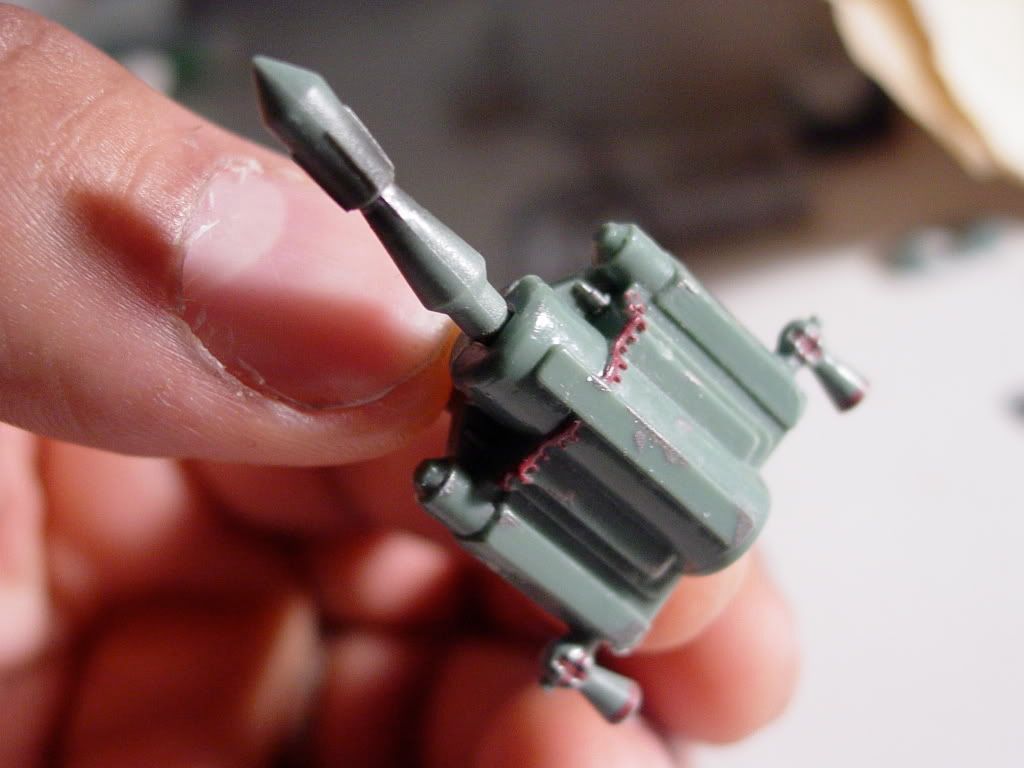
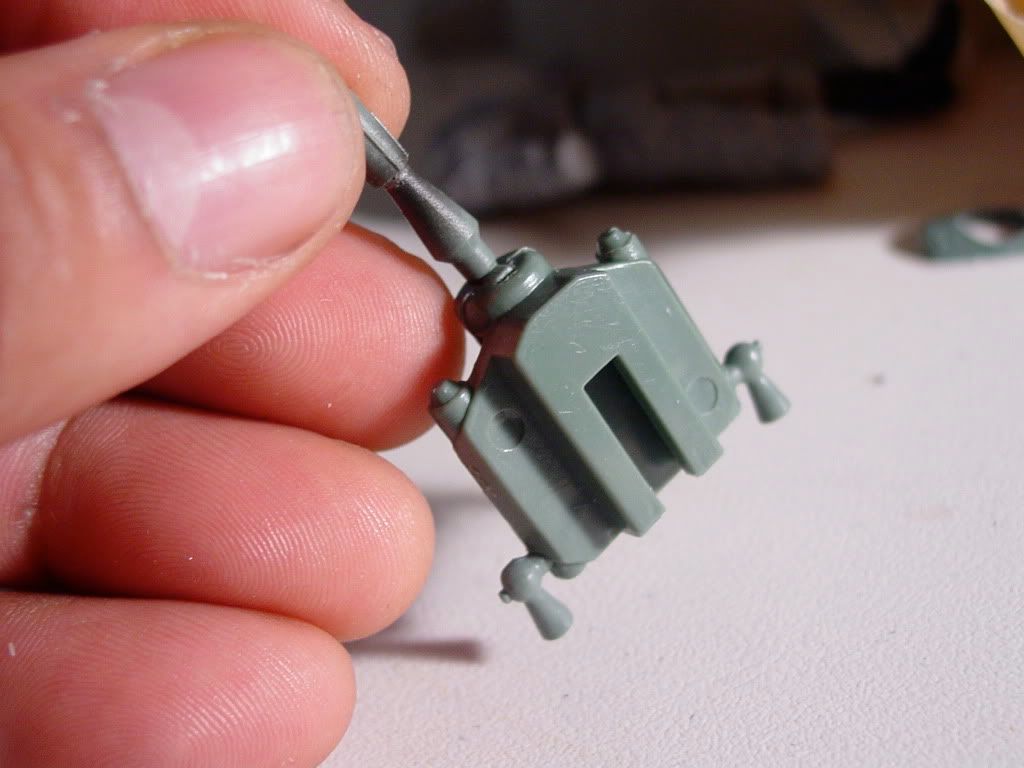
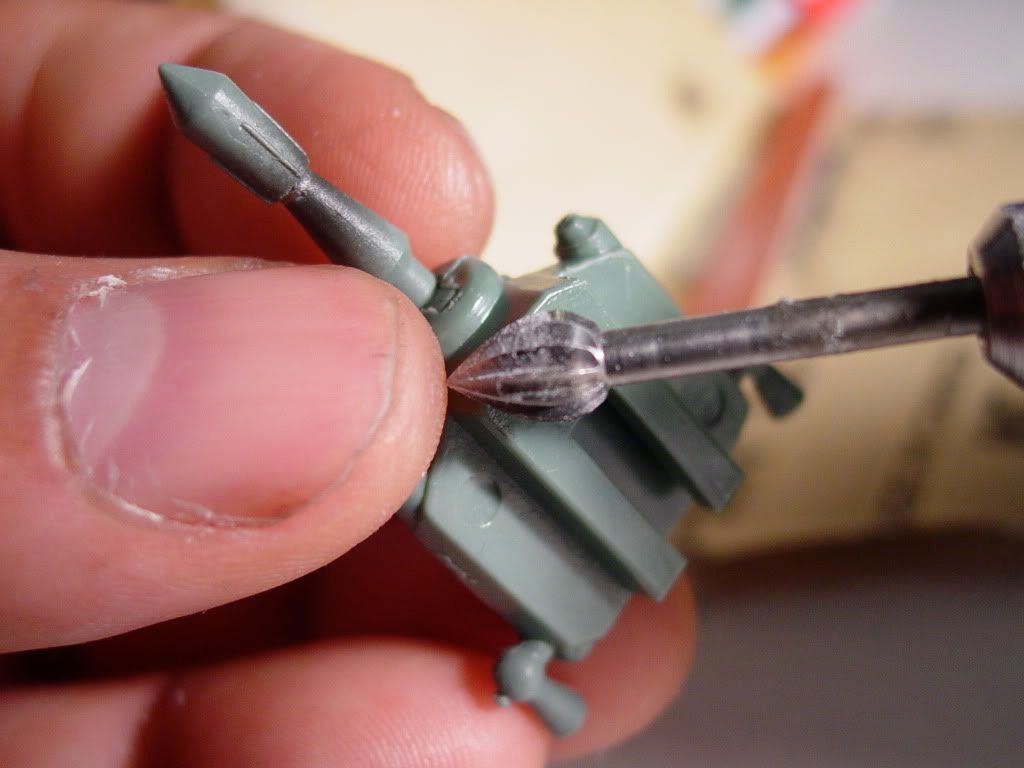
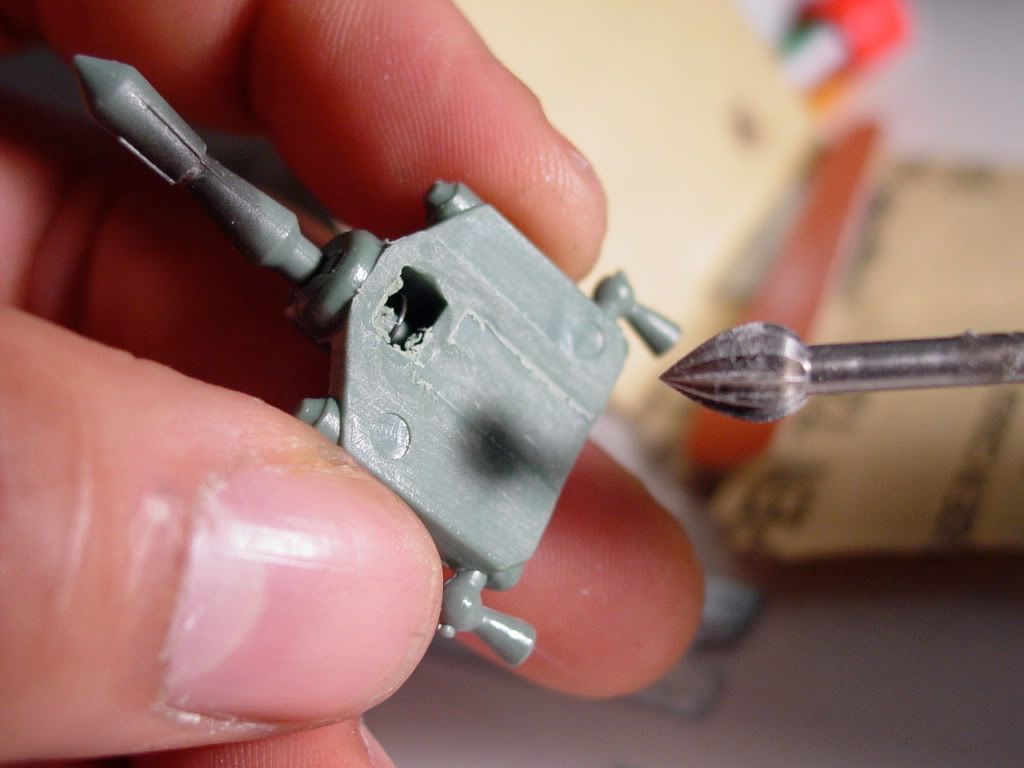
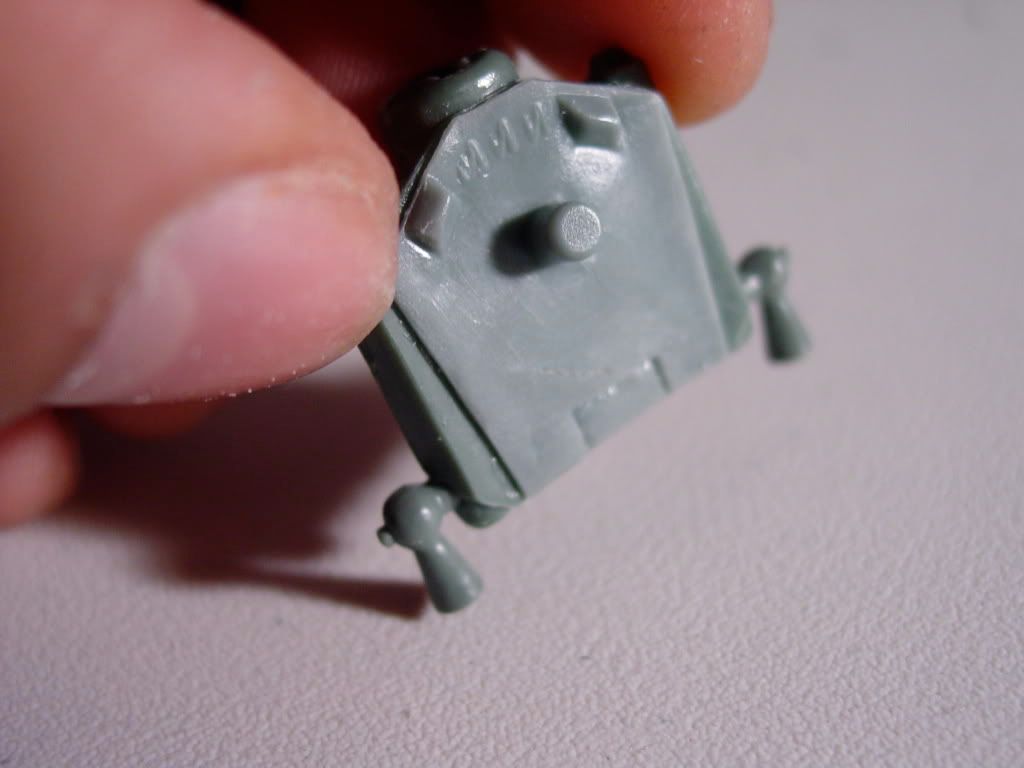
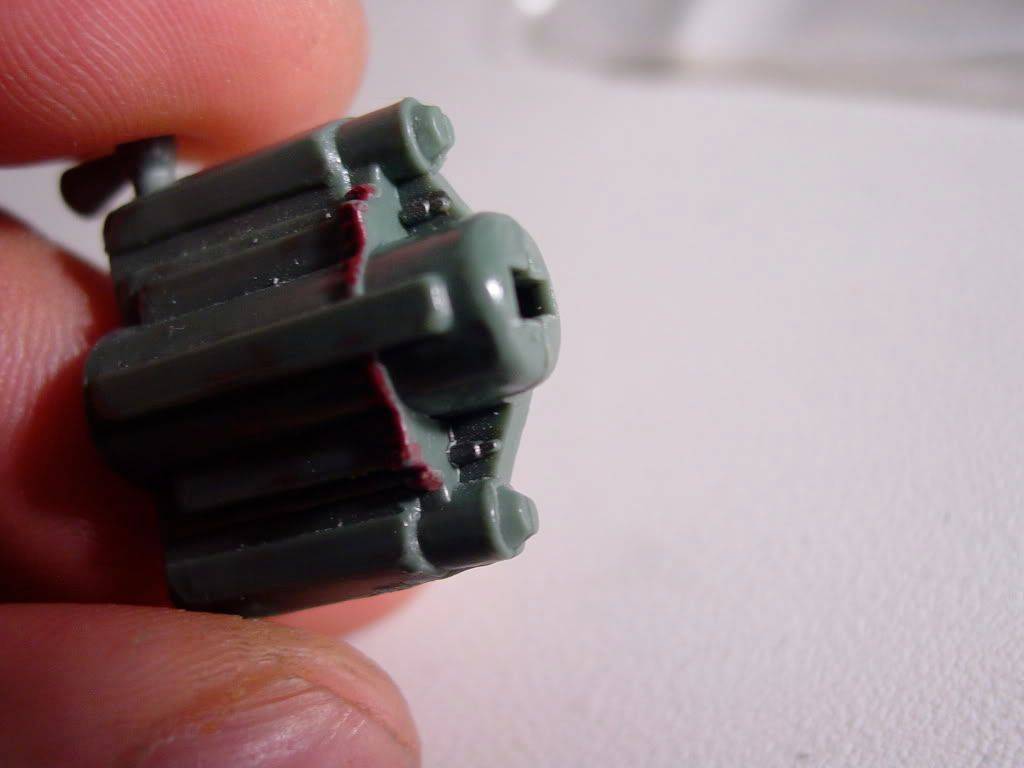
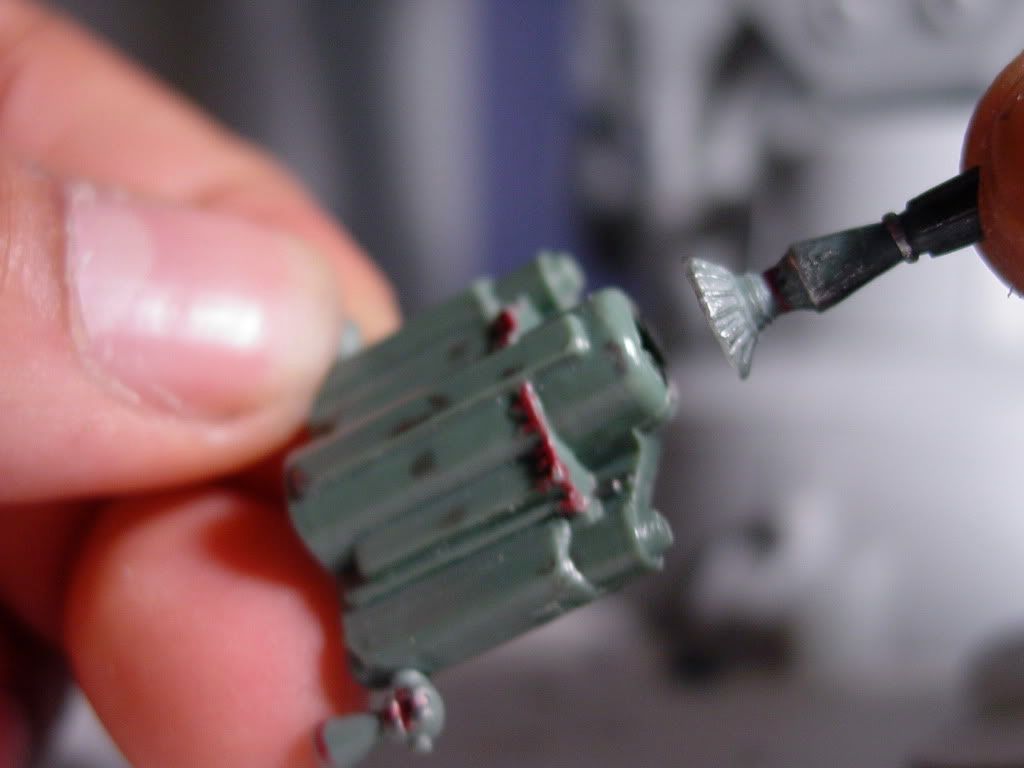
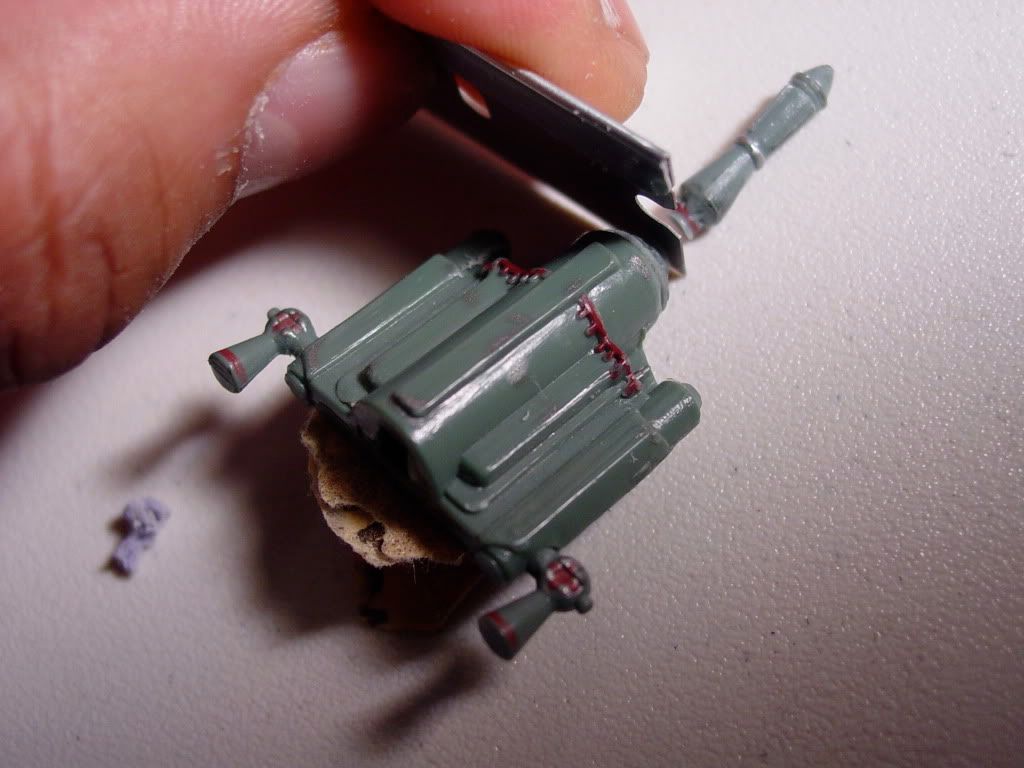
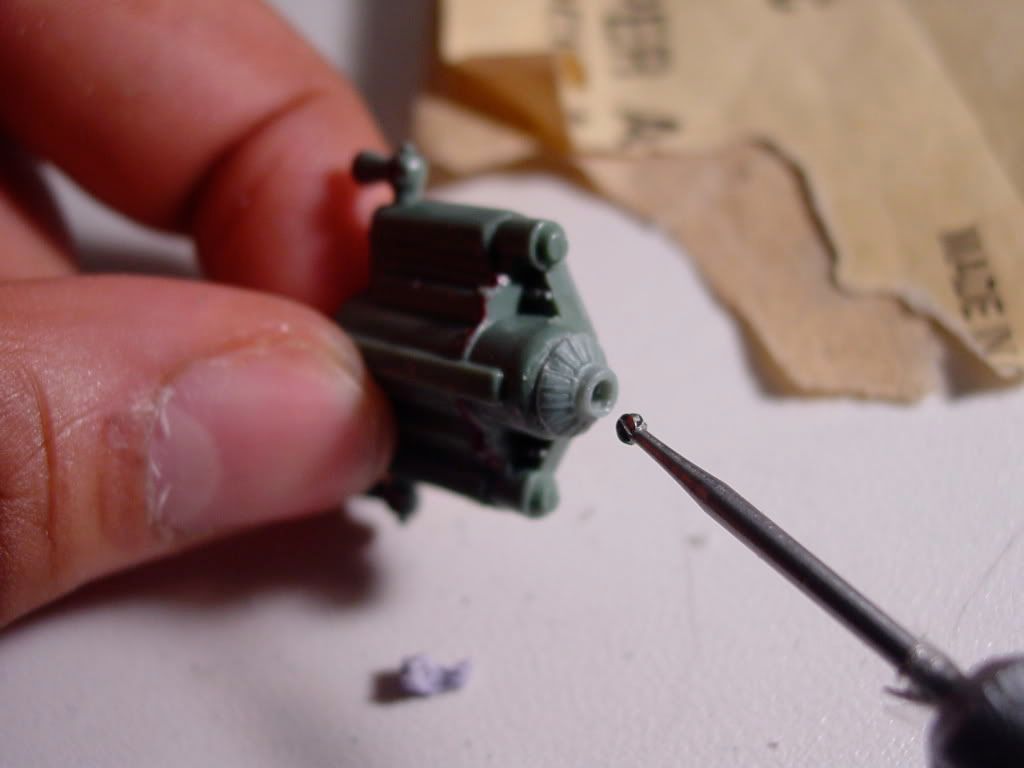
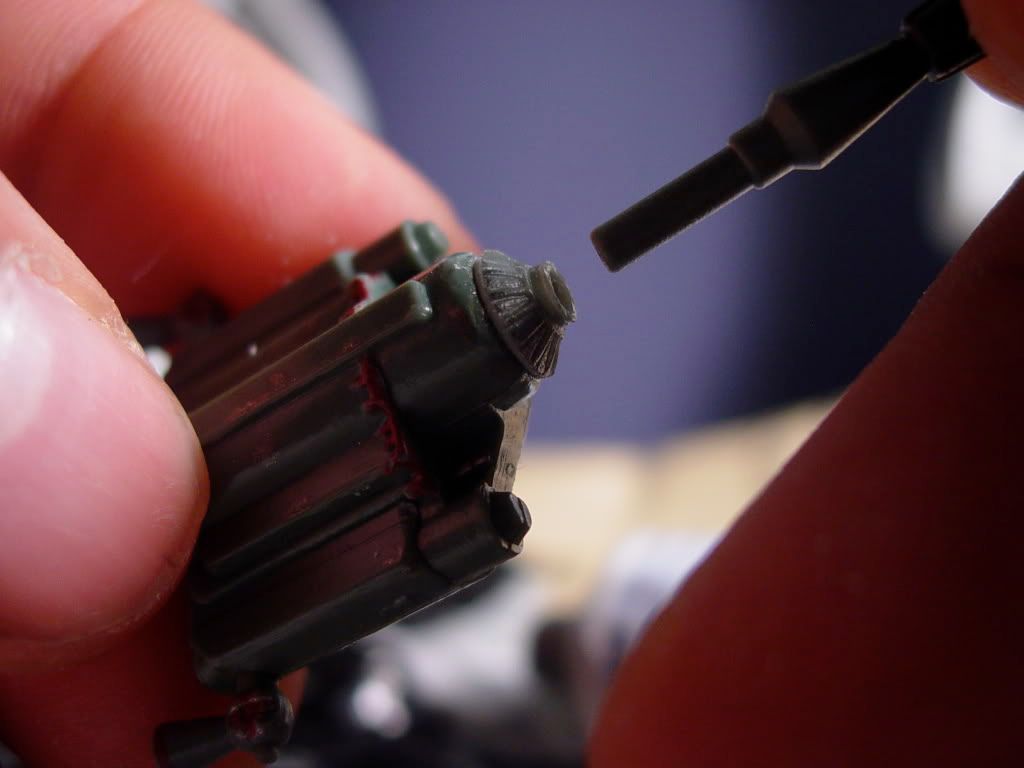
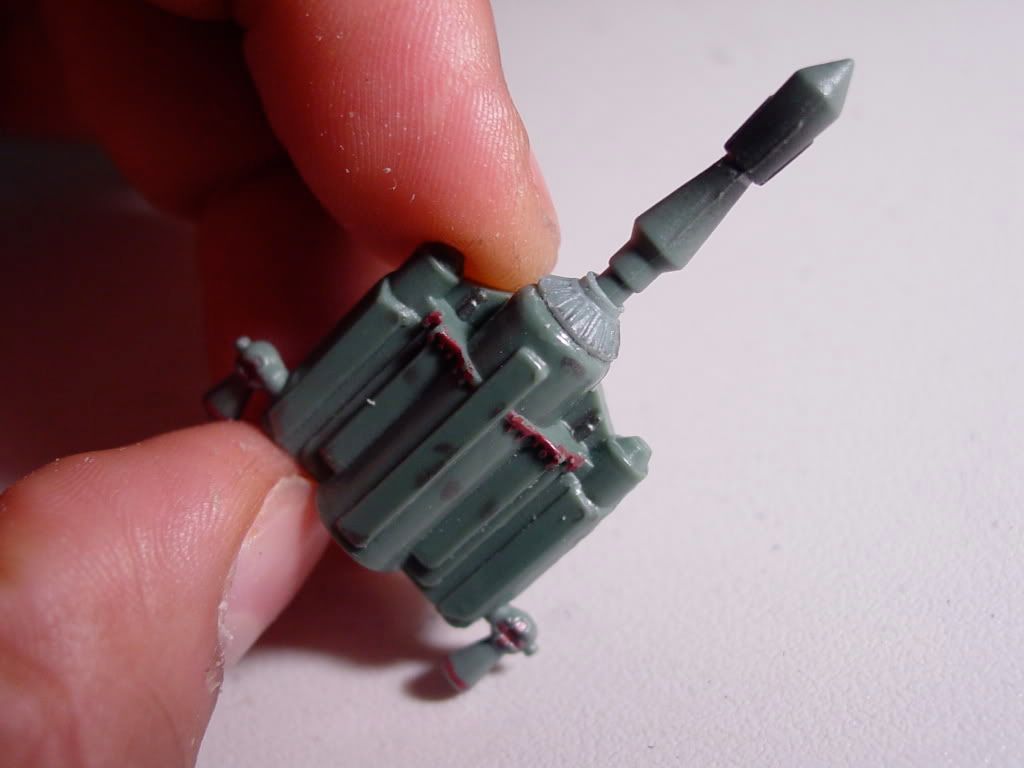
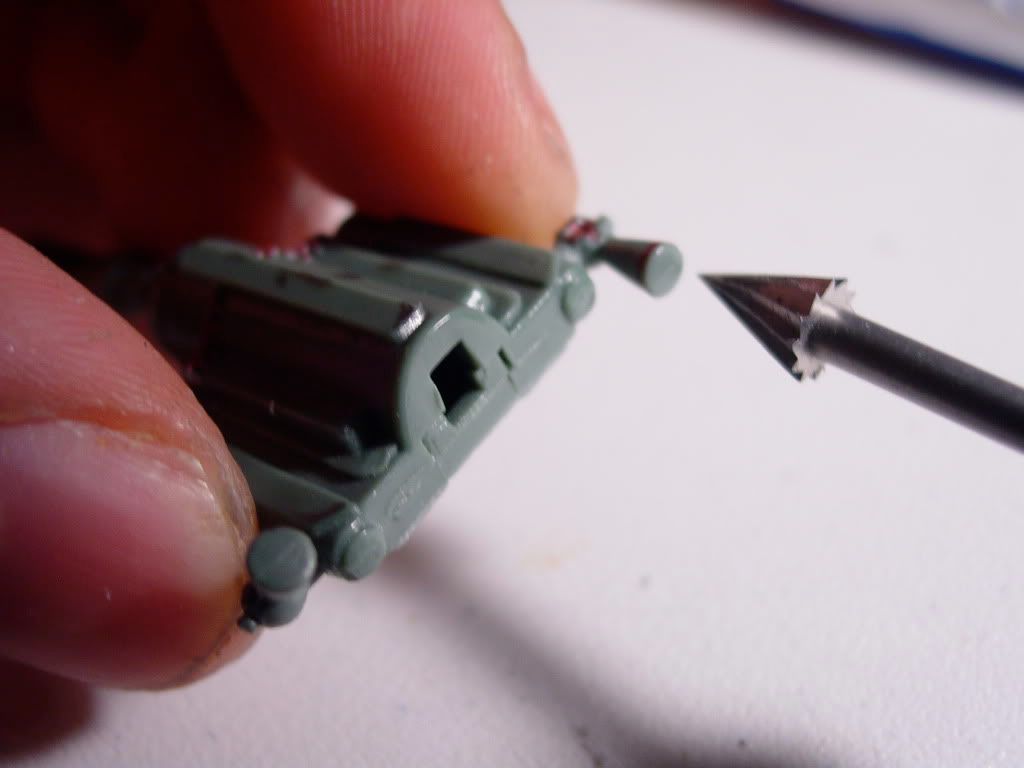
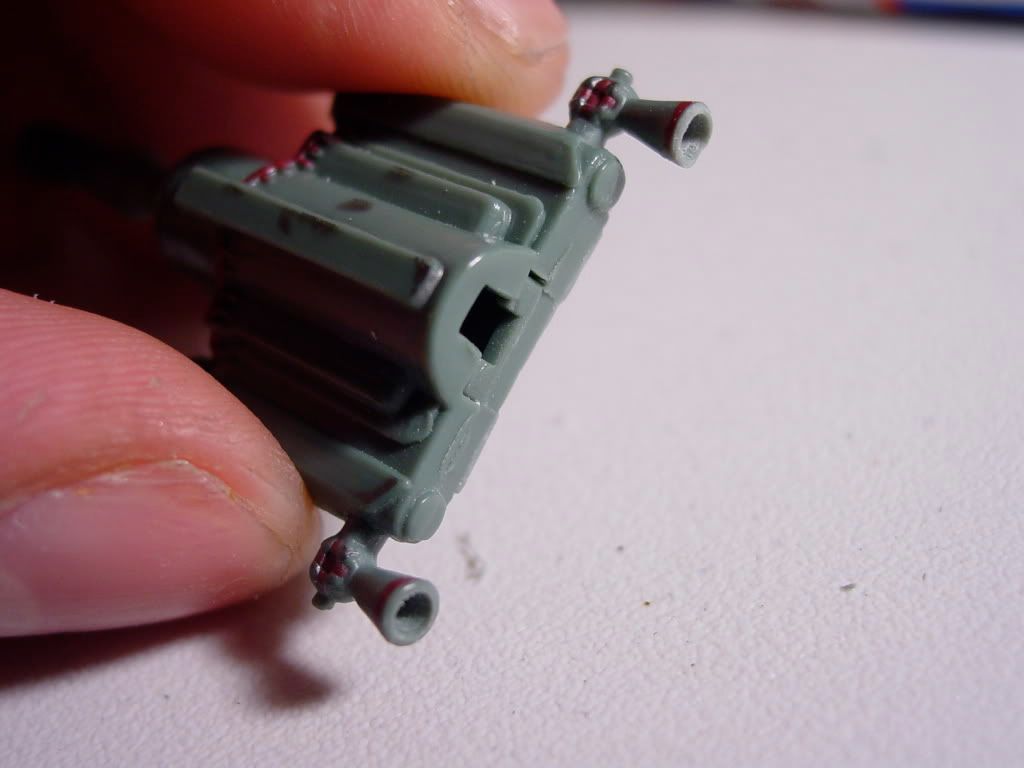
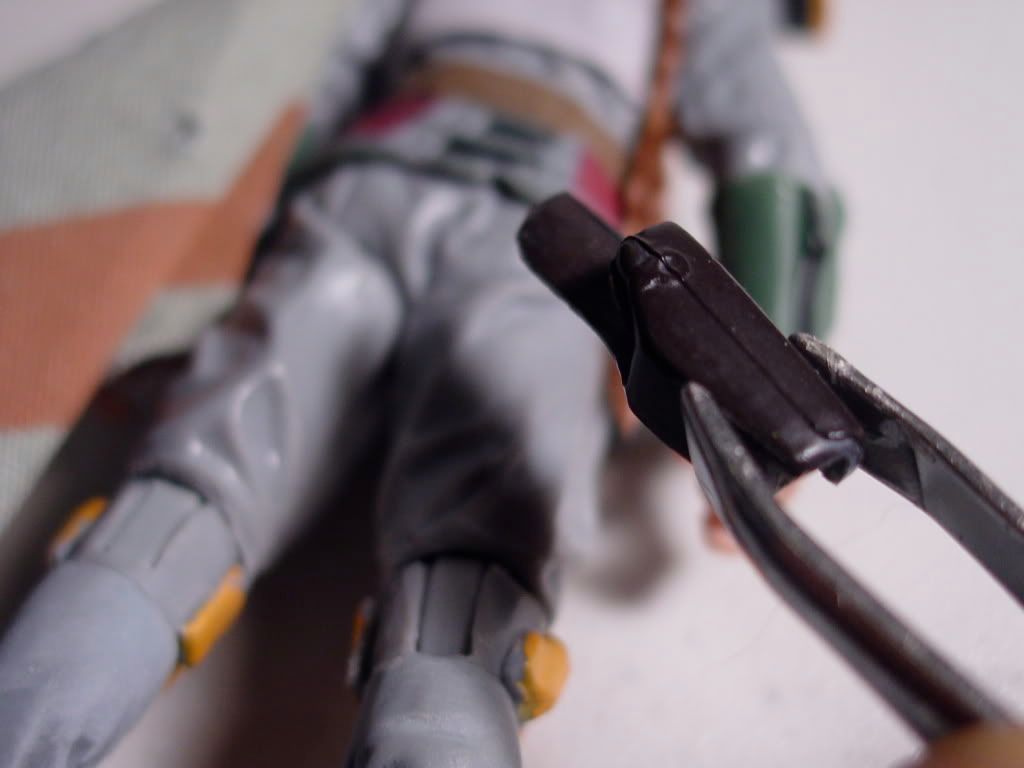
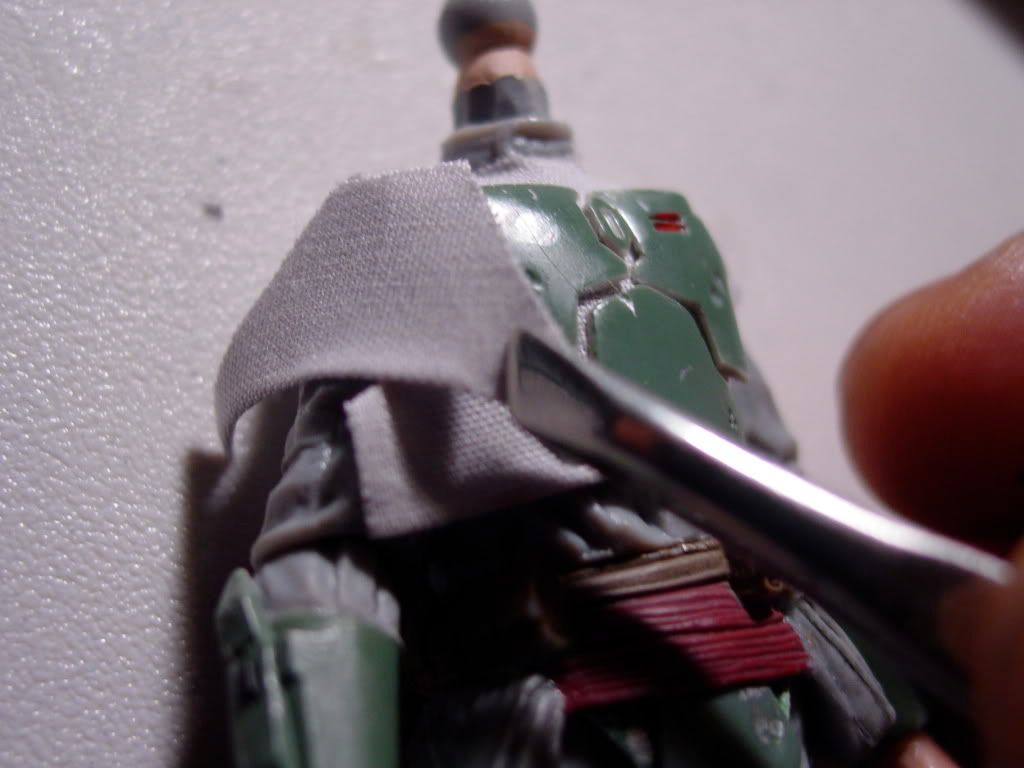
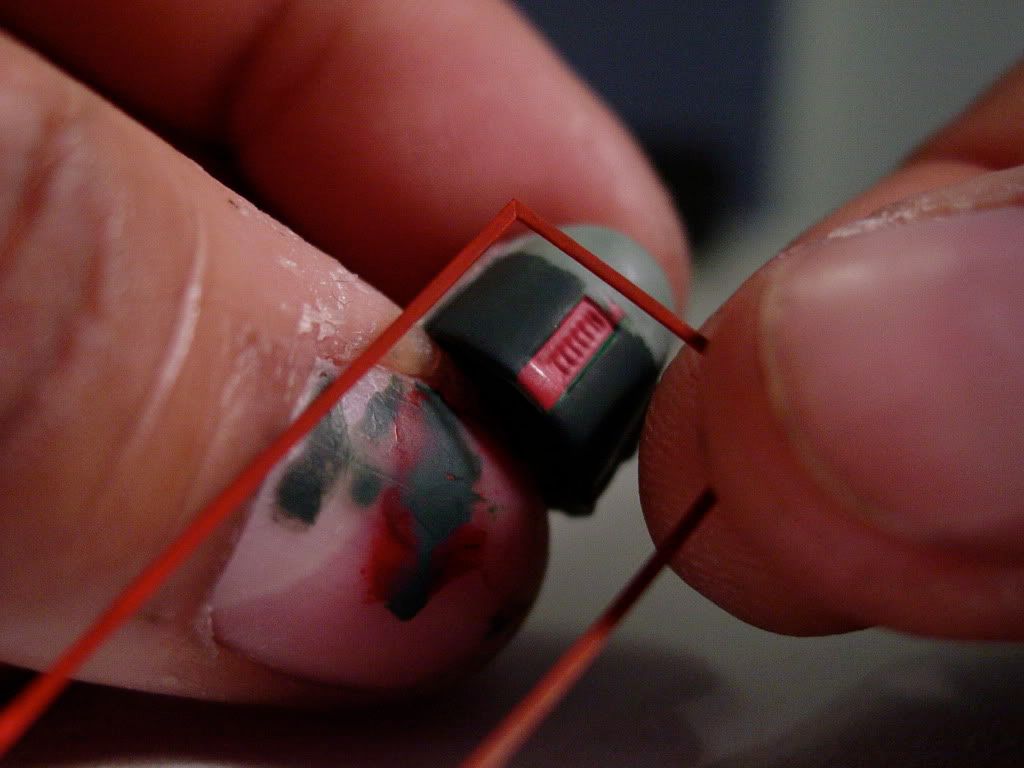
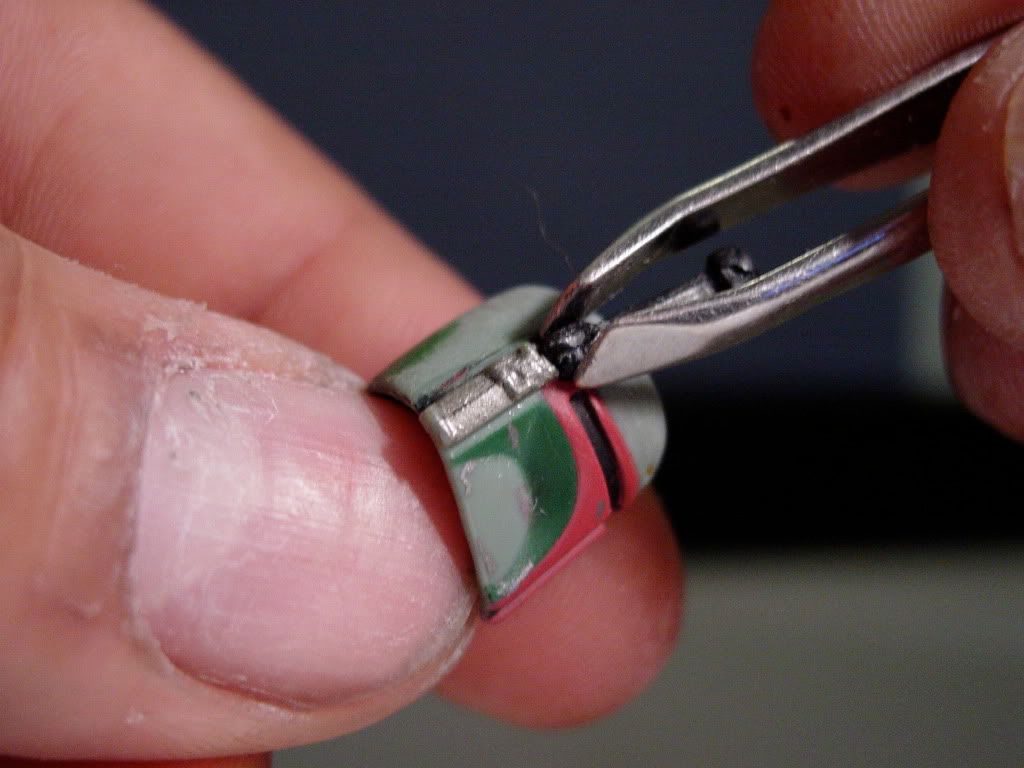
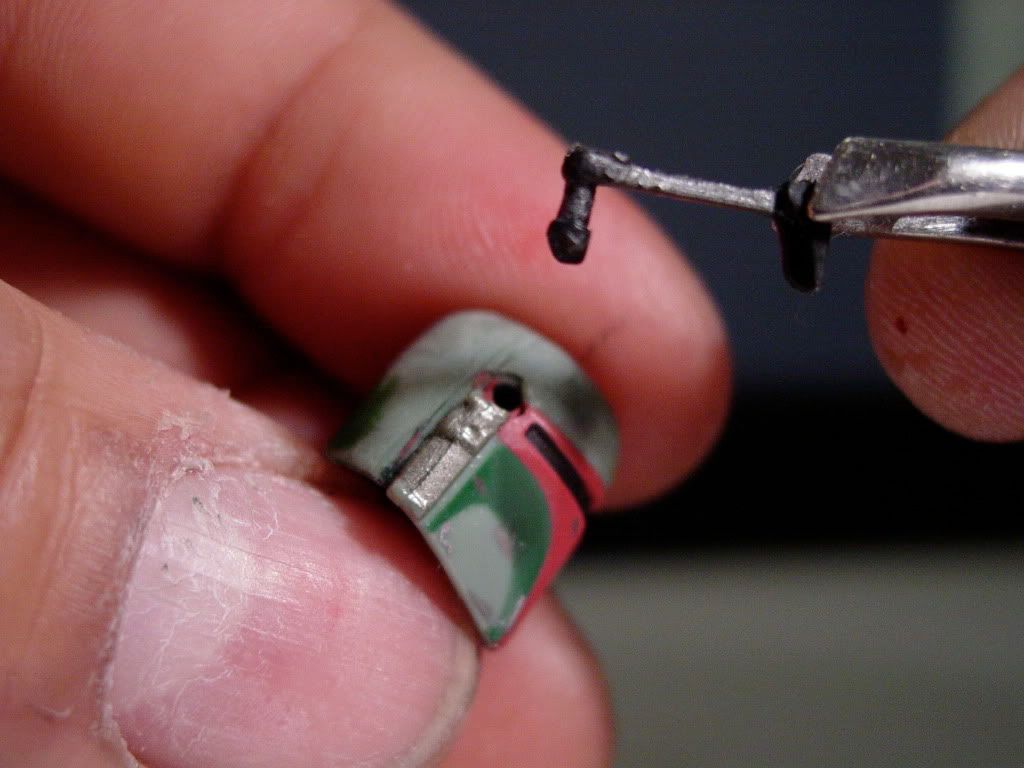
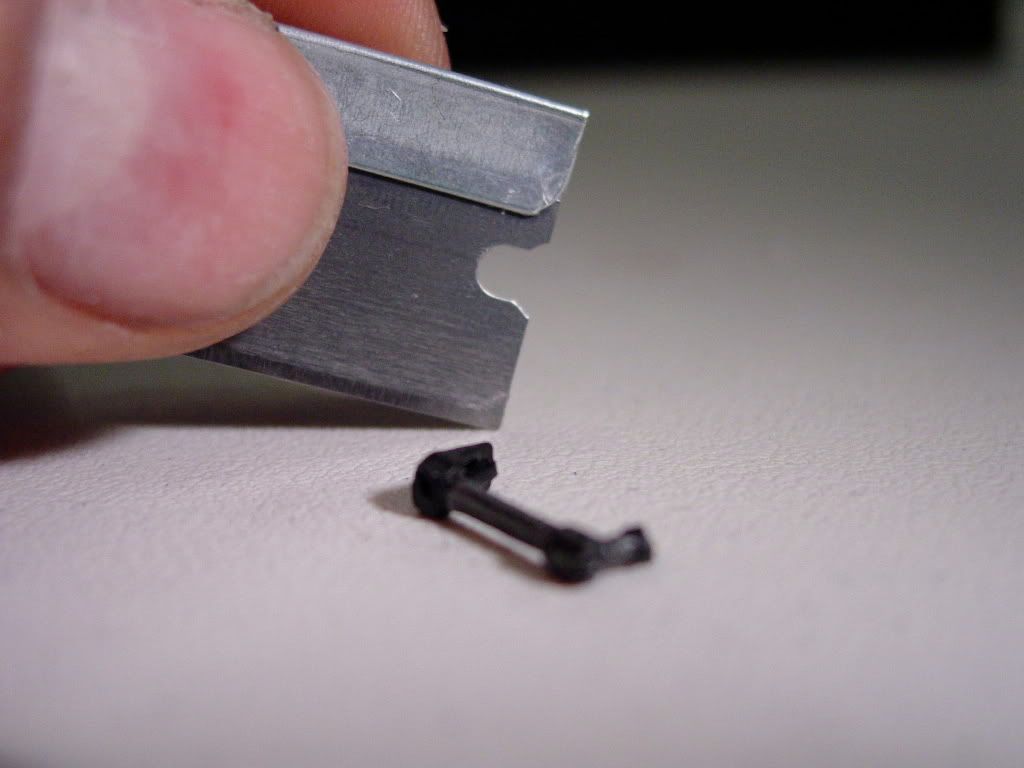
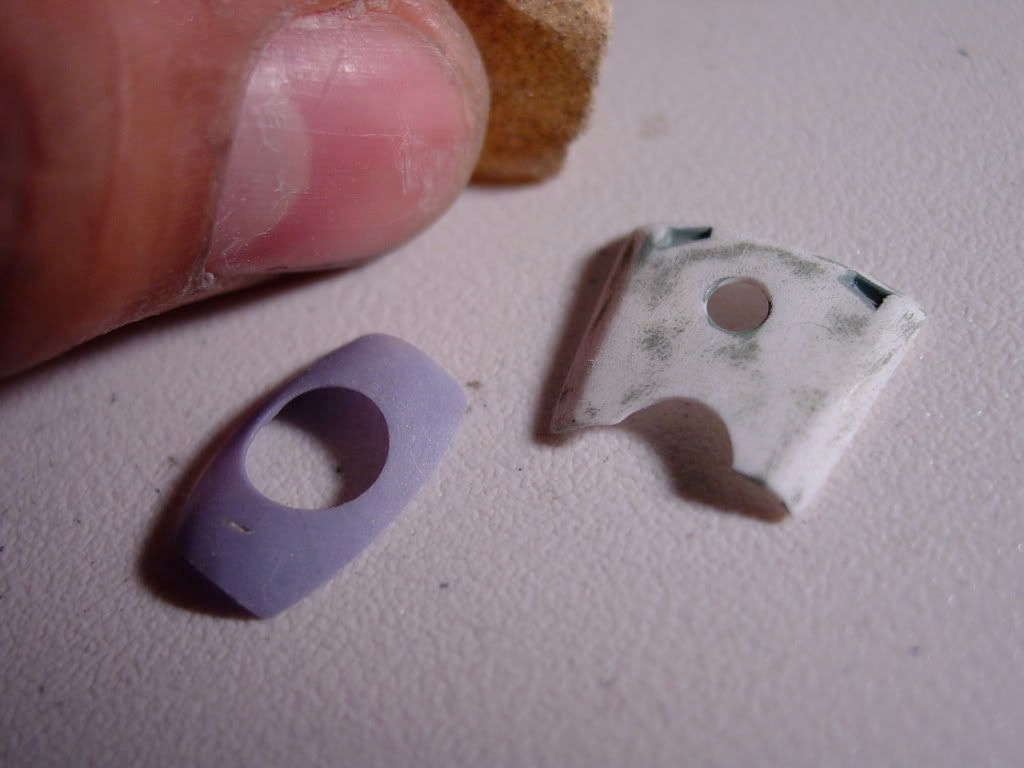
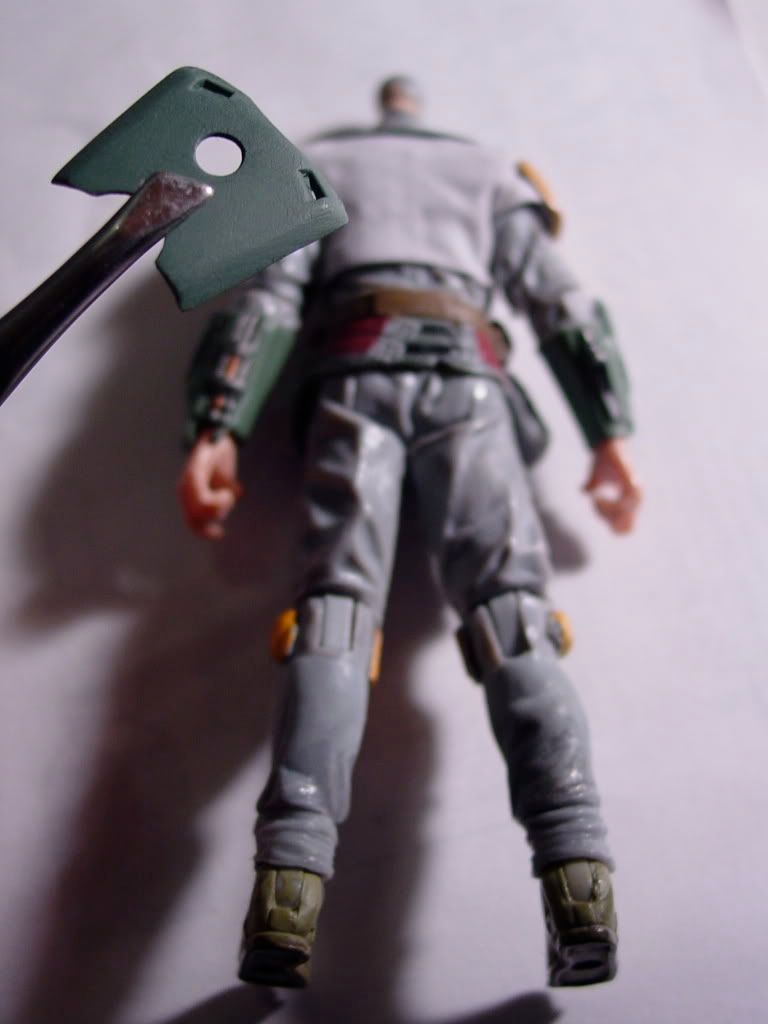
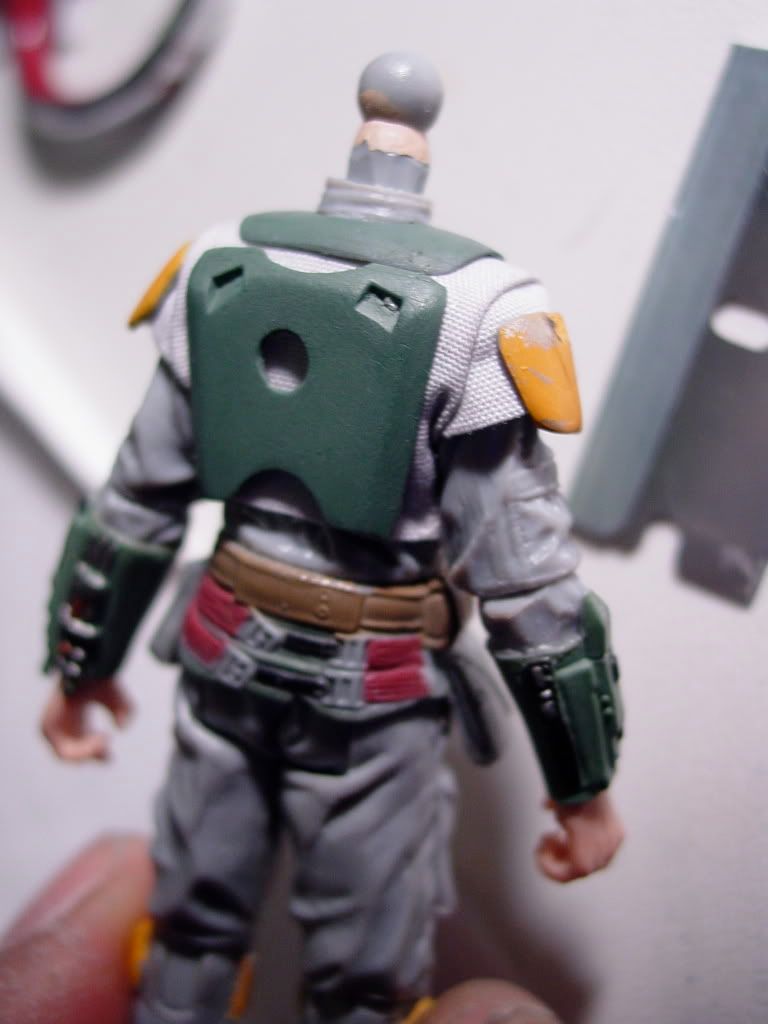
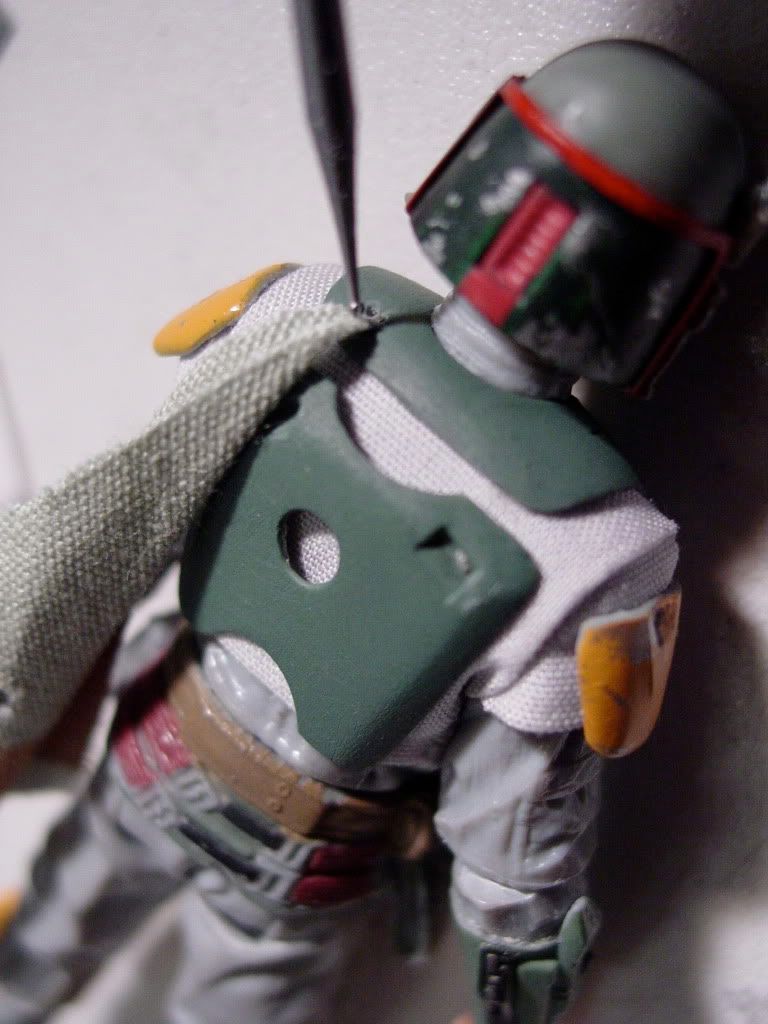
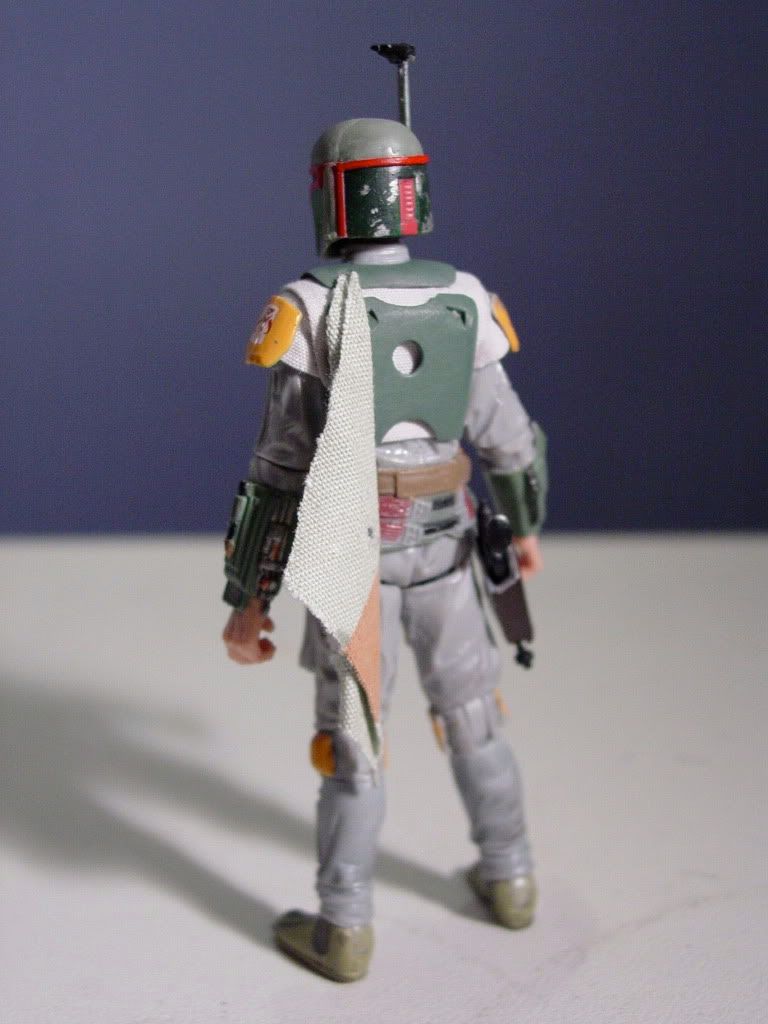
    The back armor plate (rocket pack mount) was carefully cut off the Legacy collection Fett figure, and trimmed to an appropriate size to fit an Imperial Scanning Crewman’s back.


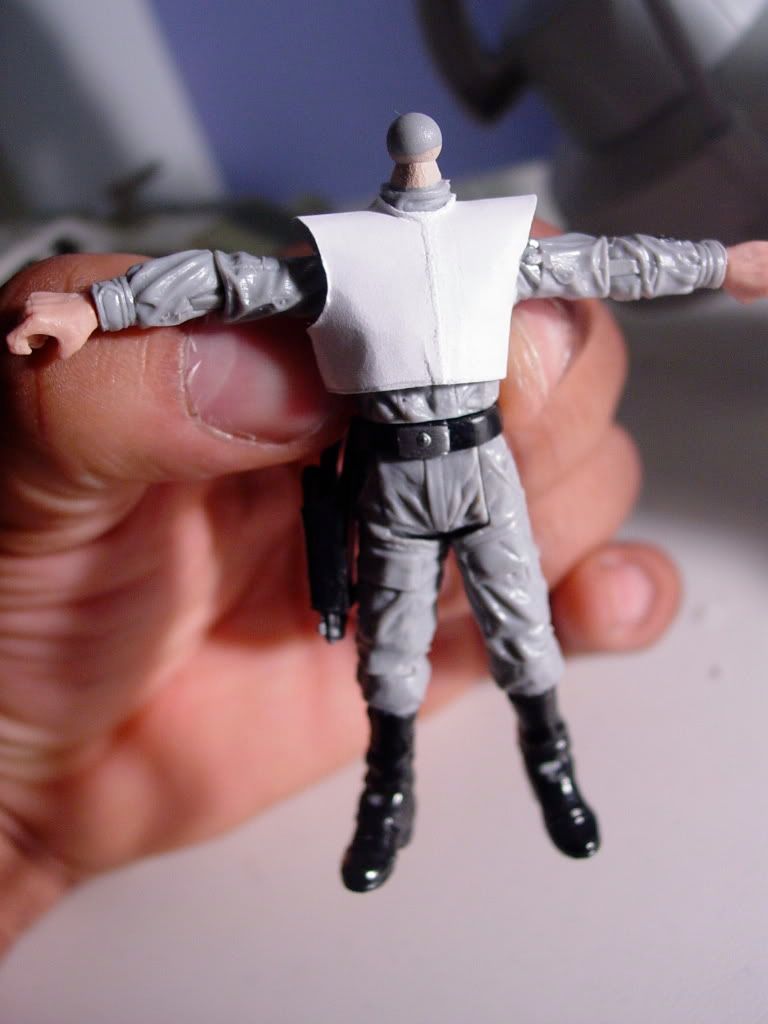
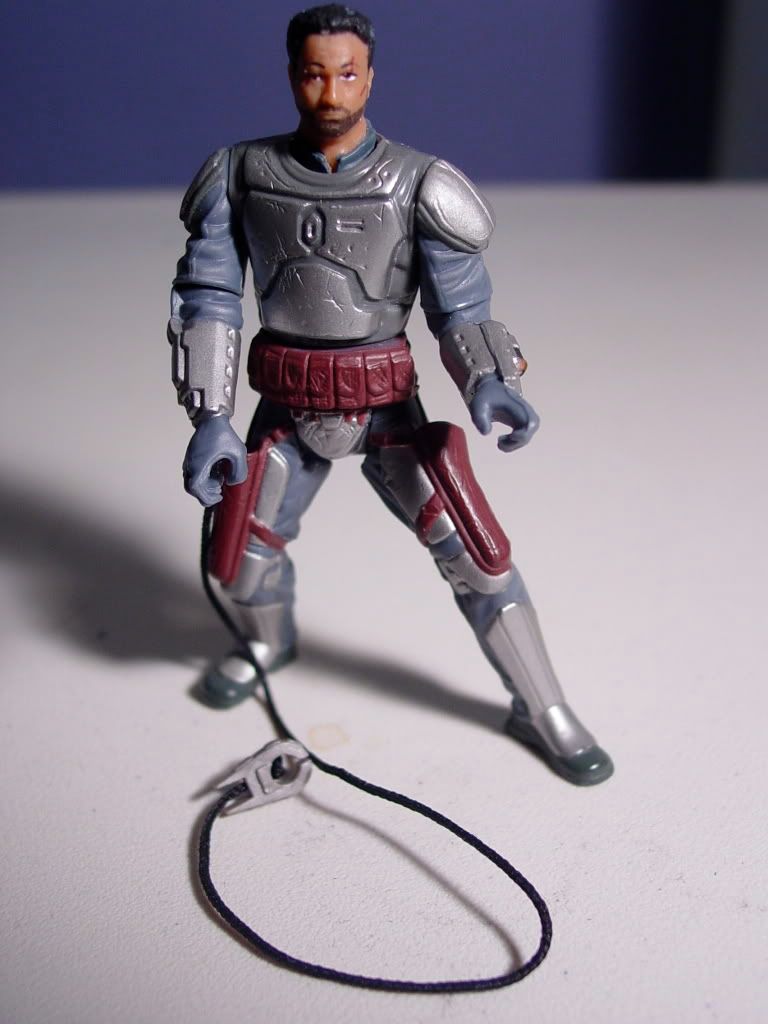
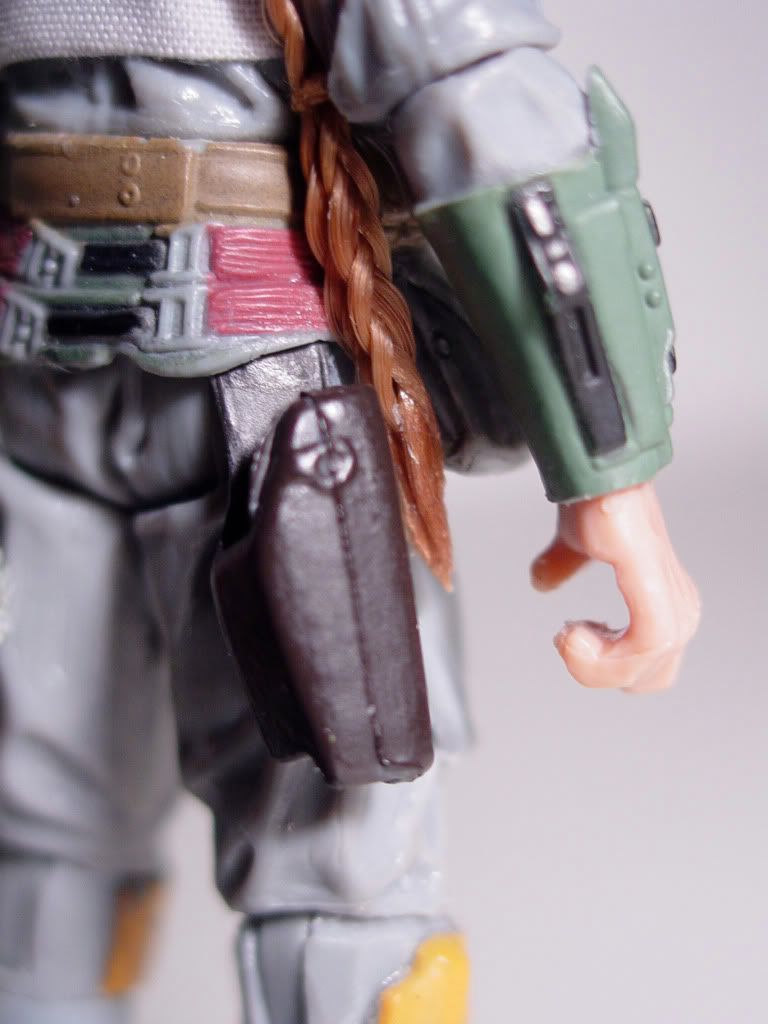
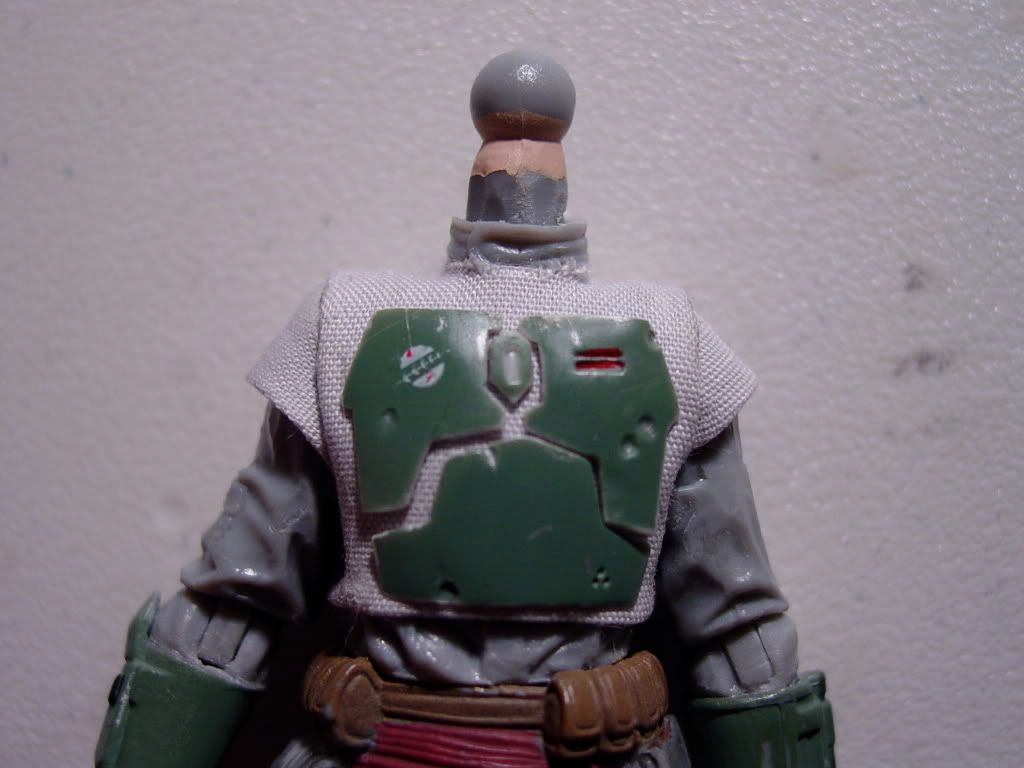
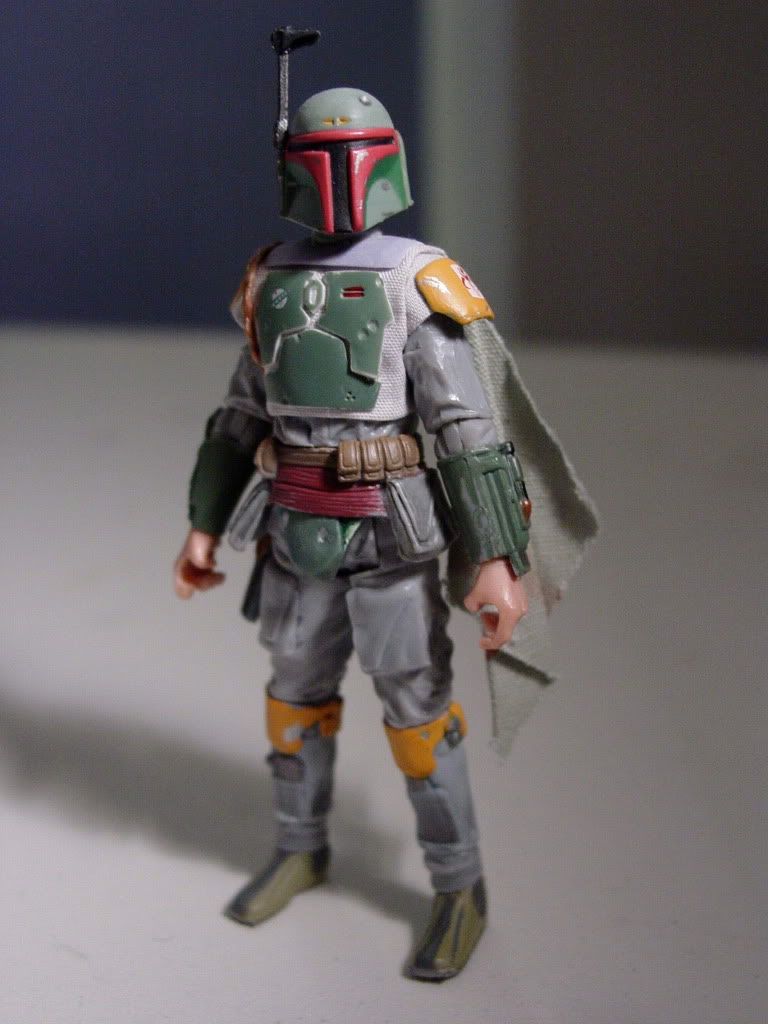
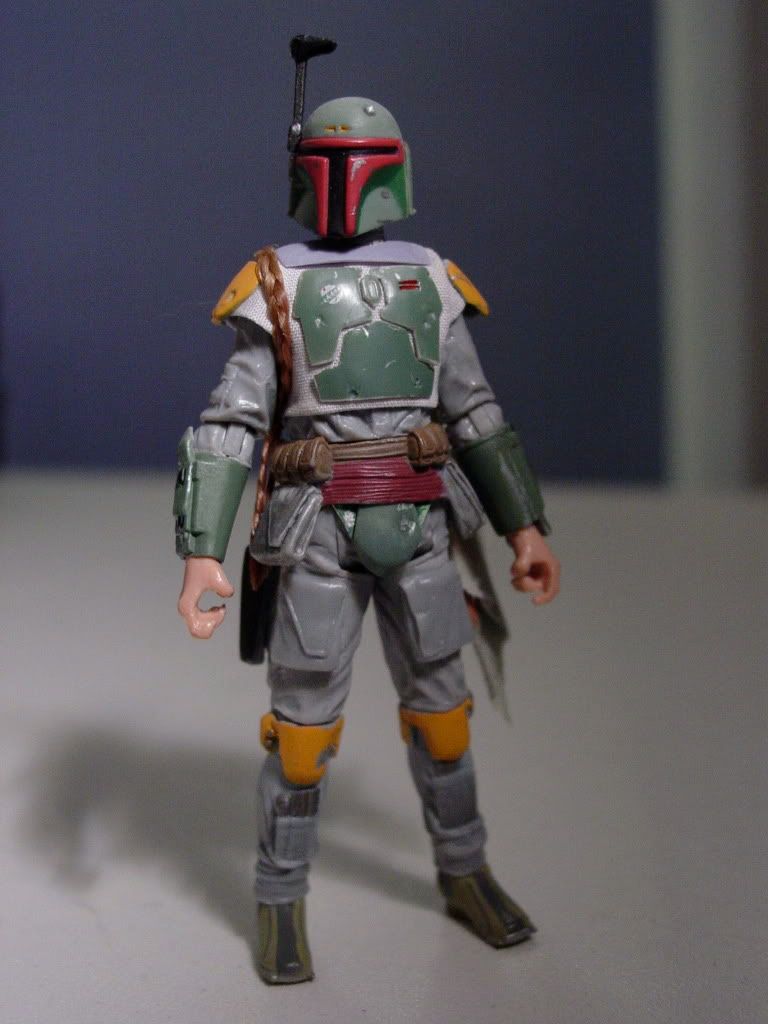
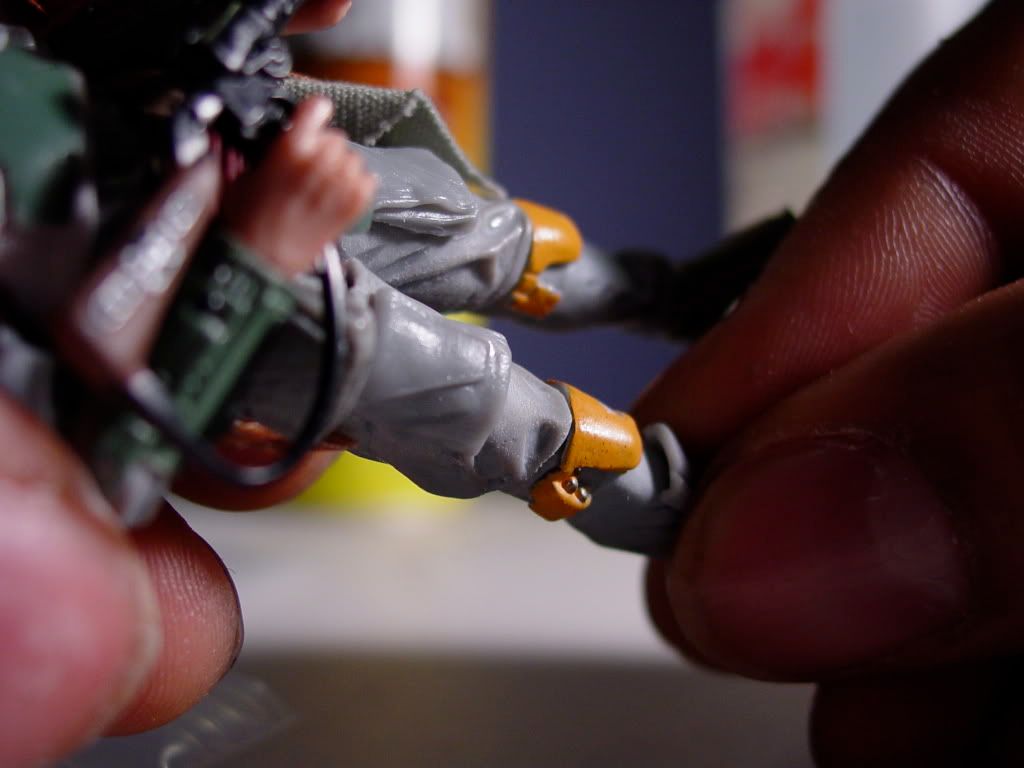
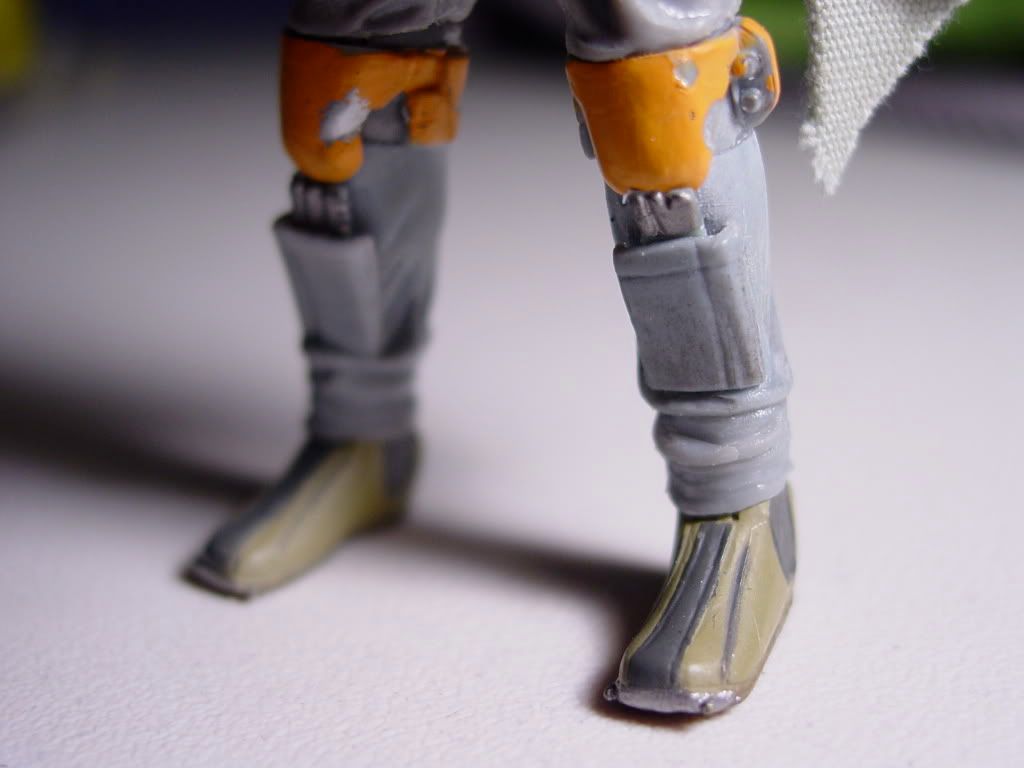
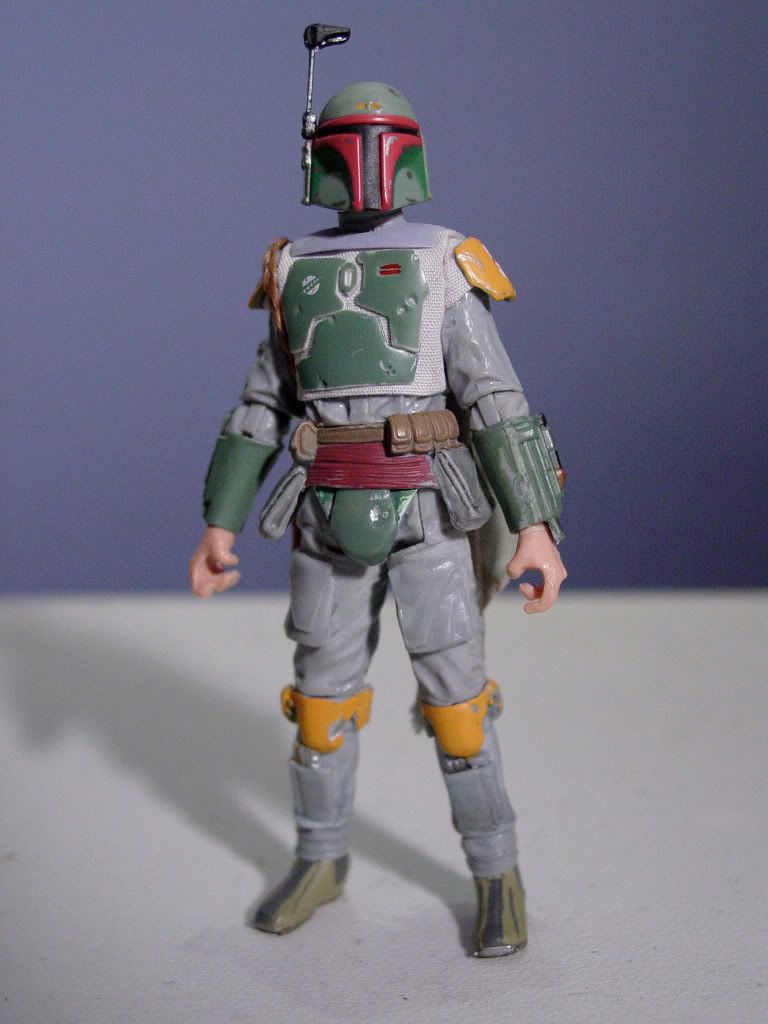
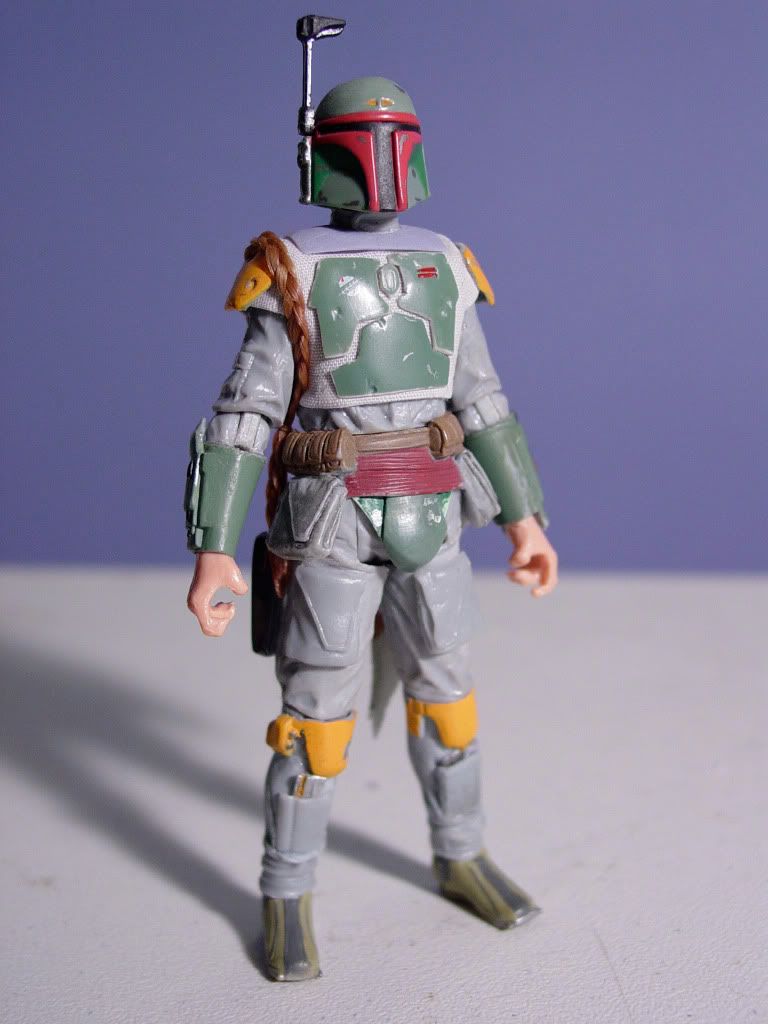
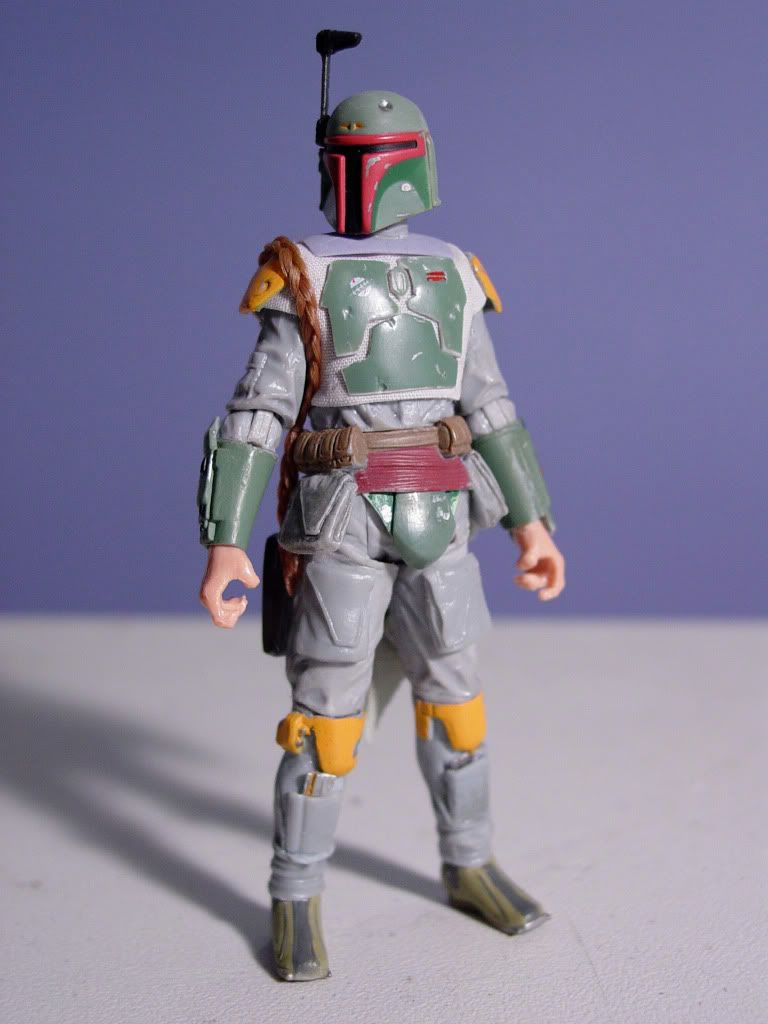
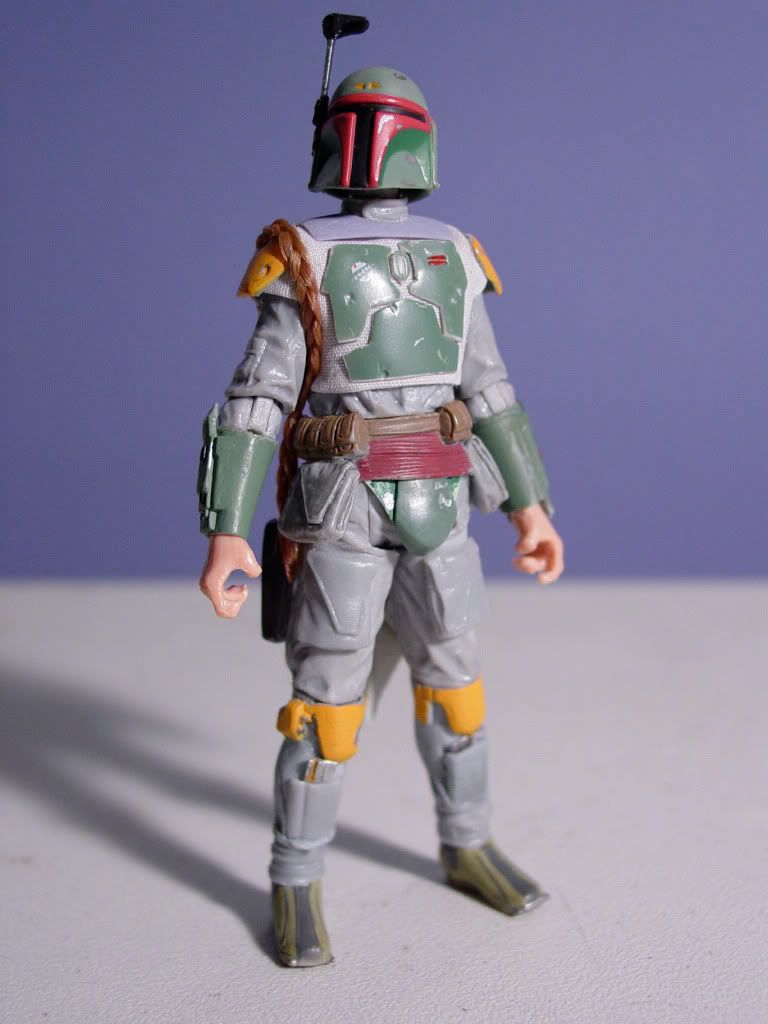
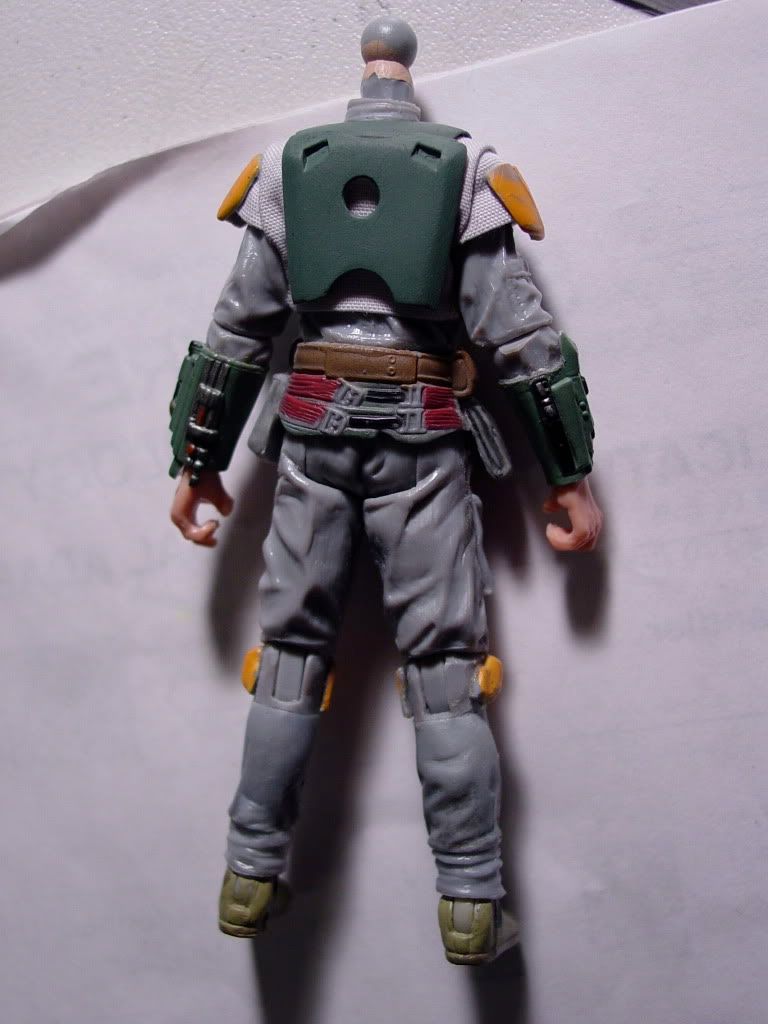
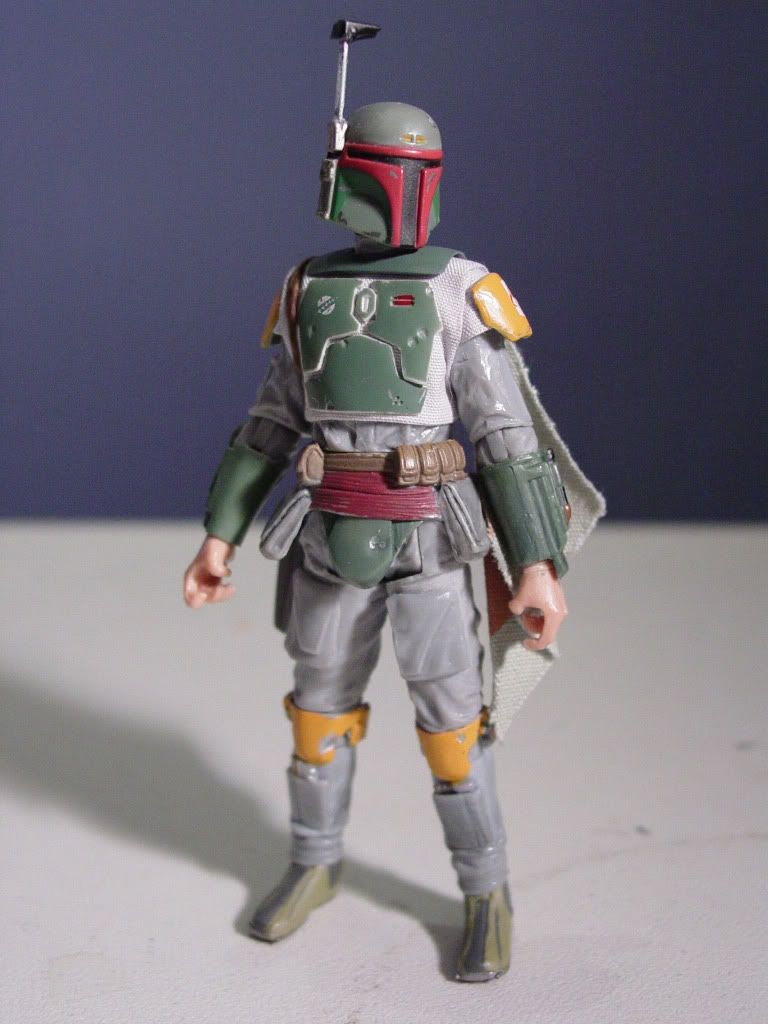
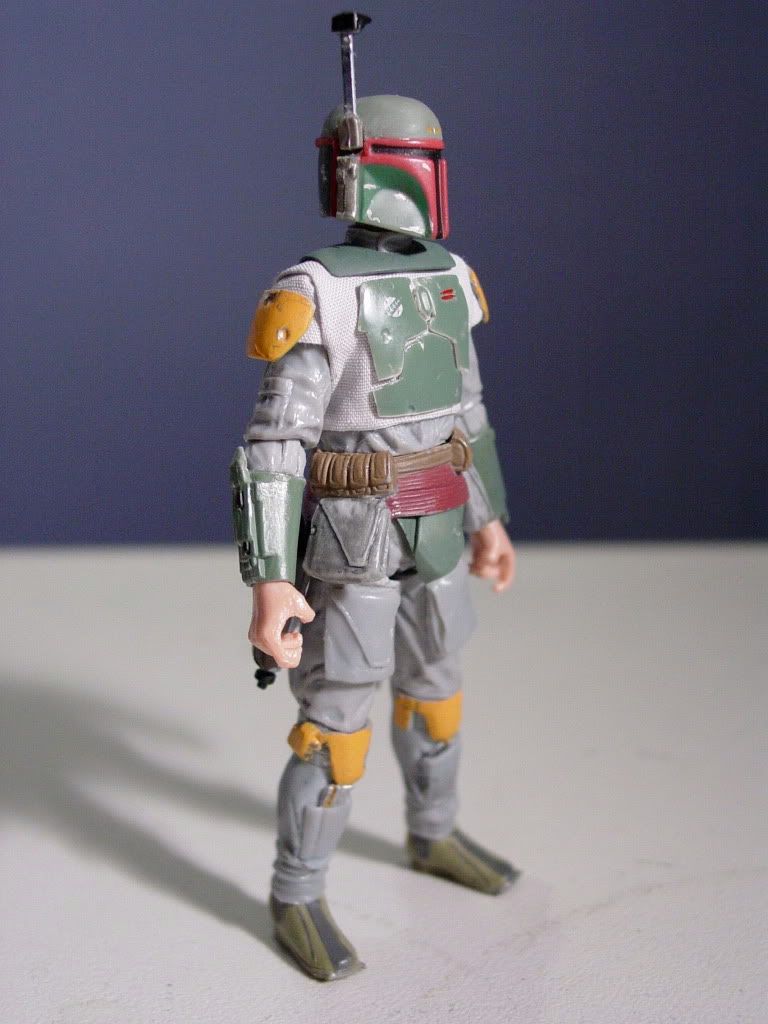
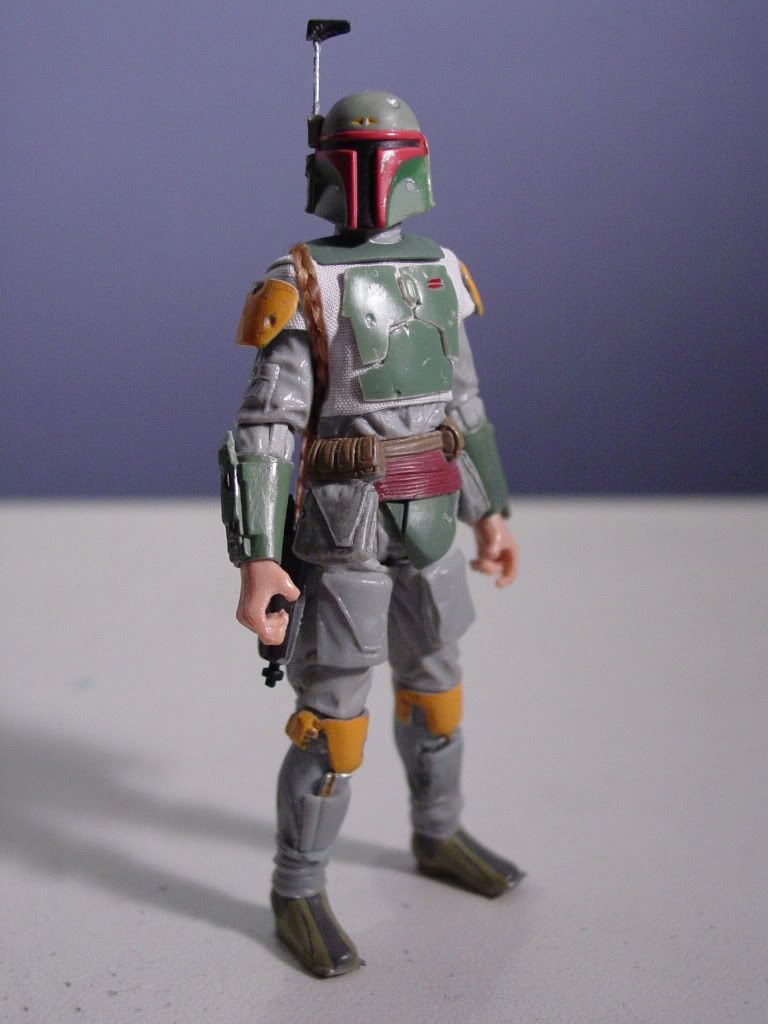
    Once I created all of these appliances, I did a quick test-fit on the Imperial Scanning Trooper Body (With the helmet) to check on the overall proportions, stance, and aesthetic attitude of the figure.

    I... am an action figure customizer

    Comment

    • darklord1967
      Persistent Member
      • Mar 27, 2008
      • 1550

      #32
      Creating the pattern for Boba Fett’s flack vest was a matter of trial and error. But, I produced a paper template quickly enough, and used it to cut out a basic cloth vest. I added small upper sleeve extensions (for the armored shoulder bells to be attached to) and I made a neck hole in the vest with a paper hole-punch.


      Prior to the soft-goods flack vest being permanently glued to the Imperial Scanning Crewman body, I performed a test fit of the armored torso plates onto the vest to check the overall color layout and texture contrasts on the figure.


      I... am an action figure customizer

      Comment

      • darklord1967
        Persistent Member
        • Mar 27, 2008
        • 1550

        #33
        I next decided to give Boba Fett's backpack some attention.

        For this figure I always knew that I wanted to use the excellent backpack from the POTJ 300th figure Boba Fett.

        Molded in solid ABS plastic, this backpack had superior detail in the casting to the softer PVC rubbery backpacks used by many Boba Fett figures. It also boasted adjustable rocket nozzels and a removable top concussion missile rocket (none of which are offered by Hasbro's latest Vintage Collection Fett)


        There were, however, three (3) issues with this backpack that needed to be addressed:

        1) The mounting system for the backpack is completely inconsistent with the custom figure I am creating. This system features a bulky mounting box molded to the inside of the backpack (which would create an unnatural space away from the figure's back when worn).

        This backpack would have to be converted to the simpler peg mounting system utilized on today's figures.


        2) The sculpted ribs around the neck base of the removable concussion missile rocket were NOT included with this backpack. They would have to be transferred over from another backpack that had them available.


        I cut off the rubbery (non-removable) concussion missile rocket, and drilled a new hole into the ribbed neck to accommodate the removable POTJ 300th figure Boba Fett concussion rocket.


        3) The adjustable rocket nozzels at the bottom of the backpack would have to be drilled open.


        I... am an action figure customizer

        Comment

        • darklord1967
          Persistent Member
          • Mar 27, 2008
          • 1550

          #34
          TO CLONE, OR NOT TO CLONE. THAT IS THE QUESTION

          I’ve said this before and I’ll say it again. I am a huge fan of the STAR WARS movie Saga… all 6 films. But I am strictly an Original Trilogy Collector.

          Although I gave considerable thought to having a clone / Jango-esque head sculpt on my custom Fett figure, with a helmet engineered to be removable, I decided against proceeding in this direction.

          There are two reasons for this:

          1) I wanted to look upon my Boba Fett figure as faceless and anonymous… just as the character was in the OT.

          2) Although I was confident that I could successfully increase the size of the helmet to be wearable by a clone head sculpt, I realized there was NOTHING I was going to be able to do about the resulting chewing gum helmet syndrome. This is the condition that exists with the current Vintage Collection Boba Fett figure helmet, where it is too soft to hold its shape since it is fashioned out of soft, rubbery PVC plastic.

          The same thing would happen with any available helmet sculpt if I Dremelled it into a wearable helmet. The walls of the helmet would become too thin, and it would warp terribly when worn by the figure.

          Unacceptable.

          I also considered making a mold and hard resin casting of a Boba helmet knowing that a hollowed-out resin helmet would will hold its shape fine because it would be solid and NOT be rubbery.

          This idea was rejected because during the inevitable shrinkage of the molding and casting process, I would lose 1% - 2% of my original helmet’s overall size.

          Again, unacceptable.
          I... am an action figure customizer

          Comment

          • darklord1967
            Persistent Member
            • Mar 27, 2008
            • 1550

            #35
            PROFILING A HELMET

            I selected (what I considered to be) the best Boba Fett helmet sculpt of all the available production figures released by Hasbro: SAGA 2 Boba Fett Battle of Carkoon: (2006)

            To my eyes, this was the sharpest, straightest, cleanest (and certainly largest) sculpt we had gotten out of Hasbro from all the Fett figures they’d ever produced.

            Was it PERFECT?

            No. Not by a long shot. But I did consider it reasonably workable into a helmet that I would accept for my custom figure.

            However… More surgery required.

            I liked the face of the helmet very much (although it was NOT 100% accurate to the film prop.

            It was the profile that I had major problems with.


            Putting it simply, the crown of the helmet was far too narrow to adequately and realistically accommodate an average human male head. And with the base of the helmet being as wide as it is, the overly narrow crown is only augmented visually.

            In THE EMPIRE STRIKES BACK Fett is mostly seen frontally. But we do get a few brief glimpses at the shape of the profile of his helmet. These are probably best seen during his conversation with Darth Vader (immediately after Han Solo’s torture). You’ll note the size of the helmet’s crown in relation to the base. Not nearly as narrow as Hasbro has presented.

            I fixed the helmet’s profile by slicing it in half horizontally along the top of the head (ear to ear). I sliced clear down to the helmet base, but I DID NOT cut all the way through.


            I pried the two helmet halves apart (while they were still attached at the helmet base.


            Using an additional Battle of Carkoon helmet, I sliced a tiny wedge spacer, and glued it into my opened helmet (increasing the width of the crown dramatically).


            After carefully filling in all of the gaps around the helmet with spare helmet shavings, I trimmed and sanded the newly created seam until it was smooth.


            I was reasonably pleased with the helmet’s new profile when compared to the original.


            Next, I knew that in order for the helmet to look like wearable head gear, I was going to have to create a bit of a recess in the helmet’s underside to visually establish the helmet’s (supposed) wall thickness. I Dremmelled a full recess of about 1/8 of an inch up into the helmet’s base. I then Dremmelled a ball joint socket that I could pop into the figure’s neck post.


            This entire operation forced the loss of raised ridge details around the rear of the helmet’s crown and at the sides. These ridges will now have to be restored to the helmet. Also, an all-new flip-down target sight will have to be made for the helmet due to the current sight being too thick and about 1/32 of an inch too tall.
            The final planned modification to this helmet will be the addition of a gloss coat to the black T-visor to give it a tinted glassy look.
            I... am an action figure customizer

            Comment

            • darklord1967
              Persistent Member
              • Mar 27, 2008
              • 1550

              #36
              When I placed the helmet on the figure, I tested the various head positions to ensure the anatomical accuracy and symmetry of the neck pivot point.


              I... am an action figure customizer

              Comment

              • darklord1967
                Persistent Member
                • Mar 27, 2008
                • 1550

                #37
                here is a comparison of custom Boba’s new helmet profile versus the original stock Hasbro helmet.


                As you can see, the helmet’s upper crown is now an appropriate size when compared to the helmet base, but the operation resulted in the loss of the raised ridge details at the rear of the bucket. They will now need to be replaced.

                HANDS AND A HOLSTER

                This custom figure is now in the final anatomical phase of construction, and is entering the fine detail phase (which is really my favorite phase).

                Tonight I worked to select a suitable set of hands for custom Boba Fett that would hold his laser rifle well, and would fit anatomically with the Imperial Scanning Crewman basic body.

                I did not bother to look to any of the previous Hasbro Boba Fett figures for help since I consider virtually all of them either gorilla handed, or hook clawed.

                But in my parts bin, I found a figure that I thought might be a very good hands / gloves candidate. None other than Jango Fett himself.


                I believe this is a SAGA 1 Jango, and what I really liked about his gloved hands sculpt (besides their suitable size) is the fact that they included the folds of the fabric to really complete the look. They will have to be painted the correct color for Boba’s gloves, of course, but I think they have very nice detail.


                I took a razor to Jango’s hands and then gradually shaved off the silver gauntlet remnants that remained on his wrist stumps.


                Once the Jango hands were cleaned and prepped, I carefully sliced away the mounting pin from the Imperial Scanning Troopers hands and transferred them over to Jango’s severed mitts.


                After these hands set, they will pop right into the Custom Boba’s gauntlet cuffs, and remain fully swivel articulated.


                While the hands were drying, I officially turned my attention to this figure’s final fine detail phase.

                I needed to outfit custom Boba with a holster for his side arm blaster. Only 2 Hasbro Boba Fetts that have included this side holster (POTJ 300th Fett, and the most recent Legacy Collection / 2010 Vintage Collection sculpt). Both figures included the holster as a permanently molded part of the right thigh.


                Once again, I let my razor do the talking. I chose the POTJ holster for my project (because of its superior sharpness and detail ) Sliced it right off of the fodder figure, and then transferred it over (as a separate wearable accessory) to my custom Boba Fett.


                I... am an action figure customizer

                Comment

                • darklord1967
                  Persistent Member
                  • Mar 27, 2008
                  • 1550

                  #38
                  COLLARS AND SLEEVES

                  Hoo-boy! Tonight was about some serious, finger-aching, detail work on ol’ Custom Boba Fett.

                  I decided to add the correct short sleeves to Boba’s flack vest so that his shoulder bells could be placed in their final positions (attached to the sleeves).

                  As per my usual procedure, I began by making a paper template of the basic shape of the sleeve, and test-fit the pattern against the shoulder of the figure.


                  I then used the pattern to cut the basic shape in fabric, and then I created a fold-over finish seam on the sleeve’s edge. Each sleeve was very carefully glued into the arm holes of the flack vest and checked for final symmetry.


                  I know they were not accurate, but I really liked those two little raised details on the front of the collar armor which I fashioned from a vintage Kenner Boba Fett figure. Consequently, I was pretty sad to have to shave them off, and sand the area smooth.


                  I replaced all of the armor back onto the figure, and once again checked the overall stance and attitude of ol’Boba… now with his new flack vest sleeves!


                  I... am an action figure customizer

                  Comment

                  • darklord1967
                    Persistent Member
                    • Mar 27, 2008
                    • 1550

                    #39
                    GET ‘IM ON THE SHINS!!

                    There has always been a detail on all Boba Fett action figures that I really wish had been treated like any of his loose weapon accessories: The shin pocket tools . I’ve honestly never really liked how the tools (and the pockets they were stored in), were always treated as a solid molded part of his lower leg sculpts.

                    Now when I embarked upon this project, I fully intended to include working shin pockets and separate tools details for my custom figure. But I had no idea what I was in for. I only partially succeeded in my effort since it wasn’t really possible for me to create accurate versions of the tools in this scale, AND to have them all fit into working shin pockets that were not actually made of cloth.

                    In the end, I made a compromise between screen accuracy and functionality that nevertheless preserved the established aesthetic of the figure.


                    I began by razoring out the two shin pockets that I intended to use on this figure. Although the two pockets came from two different figures, I selected them because they were size-compatible with one another, and because they matched the main Imperial Scanning Crewman jumpsuit color.

                    POTJ 300th figure Boba Fett provided the left shin pocket, while Legacy Evolutions Fett provided the right one.


                    I carefully used my trusty razor to cut out the two solid shin pocket “blocks” into actual open pockets. The pockets, in turn, were trimmed and glued to the figure’s shins.


                    As I set my sights on creating the shin tools, I attempted to utilize the sculpts that I found to be most accurate and detailed: Vintage Kenner Boba Fett. I sliced out the portions of the tools that were sculpted to be visible on the figure’s legs, and I actually attempted to complete the un-seen portion of the tools either by scratch building, and or scratch sculpting them . However, at this small a scale, that proved to be far more trouble than it was worth, especially since the preliminary full length tools I fashioned were far too long and would not fit into the pockets I had created.


                    My compromise ended up being to utilize the half shin tools sculpt from POTJ 300th Boba and SAGA I Pit of Carkoon Fett, and scratch building just enough of the un-seen portion of the tools so that they could slip into the shin pockets. I didn’t achieve the tiny separate tools accessories I hoped for, BUT at least I was able to do away with the solid molded shin pockets look which I disliked so much... a compromise that I was reasonably satisfied with.

                    I... am an action figure customizer

                    Comment

                    • darklord1967
                      Persistent Member
                      • Mar 27, 2008
                      • 1550

                      #40
                      HELMET DETAILING

                      Sometimes the fine detail phase is fun. And sometimes it is NOT.

                      Tonight, it was definitely NOT fun!

                      I worked to finalize the final details of Boba Fett’s helmet and it was truly a tedious experience.

                      Using strip styrene, I re-created the raised ridge details at the back of the helmet (which were lost during the cranial enlargement operation I performed three weeks ago).


                      I carefully measured the required size of the raised ridge and began assembling it off of the helmet. I made 45 degree angled miter cuts at the corners to form the right angles on this raised detail.


                      Let’s just say that when the strips are this small, performing this operation accurately requires more that a few attempts.

                      When the square ridge detail had fully set, I painted it in the correct dull red.


                      While I waited for the paint to dry, I painted the rear bottom half of the helmet in dark green.

                      Using superglue, I carefully attached the assembled, painted ridge to the rear of the helmet.


                      I next turned my attention to the helmet’s rangefinder.

                      I really felt like I needed to correct the rubbery, overly thick rod of the rangefinder into something that was thinner and cleaner.


                      I actually used a single staple from a grapple gun, straightened it, and attached the rangefinder tip. I was very pleased with its overall slender metallic look once it was attached to the helmet.


                      I... am an action figure customizer

                      Comment

                      • darklord1967
                        Persistent Member
                        • Mar 27, 2008
                        • 1550

                        #41
                        Alright, some PM'ed requests have come in for some up to date photos of the custom Boba Fett figure in it's current state. It's also been requested to make the photos a bit less "shadowy" so that all details of the figure are visible.

                        Well here are some new photos more frontally lit.


                        Since the last time a full body shot of the figure was taken, I added:


                        1) The Working Shin Pockets with separate Shin tools (veneers) to get away from the standard production figure's molded look. The pockets have since been made even MORE flush again the figure's shins (they were a bit too bulky before / Now they are correct). NOTE: Looking at these new photos, I am SOOOOO glad that I went to the trouble of creating these pockets and tools veneers. To my eyes they make such a huge difference in the final look of the figure when compared to the molded pocket/shins look.

                        2) The stalk for the helmet's rangefinder has been made much stronger, straighter, slimmer, and sturdier (with the use of a grapple gun staple)

                        3) The rear of the helmet has had the ridge details finalized (not visible from these photos).


                        DEATILS STILL PENDING:

                        1) All pieces of armor (crotch, torso plates, backpack mount, collar armor) painted (if needed) and final glue.

                        2) Fastening straps added to the the backs of armored knee pads, and to the underside of crotch armor.

                        3) Final gloved hands painted and the raised white details added to the backs of both hands

                        4) Bicep sleeve cuffs sculpted to both upper arms

                        5) Power feed tube added to right arm wrist weapon gauntlet.

                        6) Final decal graphics added to back rocketpack

                        7) Tiny fastening studs added to collar armor shoulder seams. Aperature drilled into collar armor for side cape fastening.

                        8) Correct color wookie braids (3 strands) added and bundled with correct red and black bands.

                        9) Flack vest turtle neck created in fabric to match the rest of the garment.

                        10) Touch ups on paint rubs on the utility belt and left hand wrist gauntlet weapon.

                        11) Lightening left shoulder bell into (correct) bright yellow (while left shoulder bell stays the current (correct) yellow / orange.

                        12) Performing silver paint touch ups on steel toe spikes and steel fastening studs on sides on armored knee pads.

                        13) Lastly, Laser rifle updated into correct configuration to match prop as seen in film.
                        Last edited by darklord1967; Oct 31, '10, 8:12 PM.
                        I... am an action figure customizer

                        Comment

                        • MegoNutt
                          Veteran Member
                          • Feb 8, 2009
                          • 273

                          #42
                          looks awesome. can't wait to see him finished. way too much work for me. can't i just buy him like that?
                          If you need a hole, I can dig it.

                          Comment

                          • darklord1967
                            Persistent Member
                            • Mar 27, 2008
                            • 1550

                            #43
                            Originally posted by MegoNutt
                            looks awesome. can't wait to see him finished. way too much work for me. can't i just buy him like that?

                            Bwaaahhh, ha, ha, ha, ha, ha, ha, ha.... Ohhhhh... that's... that's rich! A good one!
                            I... am an action figure customizer

                            Comment

                            • darklord1967
                              Persistent Member
                              • Mar 27, 2008
                              • 1550

                              #44
                              FINALIZING THE ARMOR

                              I needed to make all of Fett’s un-painted armor its final color. As usual, what I estimated to be a quick operation took me all night:

                              The collar armor, back armor plate (backpack mount), and crotch armor all needed their final paint job to match the torso armor plates (factory-painted at Hasbro).


                              The collar and back armor pieces needed prep by having the original factory paint carefully sanded off by hand.


                              Next, I used the Hasbro painted torso armor pieces as color reference to mix the paint for the collar, back, and crotch armor.

                              Using my Valejo hobby paint set, I was able to mix up a VERY, VERY close duplication of the flat green for Boba’s armor.


                              I loaded up my airbrush and went to work.


                              Once the newly painted armor pieces were dry, I placed them back onto the figure and checked their final color accuracy under a white light against the Hasbro factory painted torso armor pieces.


                              I drilled a tiny hole into the back of the collar armor to accommodate Boba’s side cape, and cut the fastening lead of the cape into a very fine point. I applied some glue, and then inserted the cape into the hole in the armor.


                              A quick series of photos to check the color accuracy and quality of Boba’s new armor paint-job before the gloved hands and final detailing complete this figure.


                              I love how this photo demonstrates the preservation of this figure’s slender build despite the addition of the soft-goods flak vest and the torso armor pieces.


                              Without wookie scalps…


                              Last edited by darklord1967; Dec 12, '10, 6:44 PM.
                              I... am an action figure customizer

                              Comment

                              • SeattleEd
                                SynthoRes Transmigrator
                                • Oct 24, 2007
                                • 4350

                                #45
                                Looking excellent!! Thanks so much for the progress photos.

                                Comment

                                Working...
                                😀
                                🥰
                                🤢
                                😎
                                😡
                                👍
                                👎